
EPEX3905.0 specifications
The Epic Fitness EPEX3905.0 is a compelling option for fitness enthusiasts seeking an all-in-one workout solution. This versatile piece of equipment is designed to accommodate a wide range of exercises, making it suitable for both beginners and experienced users. With its robust construction and innovative features, the EPEX3905.0 elevates home workouts to new heights.One of the standout features of the EPEX3905.0 is its multi-functionality. It combines cardio and strength training capabilities, enabling users to perform various exercises without the need for multiple machines. The equipment includes an adjustable bench, allowing for both flat and inclined positions, ideal for bench presses, rows, and a multitude of other strength exercises. Additionally, the integrated lat tower adds even more versatility, facilitating pull-downs and chin-ups to target the upper body effectively.
The EPEX3905.0 is equipped with advanced technologies designed to enhance the user experience. The built-in LCD display provides real-time feedback on key metrics such as time, distance, speed, and calories burned. This feature helps users track their progress and stay motivated throughout their workouts. Users can also easily adjust resistance levels to suit their fitness goals, ensuring a customized workout experience.
Another impressive aspect of the EPEX3905.0 is its ergonomic design. The padded seat and backrest are designed for comfort and support during prolonged workouts, reducing the risk of injury and enhancing overall performance. The machine is also compact, making it suitable for a variety of home environments without sacrificing functionality.
Durability is a key characteristic of the Epic Fitness EPEX3905.0. Constructed with high-quality materials, the equipment is built to withstand rigorous use, ensuring longevity and reliability. Users can engage in intense workouts with confidence, knowing that their machine is up to the challenge.
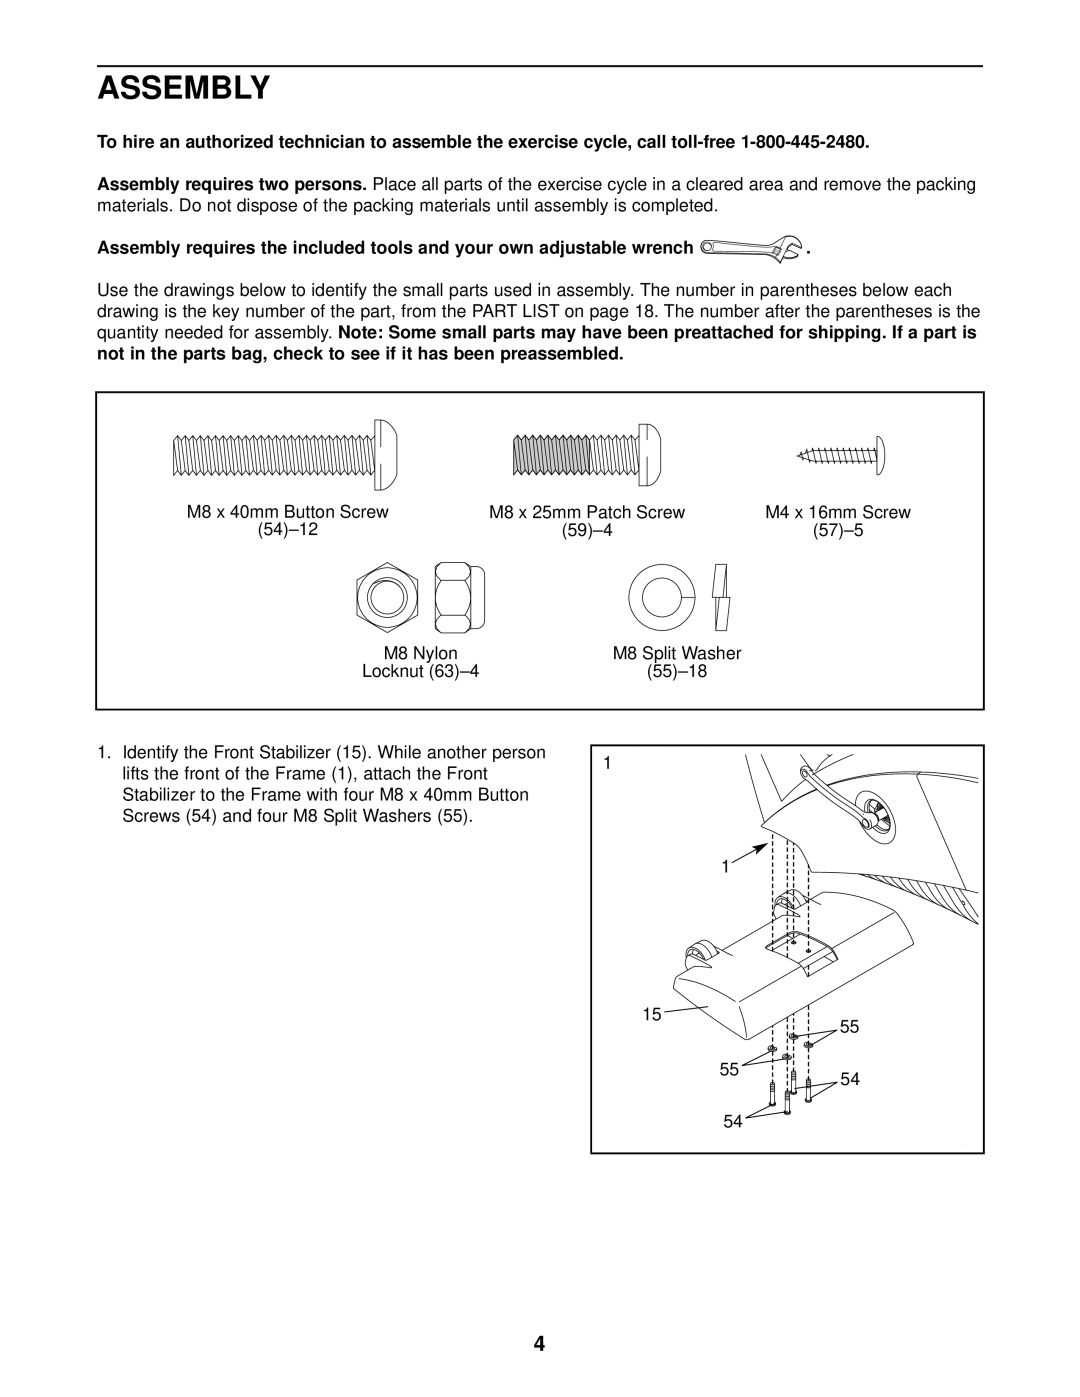
In terms of assembly, the EPEX3905.0 comes with clear instructions and all necessary tools, allowing for a straightforward setup process. Once assembled, users can immediately begin enjoying the full range of functionalities it has to offer.
In summary, the Epic Fitness EPEX3905.0 embodies innovation and versatility, making it a top choice for anyone looking to enhance their fitness routine. With its multi-functionality, advanced technologies, ergonomic design, and durable construction, this piece of equipment promises a comprehensive and satisfying workout experience for users at any fitness level.