tube clip so the tubes don’t touch the bottom of the printer, and so the carts can reach far left and right with out the tubes stopping the motion. This is important.
6.Clean the right section of the printer housing with alcohol, then install the second bracket on the right hand edge of the housing so the tubing is in a straight line. Put the tubing into this small bracket. Now you are ready to insert the tubes into the bottles. The position of the bracket opening can be either up or down. It does not matter.
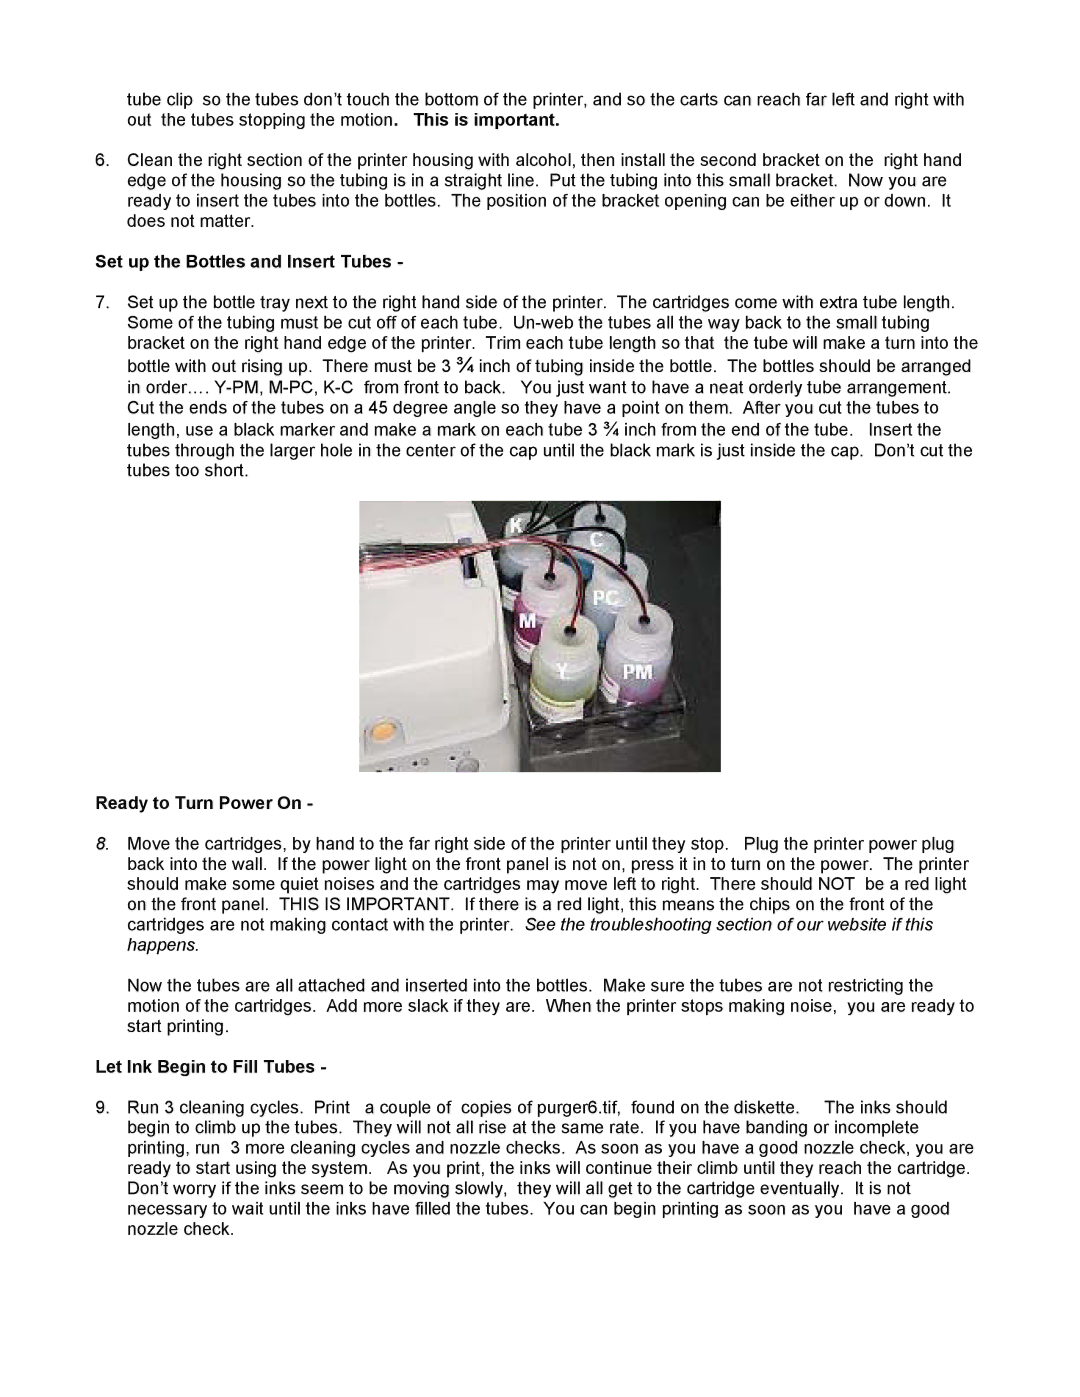
Set up the Bottles and Insert Tubes -
7.Set up the bottle tray next to the right hand side of the printer. The cartridges come with extra tube length. Some of the tubing must be cut off of each tube.
Ready to Turn Power On -
8.Move the cartridges, by hand to the far right side of the printer until they stop. Plug the printer power plug back into the wall. If the power light on the front panel is not on, press it in to turn on the power. The printer should make some quiet noises and the cartridges may move left to right. There should NOT be a red light on the front panel. THIS IS IMPORTANT. If there is a red light, this means the chips on the front of the cartridges are not making contact with the printer. See the troubleshooting section of our website if this happens.
Now the tubes are all attached and inserted into the bottles. Make sure the tubes are not restricting the motion of the cartridges. Add more slack if they are. When the printer stops making noise, you are ready to start printing.
Let Ink Begin to Fill Tubes -
9. Run 3 cleaning cycles. Print a couple of copies of purger6.tif, found on the diskette. The inks should begin to climb up the tubes. They will not all rise at the same rate. If you have banding or incomplete printing, run 3 more cleaning cycles and nozzle checks. As soon as you have a good nozzle check, you are ready to start using the system. As you print, the inks will continue their climb until they reach the cartridge. Don’t worry if the inks seem to be moving slowly, they will all get to the cartridge eventually. It is not necessary to wait until the inks have filled the tubes. You can begin printing as soon as you have a good nozzle check.