870/890 CFS Assembly Instructions
Pre Assembled CFS with Auto Reset Chips
Rev 4/23/03
Below are the instructions for installing a
Here is what you will need to do this installation…..
•Alcohol or Alcohol swabs
•Continuous Flow Cartridge set with empty tubes attached
•MIS Short Bracket (1) and MIS Bridge Bracket (1)
•MIS Ink Tray
•Ruler or tape measure
•Black Felt Marker and a pair of scissors.
•Small thin screw driver, not phillips.
Get everything together in one place so you can do this all at the same time. It will take about 15 minutes of your time. It is not difficult if you have the right tools. Of course the second time you do it , it will be a lot easier.
Validate Your Printer Performance and Set Up USB Cable –
1.Before you begin installing the CFS, make sure your printer is working perfectly. If you don’t do this and you have problems later on, you will never know if it is the CFS or your printer. So, DO NOT SKIP THIS STEP. Use your Epson cartridges, and check your nozzle pattern, if it looks good, then print 5 copies of the PURGE6.TIF image. The prints must not have any banding or skipping on them. Make sure you print using 360 DPI, PLAIN PAPER settings. If either the purge6 prints or your nozzle pattern tests have problems, then run cleaning cycles in groups of 3. Print a copy of purge6 after 3 cleanings. Always check your nozzles before and after each cleaning. If you can not get a perfect print or nozzle pattern, then DO NOT PROCEED
WITH THE INSTALLATION OF YOUR CFS.
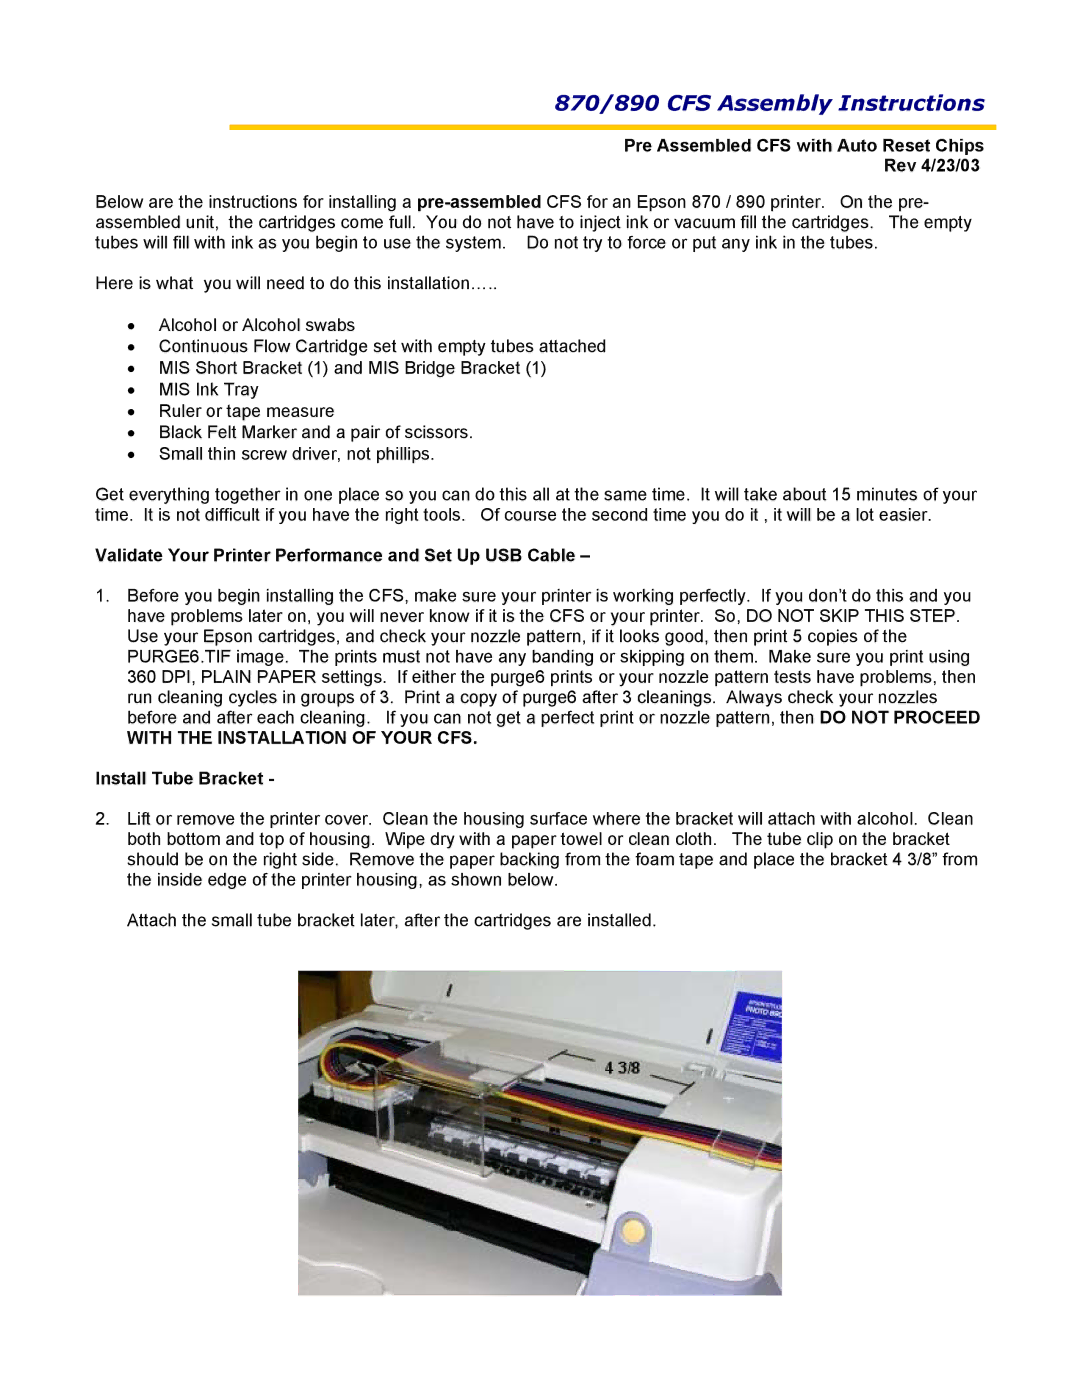
Install Tube Bracket -
2.Lift or remove the printer cover. Clean the housing surface where the bracket will attach with alcohol. Clean both bottom and top of housing. Wipe dry with a paper towel or clean cloth. The tube clip on the bracket should be on the right side. Remove the paper backing from the foam tape and place the bracket 4 3/8” from the inside edge of the printer housing, as shown below.
Attach the small tube bracket later, after the cartridges are installed.