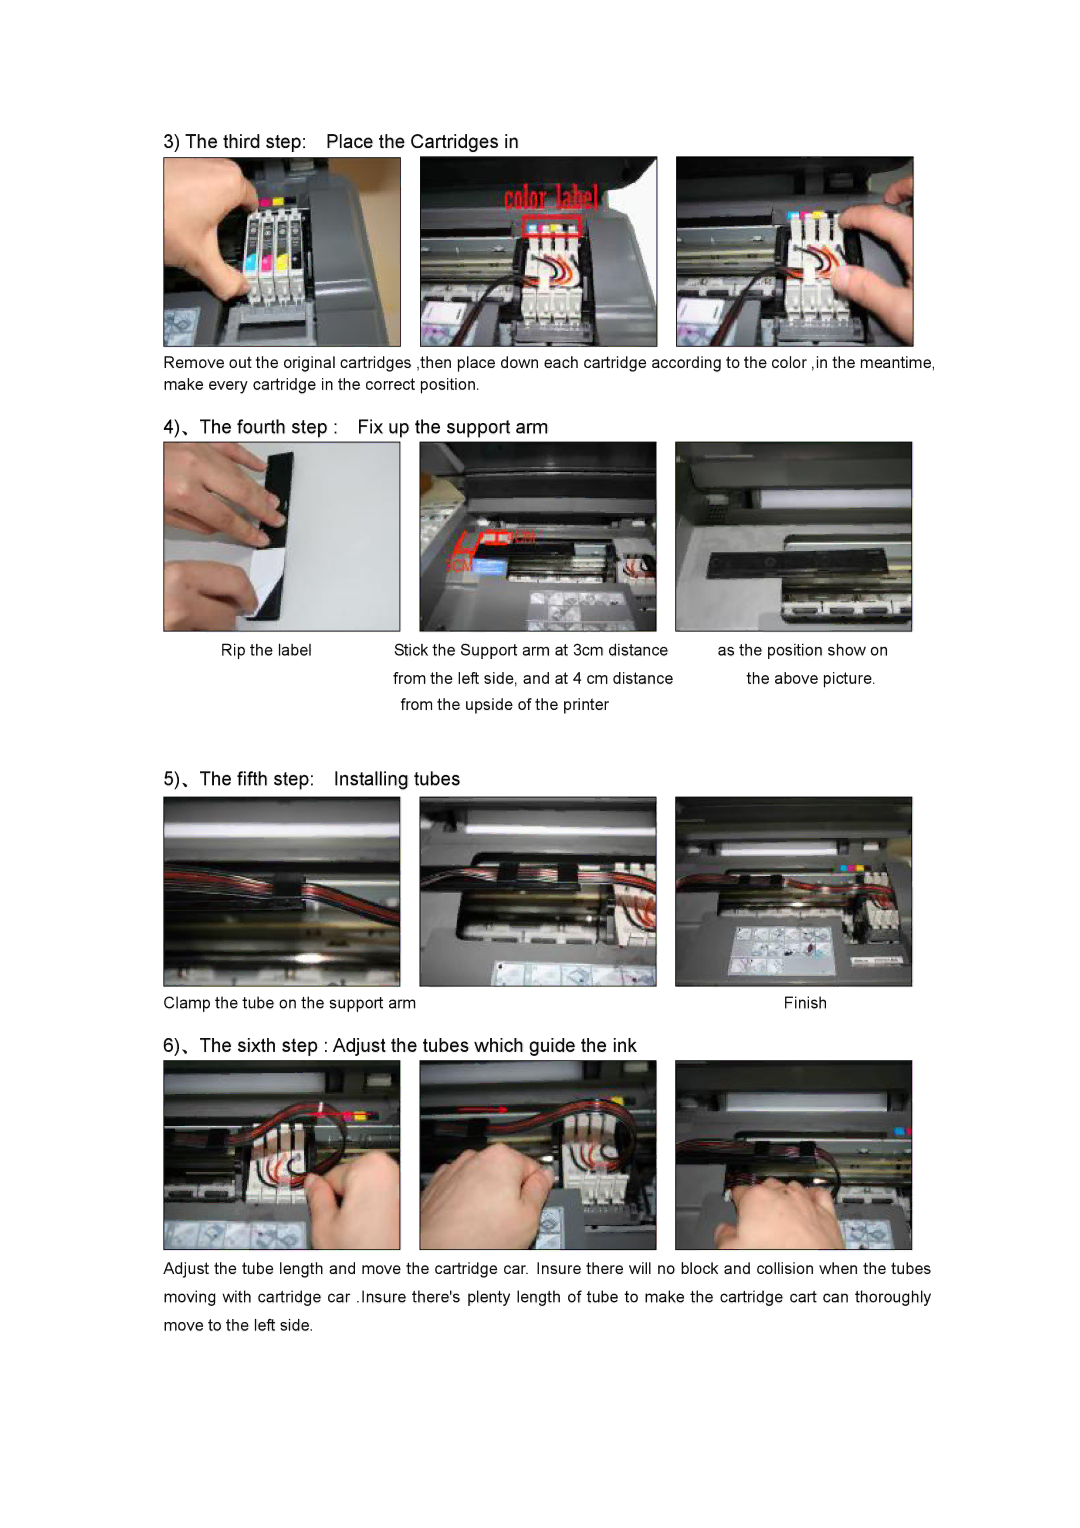
3) The third step: Place the Cartridges in
Remove out the original cartridges ,then place down each cartridge according to the color ,in the meantime, make every cartridge in the correct position.
4)、The fourth step : Fix up the support arm
Rip the label | Stick the Support arm at 3cm distance |
| from the left side, and at 4 cm distance |
| from the upside of the printer |
as the position show on the above picture.
5)、The fifth step: Installing tubes
Clamp the tube on the support arm | Finish |
6)、The sixth step : Adjust the tubes which guide the ink
Adjust the tube length and move the cartridge car. Insure there will no block and collision when the tubes moving with cartridge car .Insure there's plenty length of tube to make the cartridge cart can thoroughly move to the left side.