Operation
Manual Control Units
•Pump setting. The rotary switch has 6 settings. The “Pump” setting will operate the pump without the blower. For best results turn the switch to “Pump” for a few minutes to wet the pads before operating the fan.
•High and low cool settings. The “High Cool” and “Low Cool” set- tings operate both the pump and the blower. Turn the unit to “Low Cool” when possible. This lower speed allows the air to stay longer in the wet pads and therefore increases it’s cooling efficiency.
•High and low vent settings. The “High Vent” and “Low Vent” settings operate the blower without the pump. This is useful on cool nights or at times when just a fan is desired.
Remote Control Units
These units may be controlled using the 3 buttons on the front panel of the cooler or with the remote control.
• PUMP button. Pressing this button toggles the pump on and off. |
When the LED is lit, the pump is running. For best results turn |
on the pump for a few minutes to wet the pads before operating |
the fan. The pump must be on while operating the fan for cooling. |
You may also want the pump turned off at times when just a fan is |
desired. |
• FAN button. Pressing this button will cycle the fan through High |
Speed / Low Speed / Off. The LED’s on the front of the control |
indicate wether the fan is on high speed, low speed or off (no LED’s |
lit). Note: There will be a 2 second delay between a button press |
and the operation of the fan. |
• ON/OFF button. Pressing this button while the pump or fan is on |
will turn everything off. Pressing it again while in the off state will |
return the fan and pump to their previous operating settings. When |
first plugging in the cooler or after power has been interrupted, |
pressing the On/Off button will start the cooler in the default state |
which is with the pump on and the fan on high. |
• Remote Control. To operate the cooler with the remote you must |
IF It falls down.
THEN CLOSE all of the windows one inch and try step 4 again.
IF It plasters itself to the screen.
THEN OPEN all of the windows one inch and try step 4 again.
IF It stays on the screen lightly.
THEN PERFECT. You are done. Enjoy your cooler.
Notes:
•When switching to Low Cool, you must rebalance your home. Repeat step 4.
•Once you balance your home you can cool some areas more than others by opening those windows more and closing the others by the same amount. Repeat step 4 to make sure your home is still air balanced.
Cooler Installation
Installing House Legs
•NOTE: If installing unit without the use of the installation kit, omit these directions and those pertaining to Fig. 2.
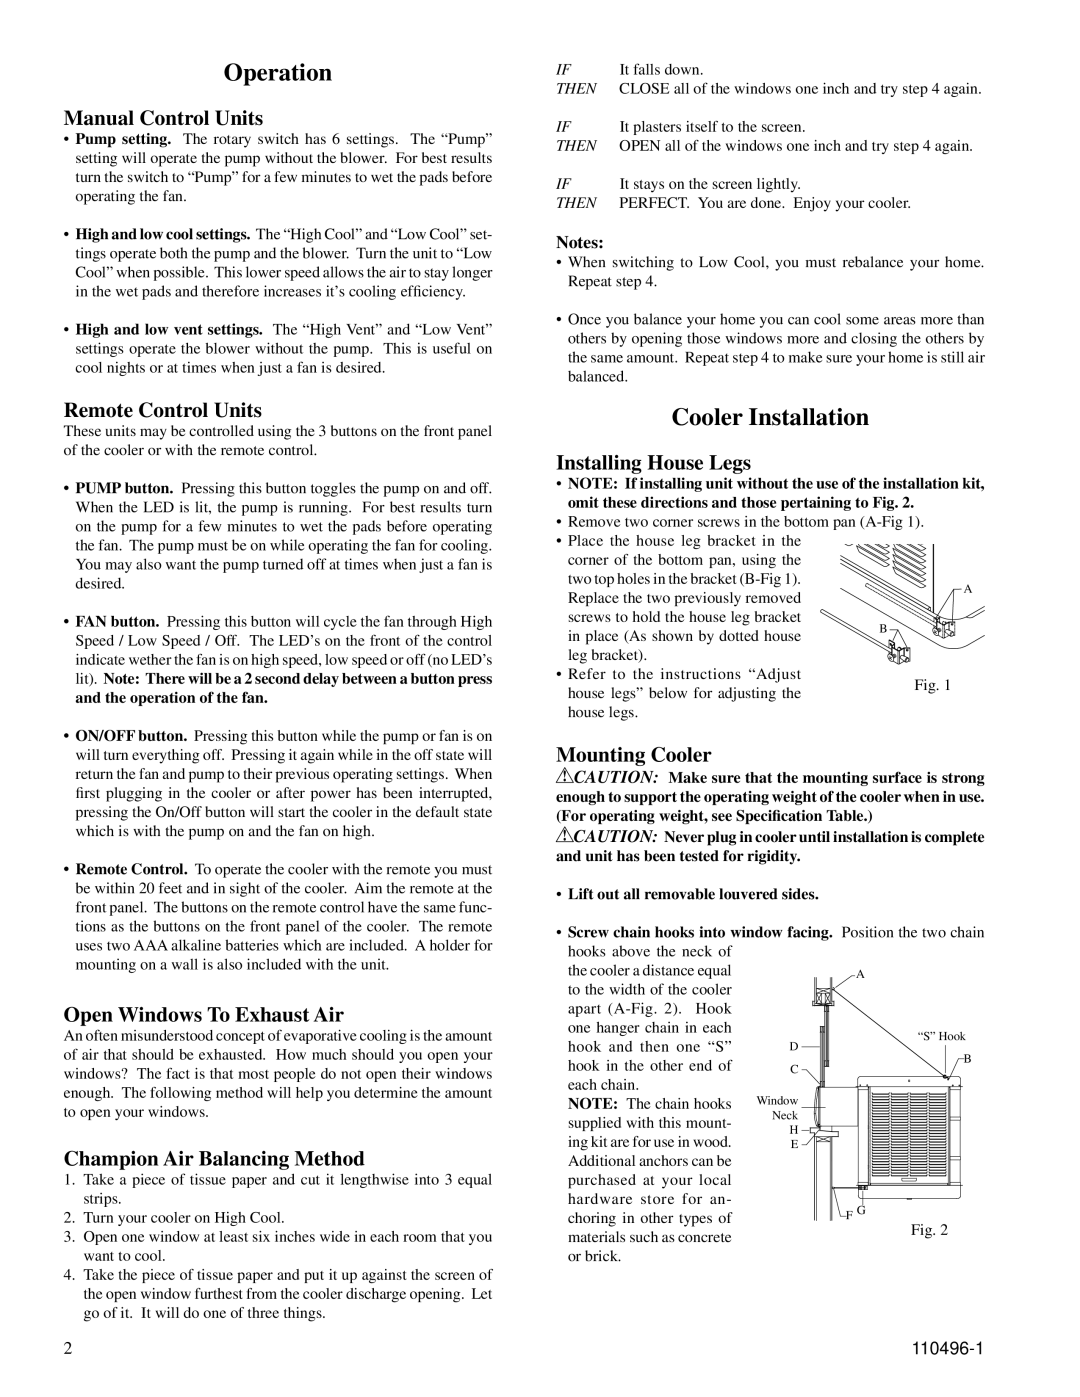
•Remove two corner screws in the bottom pan
•Place the house leg bracket in the corner of the bottom pan, using the
two top holes in the bracket
Replace the two previously removedA
screws to hold the house leg bracket
in place (As shown by dotted house B leg bracket).![]()
• Refer to the instructions “Adjust house legs” below for adjusting the house legs.
Mounting Cooler
![]() CAUTION: Make sure that the mounting surface is strong enough to support the operating weight of the cooler when in use. (For operating weight, see Specification Table.)
CAUTION: Make sure that the mounting surface is strong enough to support the operating weight of the cooler when in use. (For operating weight, see Specification Table.)
![]() CAUTION: Never plug in cooler until installation is complete and unit has been tested for rigidity.
CAUTION: Never plug in cooler until installation is complete and unit has been tested for rigidity.
be within 20 feet and in sight of the cooler. Aim the remote at the |
front panel. The buttons on the remote control have the same func- |
tions as the buttons on the front panel of the cooler. The remote |
uses two AAA alkaline batteries which are included. A holder for |
mounting on a wall is also included with the unit. |
Open Windows To Exhaust Air
An often misunderstood concept of evaporative cooling is the amount of air that should be exhausted. How much should you open your windows? The fact is that most people do not open their windows enough. The following method will help you determine the amount to open your windows.
Champion Air Balancing Method
1.Take a piece of tissue paper and cut it lengthwise into 3 equal strips.
2.Turn your cooler on High Cool.
3.Open one window at least six inches wide in each room that you want to cool.
4.Take the piece of tissue paper and put it up against the screen of the open window furthest from the cooler discharge opening. Let go of it. It will do one of three things.
•Lift out all removable louvered sides.
•Screw chain hooks into window facing. hooks above the neck of
the cooler a distance equal
to the width of the cooler apart
NOTE: The chain hooks supplied with this mount- ing kit are for use in wood. Additional anchors can be purchased at your local hardware store for an- choring in other types of materials such as concrete or brick.
Position the two chain
A
“S” Hook
B
F G
Fig. 2
2 |
|