
BPV325H specifications
The Euro-Pro BPV325H is an innovative vacuum cleaner designed to meet the diverse cleaning needs of modern households. This vacuum stands out in the crowded market thanks to its combination of powerful suction, versatility, and user-friendly features.One of the main characteristics of the BPV325H is its powerful 12-amp motor, providing impressive suction capabilities that can tackle various types of debris—ranging from fine dust to larger particles. This ensures a deep clean on various surfaces, including carpets, hardwood floors, and tiles, making it suitable for numerous cleaning tasks around the home.
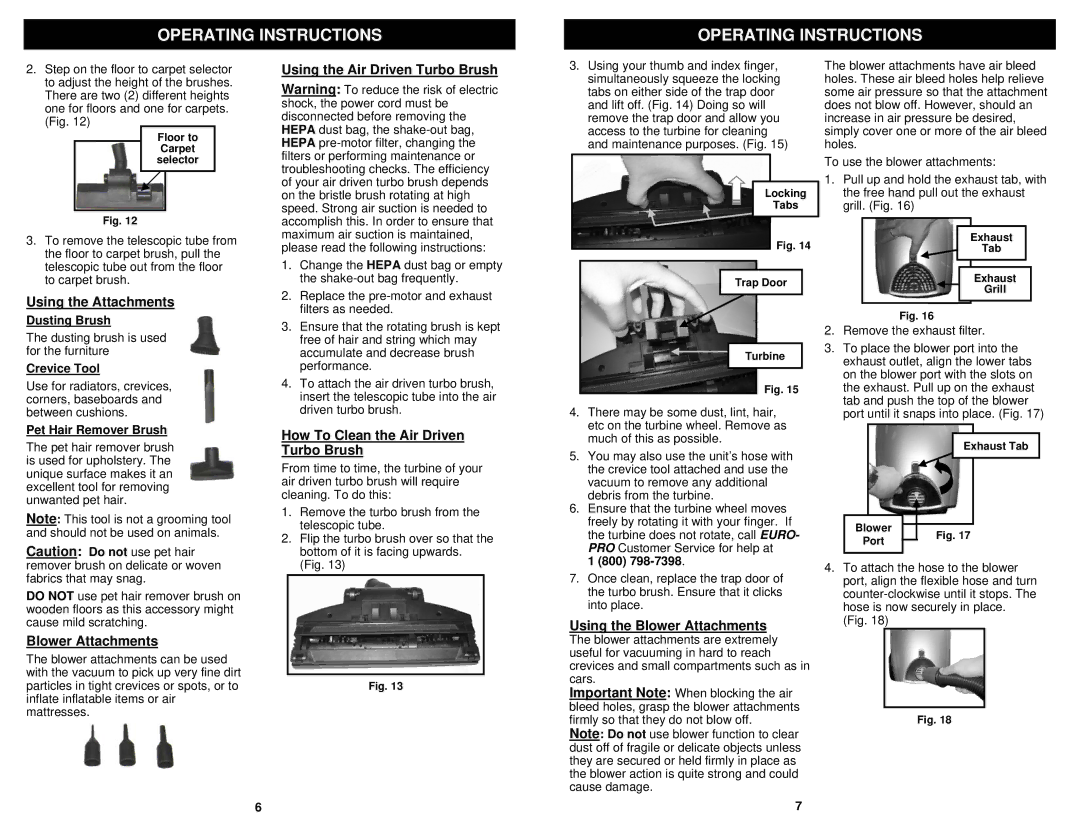
The BPV325H comes equipped with a multi-surface brush roll that enhances its cleaning efficiency. This brush roll is designed to adapt to different floor types, enabling users to seamlessly transition from carpeted areas to hard floors without needing to switch attachments. Additionally, the vacuum features specialized tools, including a crevice tool and upholstery brush, enhancing its versatility. These attachments make it easy to reach difficult corners and clean various surfaces, such as couches and car interiors.
Another remarkable aspect of the Euro-Pro BPV325H is its lightweight design. Weighing less than 10 pounds, this vacuum cleaner is easy to maneuver, making it ideal for users of all ages. Plus, its compact design allows for easy storage, fitting comfortably in closets or other tight spaces.
The feature-rich BPV325H addresses the common concern of allergen and dust control with its advanced filtration system. It includes a HEPA filter that captures 99.97% of microscopic particles, ensuring cleaner air and providing relief for allergy sufferers. The filter is washable, allowing for easy maintenance and longevity, thereby enhancing the overall value of the vacuum.
Another significant technology in the BPV325H is its easy-to-empty dust cup, which eliminates the hassle of dealing with traditional vacuum bags. With just a press of a button, users can quickly release the collected debris, making clean-up more convenient and sanitary.
With an emphasis on practicality, the Euro-Pro BPV325H also features a long power cord that extends the cleaning reach, minimizing the need for frequent outlet changes. This enhances the cleaning experience, allowing for uninterrupted, efficient cleaning sessions.
In summary, the Euro-Pro BPV325H vacuum cleaner combines powerful suction, advanced filtration, and lightweight design to offer an exceptional cleaning solution for various households. Its user-friendly features highlight its commitment to making cleaning tasks simpler and more efficient, catering to the needs of modern lifestyles.