OPERATING INSTRUCTIONS
OPERATING INSTRUCTIONS
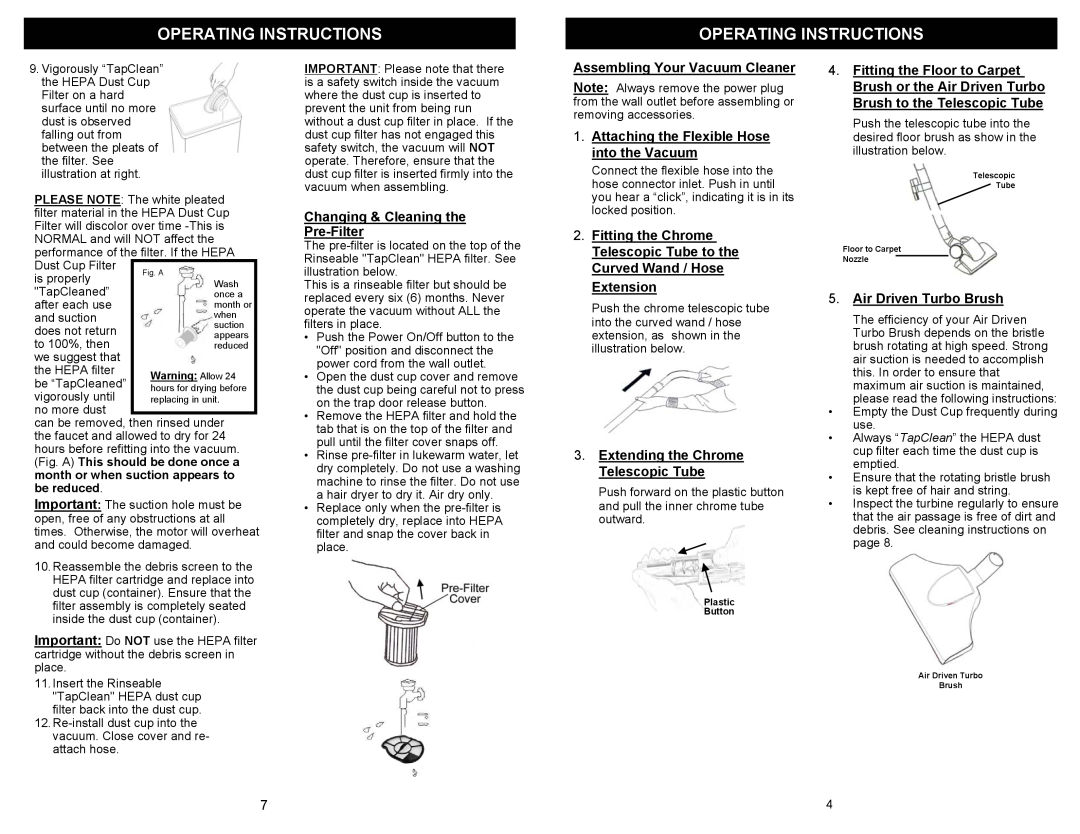
9.Vigorously “TapClean” the HEPA Dust Cup Filter on a hard surface until no more dust is observed falling out from between the pleats of the filter. See illustration at right.
PLEASE NOTE: The white pleated filter material in the HEPA Dust Cup Filter will discolor over time
is properly "TapCleaned” after each use and suction does not return to 100%, then we suggest that the HEPA filter be “TapCleaned” vigorously until no more dust
can be removed, then rinsed under the faucet and allowed to dry for 24 hours before refitting into the vacuum. (Fig. A) This should be done once a month or when suction appears to be reduced.
Important: The suction hole must be open, free of any obstructions at all times. Otherwise, the motor will overheat and could become damaged.
IMPORTANT: Please note that there is a safety switch inside the vacuum where the dust cup is inserted to prevent the unit from being run without a dust cup filter in place. If the dust cup filter has not engaged this safety switch, the vacuum will NOT operate. Therefore, ensure that the dust cup filter is inserted firmly into the vacuum when assembling.
Changing & Cleaning the
The
This is a rinseable filter but should be replaced every six (6) months. Never operate the vacuum without ALL the filters in place.
•Push the Power On/Off button to the "Off" position and disconnect the power cord from the wall outlet.
•Open the dust cup cover and remove the dust cup being careful not to press on the trap door release button.
•Remove the HEPA filter and hold the tab that is on the top of the filter and pull until the filter cover snaps off.
•Rinse
•Replace only when the
Assembling Your Vacuum Cleaner
Note: Always remove the power plug from the wall outlet before assembling or removing accessories.
1.Attaching the Flexible Hose into the Vacuum
Connect the flexible hose into the hose connector inlet. Push in until you hear a “click”, indicating it is in its locked position.
2.Fitting the Chrome Telescopic Tube to the Curved Wand / Hose Extension
Push the chrome telescopic tube into the curved wand / hose extension, as shown in the illustration below.
3.Extending the Chrome Telescopic Tube
Push forward on the plastic button and pull the inner chrome tube outward.
4.Fitting the Floor to Carpet Brush or the Air Driven Turbo Brush to the Telescopic Tube
Push the telescopic tube into the desired floor brush as show in the illustration below.
Telescopic
Tube
Floor to Carpet
Nozzle
5.Air Driven Turbo Brush
The efficiency of your Air Driven Turbo Brush depends on the bristle brush rotating at high speed. Strong air suction is needed to accomplish this. In order to ensure that maximum air suction is maintained, please read the following instructions:
•Empty the Dust Cup frequently during use.
•Always “TapClean” the HEPA dust cup filter each time the dust cup is emptied.
•Ensure that the rotating bristle brush is kept free of hair and string.
•Inspect the turbine regularly to ensure that the air passage is free of dirt and debris. See cleaning instructions on page 8.
10.Reassemble the debris screen to the HEPA filter cartridge and replace into dust cup (container). Ensure that the filter assembly is completely seated inside the dust cup (container).
Important: Do NOT use the HEPA filter cartridge without the debris screen in place.
11.Insert the Rinseable "TapClean" HEPA dust cup filter back into the dust cup.
12.
Plastic
Button
Air Driven Turbo
Brush
7
4