Manuals
/
Euro-Pro
/
Household Appliance
/
Carpet Cleaner
Euro-Pro
S3306HB, S3306HC Operating Instructions, Attaching the Shoulder Strap, Components
Models:
S3306HC
S3306HG
S3306HB
1
7
8
8
Download
8 pages
5.04 Kb
1
2
3
4
5
6
7
8
Specs
Warranty
Hard Surface Steam Cleaner
How to
Features Of Steam Cleaner
Page 7
Image 7
Page 6
Page 8
Page 7
Image 7
Page 6
Page 8
Contents
Hard Surface Steam Cleaner
OWNER’S MANUAL
EURO-PRO Operating LLC
OWNERSHIP REGISTRATION CARD
1 YEAR LIMITED WARRANTY
ORDERING SUPPLIES
TIPS ON HOW TO USE YOUR SYSTEM
SAVE THESE INSTRUCTIONS
For Household Use Only
Soap Scum
ADDITIONAL IMPORTANT SAFEGUARDS
FOR HOUSEHOLD USE ONLY
Bathroom Areas
Wood, Vinyl and Marble Floors
GETTING TO KNOW YOUR STEAM CLEANER
Technical Specifications
Spot Cleaning Carpets
1.Multipurpose Steam Cleaner
FEATURES OF STEAM CLEANER
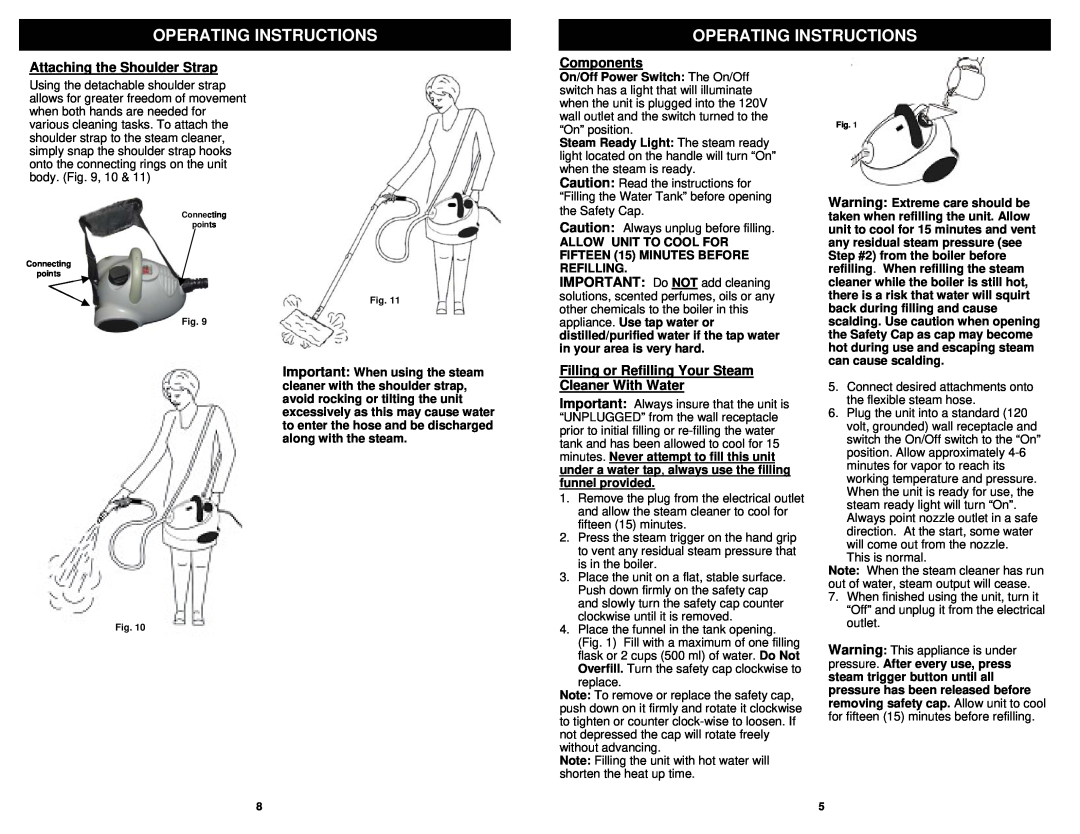
Components
OPERATING INSTRUCTIONS
Filling or Refilling Your Steam Cleaner With Water
Attaching the Shoulder Strap
Extended Concentrator
Window Squeegee
Nylon Bristle Brush
Top
Page
Image
Contents