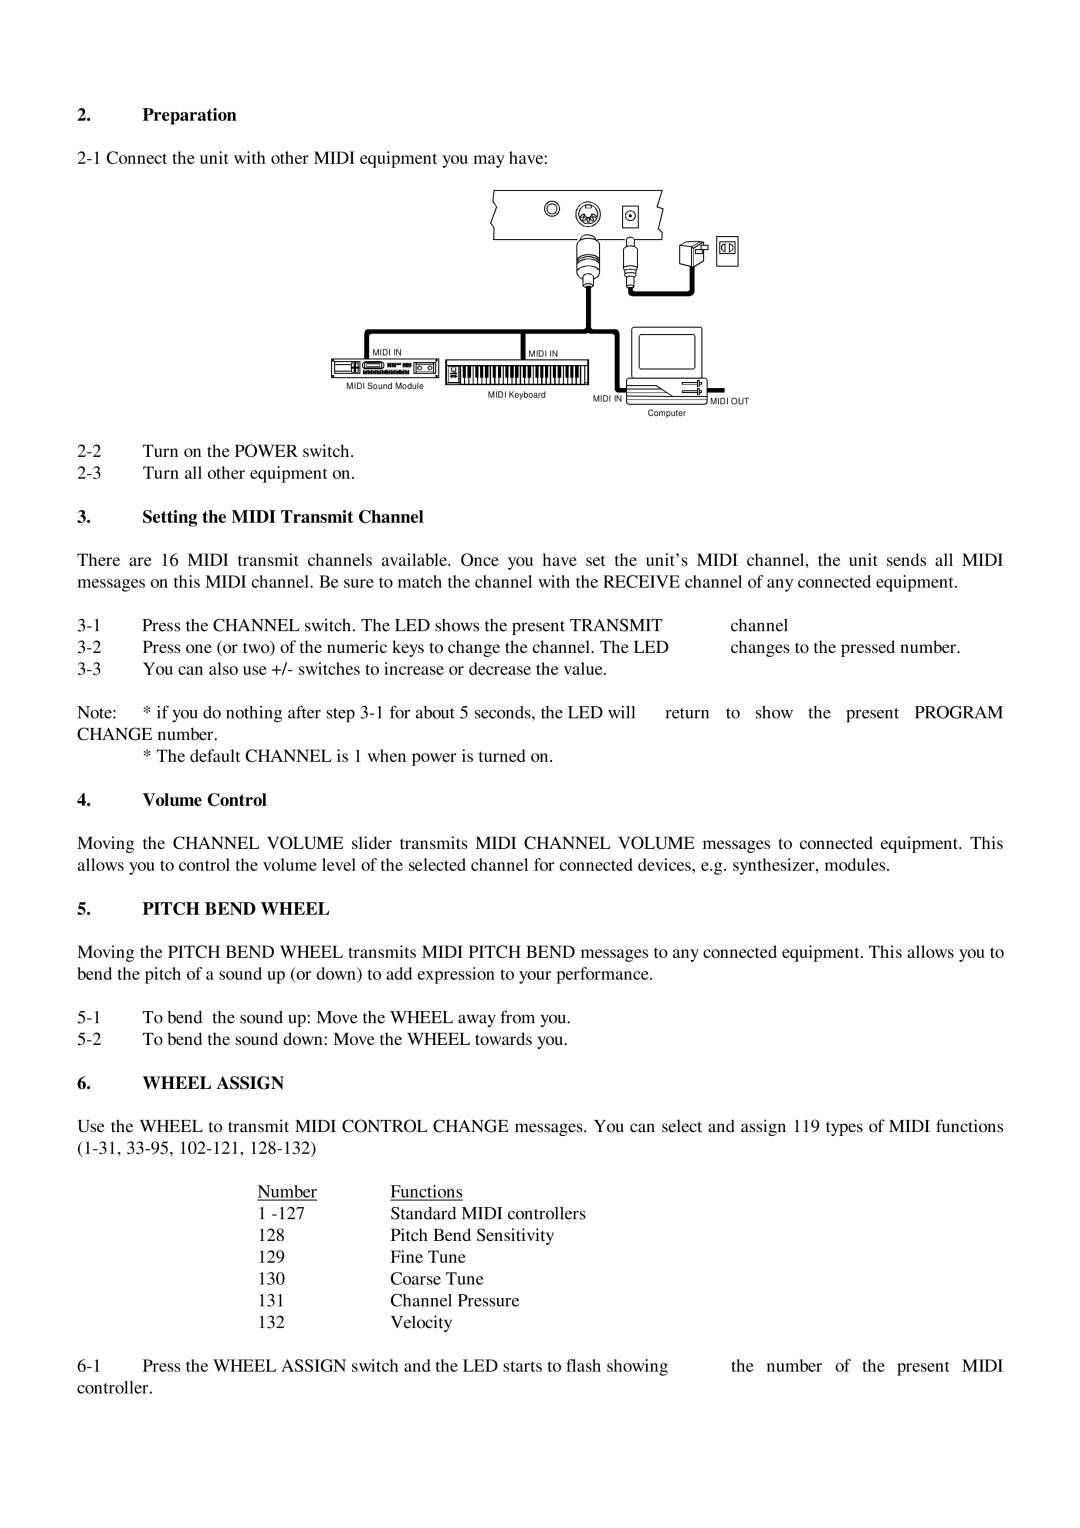
2.Preparation
MIDI IN
MIDI Sound Module
3.Setting the MIDI Transmit Channel
MIDI IN |
|
MIDI Keyboard | MIDI IN |
|
![]()
![]() MIDI OUT Computer
MIDI OUT Computer
There are 16 MIDI transmit channels available. Once you have set the unit’s MIDI channel, the unit sends all MIDI messages on this MIDI channel. Be sure to match the channel with the RECEIVE channel of any connected equipment.
Press the CHANNEL switch. The LED shows the present TRANSMIT | channel | |
Press one (or two) of the numeric keys to change the channel. The LED | changes to the pressed number. | |
You can also use +/- switches to increase or decrease the value. |
| |
Note: | * if you do nothing after step | to show the present PROGRAM |
CHANGE number.
*The default CHANNEL is 1 when power is turned on.
4.Volume Control
Moving the CHANNEL VOLUME slider transmits MIDI CHANNEL VOLUME messages to connected equipment. This allows you to control the volume level of the selected channel for connected devices, e.g. synthesizer, modules.
5.PITCH BEND WHEEL
Moving the PITCH BEND WHEEL transmits MIDI PITCH BEND messages to any connected equipment. This allows you to bend the pitch of a sound up (or down) to add expression to your performance.
6.WHEEL ASSIGN
Use the WHEEL to transmit MIDI CONTROL CHANGE messages. You can select and assign 119 types of MIDI functions
| Number | Functions |
|
| 1 | Standard MIDI controllers |
|
| 128 | Pitch Bend Sensitivity |
|
| 129 | Fine Tune |
|
| 130 | Coarse Tune |
|
| 131 | Channel Pressure |
|
| 132 | Velocity |
|
Press the WHEEL ASSIGN switch and the LED starts to flash showing | the number of the present MIDI | ||
controller. |
|
| |