DIALING A CALLER ID NUMBER
1.Make sure the phone is OFF.
2.Use the CID review (up or down arrow) buttons to display the desired Caller ID record.
3.Press TALK/callback. The number dials automatically.
CHANGING THE NUMBER FORMAT
STORING A REDIAL NUMBER
1. | Make sure the phone is OFF. |
2. | Press the mem button. |
3. | Press any number key |
| in that memory location. |
4. | Press redial. |
5. | Press the mem button again to confirm. |
HEADSET AND BELT CLIP
OPERATION
CONNECTING AN OPTIONAL HEADSET
TO THE HANDSET
CAUSES OF POOR RECEPTION
• | Aluminum siding. |
• Foil backing on insulation. | |
• Heating ducts and other metal construction can shield | |
| radio signals. |
• | You’re too close to appliances such as microwaves, |
TROUBLESHOOTING TIPS
CALLER ID
Problem | Solution |
No Display | • Is battery fully charged?Try |
| replacing the battery. Make sure |
Memory Dialing | • Did you program the memory |
| location keys correctly? |
| • Did you follow proper dialing |
| sequence? |
| • Make sure the tone/pulse setting is |
| programmed correctly. |
| • Did you reprogram numbers into |
| memory after power outage or |
| battery replacement? |
If you are unable to find a qualified servicer for out of warranty service, you may write to:
ATLINKS Communications Canada, Inc. c/o Thomson multimedia Inc.
P.O. Box 0944
Indianapolis, Indiana, U.S.A.,
Attach your sales receipt to this booklet for future reference.This information is required if service is needed during the warranty period.
The FORMAT button lets you change the format of the displayed number. The available formats are as follows.
1. | Use the CID review (up or down arrow) buttons to scroll |
| to the number you want to call back. |
2. | If the number will not dial as shown, press the FORMAT |
| button. Repeat if necessary, until the correct number of |
| digits are shown. |
DIALING A STORED NUMBER
1.Make sure the phone is ON by pressing the TALK/ callback button.
2.Press mem.
3.Press the number
- OR -
1. | Make sure the phone is OFF. |
2. | Press mem. |
3. | Use the CID review (up or down arrow) buttons to scroll |
| through the numbers stored in memory until the |
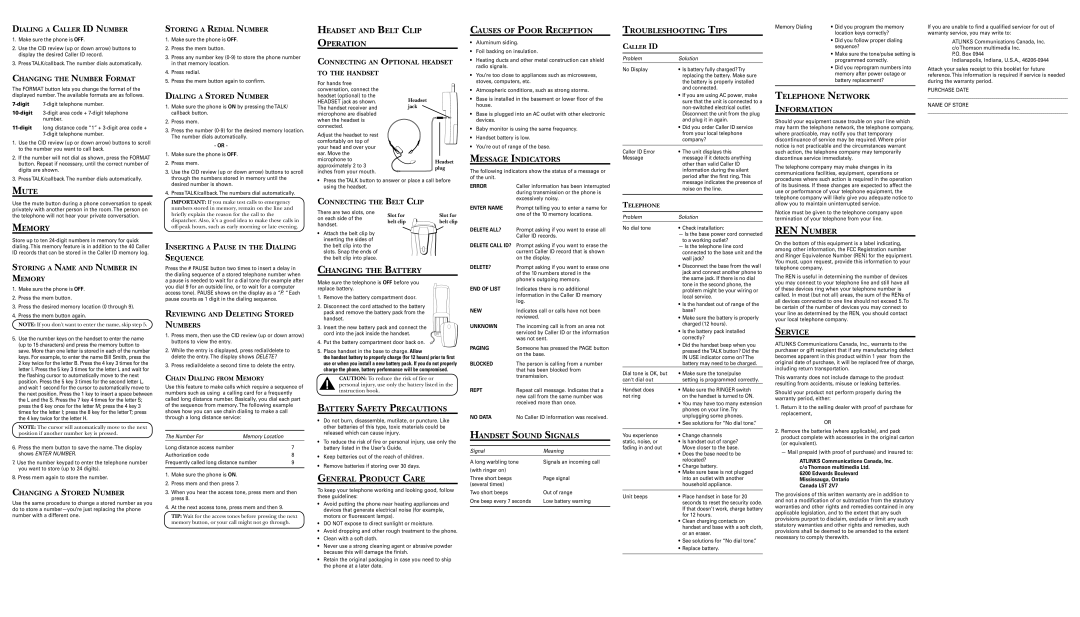
For hands free conversation, connect the headset (optional) to the HEADSET jack as shown. The handset receiver and microphone are disabled when the headset is connected.
Adjust the headset to rest comfortably on top of your head and over your ear. Move the microphone to approximately 2 to 3 inches from your mouth.
Headset jack
Headset plug
stoves, computers, etc. |
• Atmospheric conditions, such as strong storms. |
• Base is installed in the basement or lower floor of the |
house. |
• Base is plugged into an AC outlet with other electronic |
devices. |
• Baby monitor is using the same frequency. |
• Handset battery is low. |
• You’re out of range of the base. |
MESSAGE INDICATORS
The following indicators show the status of a message or of the unit.
| the battery is properly installed |
| and connected. |
| • If you are using AC power, make |
| sure that the unit is connected to a |
| |
| Disconnect the unit from the plug |
| and plug it in again. |
| • Did you order Caller ID service |
| from your local telephone |
| company? |
|
|
Caller ID Error | • The unit displays this |
Message | message if it detects anything |
| other than valid Caller ID |
| information during the silent |
| period after the first ring.This |
TELEPHONE NETWORK
INFORMATION
Should your equipment cause trouble on your line which may harm the telephone network, the telephone company, where practicable, may notify you that temporary discontinuance of service may be required. Where prior notice is not practicable and the circumstances warrant such action, the telephone company may temporarily discontinue service immediately.
The telephone company may make changes in its communications facilities, equipment, operations or
PURCHASE DATE
_____________________________________________________________________
NAME OF STORE
_____________________________________________________________________
3. Press TALK/callback. The number dials automatically. |
MUTE
Use the mute button during a phone conversation to speak privately with another person in the room. The person on the telephone will not hear your private conversation.
MEMORY
Store up to ten
STORING A NAME AND NUMBER IN MEMORY
1.Make sure the phone is OFF.
2.Press the mem button.
3.Press the desired memory location (0 through 9).
4.Press the mem button again.
NOTE: If you don't want to enter the name, skip step 5.
5.Use the number keys on the handset to enter the name (up to 15 characters) and press the memory button to save. More than one letter is stored in each of the number keys. For example, to enter the name Bill Smith, press the 2 key twice for the letter B. Press the 4 key 3 times for the letter I. Press the 5 key 3 times for the letter L and wait for the flashing cursor to automatically move to the next position. Press the 5 key 3 times for the second letter L, and wait 1 second for the cursor to automatically move to the next position. Press the 1 key to insert a space between the L and the S. Press the 7 key 4 times for the letter S; press the 6 key once for the letter M; press the 4 key 3 times for the letter I; press the 8 key for the letterT; press the 4 key twice for the letter H.
NOTE: The cursor will automatically move to the next position if another number key is pressed.
6.Press the mem button to save the name. The display shows ENTER NUMBER.
7.Use the number keypad to enter the telephone number you want to store (up to 24 digits).
8.Press mem again to store the number.
CHANGING A STORED NUMBER
Use the same procedure to change a stored number as you do to store a
desired number is shown. |
4. Press TALK/callback. The numbers dial automatically. |
IMPORTANT: If you make test calls to emergency |
numbers stored in memory, remain on the line and |
briefly explain the reason for the call to the |
dispatcher. Also, it’s a good idea to make these calls in |
INSERTING A PAUSE IN THE DIALING SEQUENCE
Press the # PAUSE button two times to insert a delay in the dialing sequence of a stored telephone number when a pause is needed to wait for a dial tone (for example after you dial 9 for an outside line, or to wait for a computer access tone). PAUSE shows on the display as a “P. “ Each pause counts as 1 digit in the dialing sequence.
REVIEWING AND DELETING STORED NUMBERS
1.Press mem, then use the CID review (up or down arrow) buttons to view the entry.
2.While the entry is displayed, press redial/delete to delete the entry. The display shows DELETE?
3.Press redial/delete a second time to delete the entry.
CHAIN DIALING FROM MEMORY
Use this feature to make calls which require a sequence of numbers such as using a calling card for a frequently called long distance number. Basically, you dial each part of the sequence from memory.The following example shows how you can use chain dialing to make a call through a long distance service:
The Number For | Memory Location |
|
Long distance access number |
| 7 |
Authorization code |
| 8 |
Frequently called long distance number | 9 | |
|
|
|
1.Make sure the phone is ON.
2.Press mem and then press 7.
3.When you hear the access tone, press mem and then press 8.
4.At the next access tone, press mem and then 9.
TIP: Wait for the access tones before pressing the next memory button, or your call might not go through.
•Press the TALK button to answer or place a call before using the headset.
CONNECTING THE BELT CLIP
There are two slots, one | Slot for | Slot for | |
on each side of the | |||
belt clip | belt clip | ||
handset. | |||
|
|
•Attach the belt clip by inserting the sides of the belt clip into the slots. Snap the ends of the belt clip into place.
CHANGING THE BATTERY
Make sure the telephone is OFF before you replace battery.
1.Remove the battery compartment door.
2.Disconnect the cord attached to the battery pack and remove the battery pack from the handset.
3.Insert the new battery pack and connect the cord into the jack inside the handset.
4.Put the battery compartment door back on. ![]()
5.Place handset in the base to charge. Allow
the handset battery to properly charge (for 12 hours) prior to first use or when you install a new battery pack. If you do not properly charge the phone, battery performance will be compromised.
CAUTION: To reduce the risk of fire or personal injury, use only the battery listed in the instruction book.
BATTERY SAFETY PRECAUTIONS
•Do not burn, disassemble, mutilate, or puncture. Like other batteries of this type, toxic materials could be released which can cause injury.
•To reduce the risk of fire or personal injury, use only the battery listed in the User’s Guide.
•Keep batteries out of the reach of children.
•Remove batteries if storing over 30 days.
GENERAL PRODUCT CARE
To keep your telephone working and looking good, follow these guidelines:
•Avoid putting the phone near heating appliances and devices that generate electrical noise (for example, motors or fluorescent lamps).
•DO NOT expose to direct sunlight or moisture.
•Avoid dropping and other rough treatment to the phone.
•Clean with a soft cloth.
•Never use a strong cleaning agent or abrasive powder because this will damage the finish.
•Retain the original packaging in case you need to ship the phone at a later date.
ERROR | Caller information has been interrupted |
| during transmission or the phone is |
| excessively noisy. |
ENTER NAME | Prompt telling you to enter a name for |
| one of the 10 memory locations. |
DELETE ALL? Prompt asking if you want to erase all
Caller ID records.
DELETE CALL ID? Prompt asking if you want to erase the current Caller ID record that is shown on the display.
DELETE? | Prompt asking if you want to erase one |
| of the 10 numbers stored in the |
| phone's outgoing memory. |
END OF LIST | Indicates there is no additional |
| information in the Caller ID memory |
| log. |
NEW | Indicates call or calls have not been |
| reviewed. |
UNKNOWN | The incoming call is from an area not |
| serviced by Caller ID or the information |
| was not sent. |
PAGING | Someone has pressed the PAGE button |
| on the base. |
BLOCKED | The person is calling from a number |
| that has been blocked from |
| transmission. |
REPT | Repeat call message. Indicates that a |
| new call from the same number was |
| received more than once. |
NO DATA | No Caller ID information was received. |
HANDSET SOUND SIGNALS
Signal | Meaning |
A long warbling tone | Signals an incoming call |
(with ringer on) |
|
Three short beeps | Page signal |
(several times) |
|
Two short beeps | Out of range |
One beep every 7 seconds | Low battery warning |
|
|
| message indicates the presence of |
| noise on the line. |
|
|
TELEPHONE |
|
|
|
Problem | Solution |
|
|
No dial tone | • Check installation: |
| — Is the base power cord connected |
| to a working outlet? |
| — Is the telephone line cord |
| connected to the base unit and the |
| wall jack? |
| • Disconnect the base from the wall |
| jack and connect another phone to |
| the same jack. If there is no dial |
| tone in the second phone, the |
| problem might be your wiring or |
| local service. |
| • Is the handset out of range of the |
| base? |
| • Make sure the battery is properly |
| charged (12 hours). |
| • Is the battery pack installed |
| correctly? |
| • Did the handset beep when you |
| pressed theTALK button? Did the |
| IN USE indicator come on?The |
| battery may need to be charged. |
Dial tone is OK, but | • Make sure the tone/pulse |
can't dial out | setting is programmed correctly. |
Handset does | • Make sure the RINGER switch |
not ring | on the handset is turned to ON. |
| • You may have too many extension |
| phones on your line.Try |
| unplugging some phones. |
| • See solutions for “No dial tone.” |
|
|
You experience | • Change channels |
static, noise, or | • Is handset out of range? |
fading in and out | Move closer to the base. |
| • Does the base need to be |
| relocated? |
| • Charge battery. |
| • Make sure base is not plugged |
| into an outlet with another |
| household appliance. |
|
|
Unit beeps | • Place handset in base for 20 |
| seconds to reset the security code. |
| If that doesn’t work, charge battery |
| for 12 hours. |
| • Clean charging contacts on |
| handset and base with a soft cloth, |
| or an eraser. |
| • See solutions for “No dial tone.” |
| • Replace battery. |
|
|
procedures where such action is required in the operation of its business. If these changes are expected to affect the use or performance of your telephone equipment, the telephone company will likely give you adequate notice to allow you to maintain uninterrupted service.
Notice must be given to the telephone company upon termination of your telephone from your line.
REN NUMBER
On the bottom of this equipment is a label indicating, among other information, the FCC Registration number and Ringer Equivalence Number (REN) for the equipment. You must, upon request, provide this information to your telephone company.
The REN is useful in determining the number of devices you may connect to your telephone line and still have all of these devices ring when your telephone number is called. In most (but not all) areas, the sum of the RENs of all devices connected to one line should not exceed 5.To be certain of the number of devices you may connect to your line as determined by the REN, you should contact your local telephone company.
SERVICE
ATLINKS Communications Canada, Inc., warrants to the purchaser or gift recipient that if any manufacturing defect becomes apparent in this product within 1 year from the original date of purchase, it will be replaced free of charge, including return transportation.
This warranty does not include damage to the product resulting from accidents, misuse or leaking batteries.
Should your product not perform properly during the warranty period, either:
1.Return it to the selling dealer with proof of purchase for replacement,
OR
2.Remove the batteries (where applicable), and pack product complete with accessories in the original carton (or equivalent).
— Mail prepaid (with proof of purchase) and insured to:
ATLINKS Communications Canada, Inc. c/o Thomson multimedia Ltd.
6200 Edwards Boulevard Mississauga, Ontario Canada L5T 2V7
The provisions of this written warranty are in addition to and not a modification of or subtraction from the statutory warranties and other rights and remedies contained in any applicable legislation, and to the extent that any such provisions purport to disclaim, exclude or limit any such statutory warranties and other rights and remedies, such provisions shall be deemed to be amended to the extent necessary to comply therewith.