
ASA Series specifications
The Extron Electronic ASA Series is a standout line of advanced audio signal processors renowned for its exceptional performance and versatility. Designed to cater to professional audio applications, this series offers a variety of features that ensure high-quality audio management in various environments, including corporate, educational, and entertainment venues.One of the main features of the ASA Series is its ability to process multiple audio channels simultaneously. This capability is vital for applications where managing numerous audio inputs and outputs is essential. The ASA Series typically includes a range of inputs such as microphones, line-level sources, and even digital audio formats, giving users the flexibility to integrate various audio sources seamlessly.
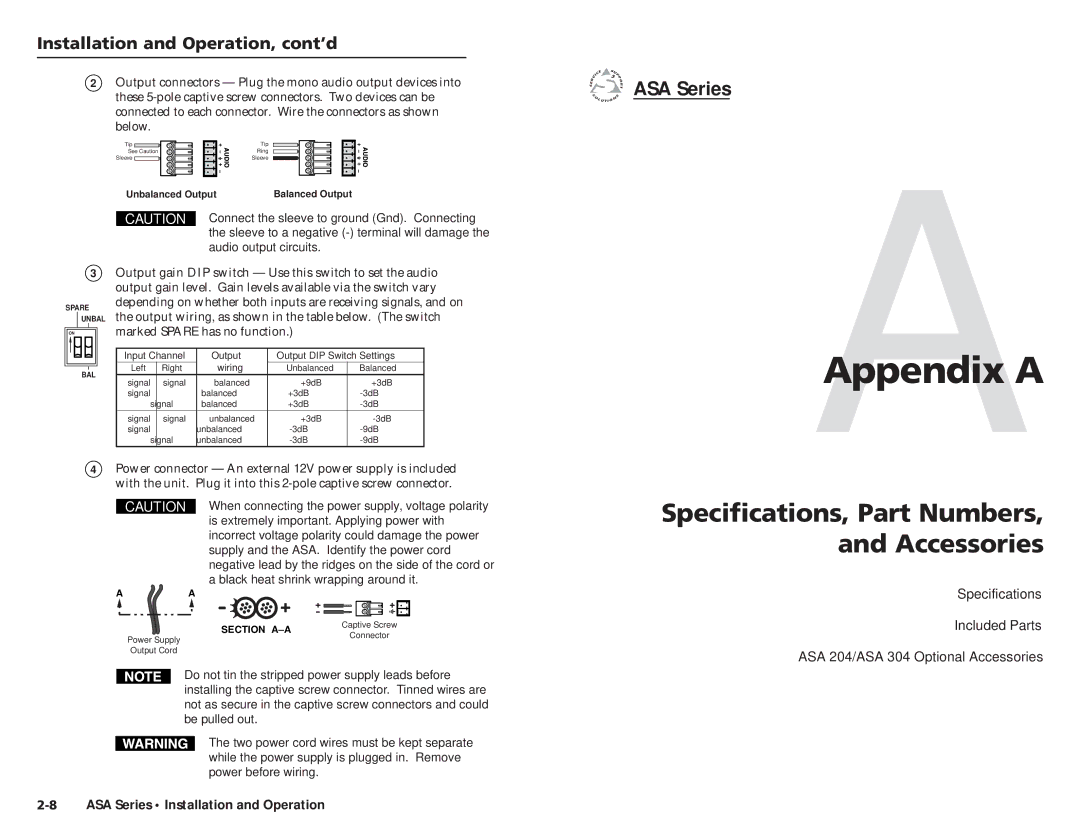
Another significant characteristic of the ASA Series is its advanced processing technologies. The processors within this series are equipped with sophisticated algorithms that facilitate noise reduction and equalization, enhancing overall audio clarity. Additionally, automatic gain control (AGC) ensures consistent volume levels, providing a smooth audio experience irrespective of the source dynamics. This is especially critical in environments like conference rooms, where the variance in speaker volume can be substantial.
The ASA Series utilizes Extron’s advanced control technologies that allow for easy operation and integration into existing systems. Users can manage audio settings through a user-friendly interface, enabling quick adjustments when necessary. The models in the ASA Series also support networked audio, allowing for remote control and monitoring capabilities from a centralized location. This feature is particularly beneficial for venues with complex audio setups requiring frequent changes.
Built-in DSP (Digital Signal Processing) is another hallmark of the ASA Series, providing a range of customizable audio effects and presets. This empowers users to tailor audio output according to the specific acoustics of a space or the requirements of a particular event, ensuring optimal sound quality at all times.
Additionally, the ASA Series devices are designed with robust build quality and reliability in mind, ensuring they can withstand the demands of professional use. Their compact design allows for installation in confined spaces, making them suitable for diverse applications.
In conclusion, the Extron Electronic ASA Series elevates audio management to new heights with its advanced features, cutting-edge processing technologies, and user-friendly controls. Whether for corporate presentations, educational settings, or live events, the ASA Series delivers a reliable solution for high-quality audio processing and distribution, making it a preferred choice among audio professionals.