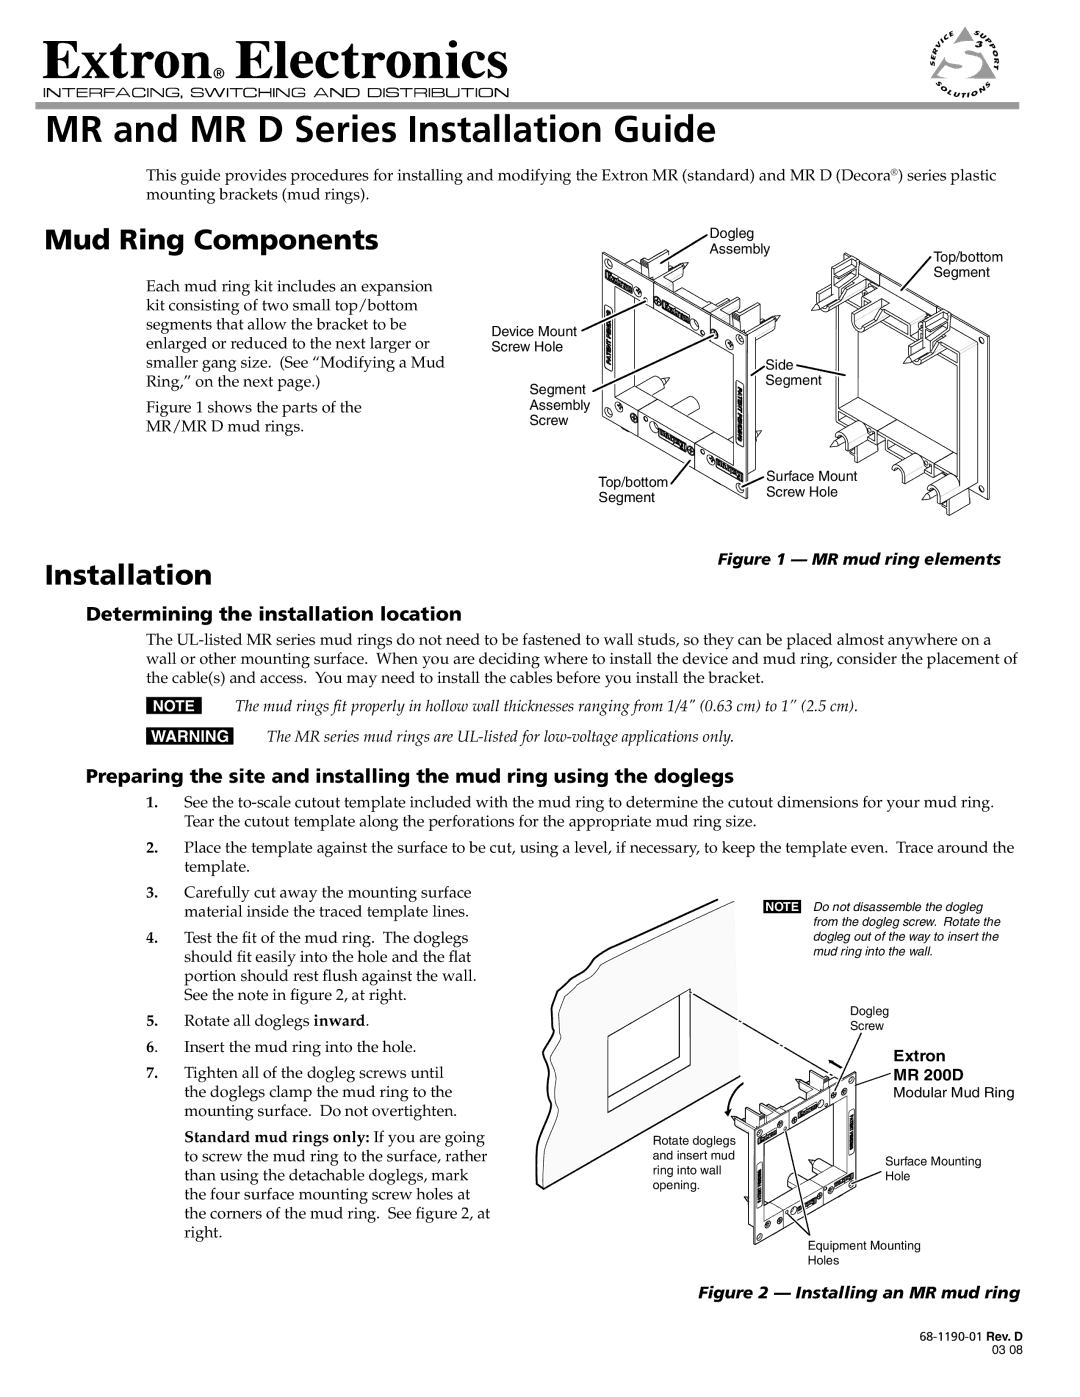
MR Series, MR D Series specifications
Extron Electronics is a well-respected name in the AV industry, known for creating innovative solutions for professional audio-video applications. The MR Series and MR D Series are two of its noteworthy product lines, designed specifically to meet the growing demands of modern AV configurations.The MR Series is distinguished by its comprehensive line of room control processors, which facilitate streamlined AV control, user-friendly operation, and reliable performance in various environments. These processors are optimized for managing AV systems in conference rooms, classrooms, and other collaborative spaces. Key features include a modular design, which allows for easy expansion and customization according to specific needs, and a robust user interface that simplifies the control of complex systems. With built-in support for IP control, users can manage devices remotely, enhancing the versatility of AV operations.
On the other hand, the MR D Series focuses on digital signal processing with an emphasis on audio performance. This series is engineered to integrate seamlessly with various AV equipment, providing high-quality sound delivery. One of the standout features of the MR D Series is its advanced audio routing capabilities, which enable users to configure audio signals from multiple sources and distribute them to various outputs. This is particularly valuable in environments where precise audio control is essential, such as in professional presentations or live events.
Both series incorporate Extron’s renowned technologies, such as the Extron Pro Series control processors that ensure smooth, automated control across AV systems. They also feature Extron's advanced graphic user interface design, which supports intuitive touch panel operation and enhances user experience. Another noteworthy characteristic is the robust build quality, ensuring these products stand up to the rigors of frequent use in professional settings.
In summary, the Extron MR Series and MR D Series represent cutting-edge solutions in the realm of AV control and audio processing. With their feature-rich designs and commitment to user-friendly operation, they have become vital tools for professionals seeking to optimize their AV environments. As technology continues to evolve, Extron remains at the forefront, providing innovative solutions to meet the dynamic needs of audio-visual applications.