GMK 1 • Installation Guide
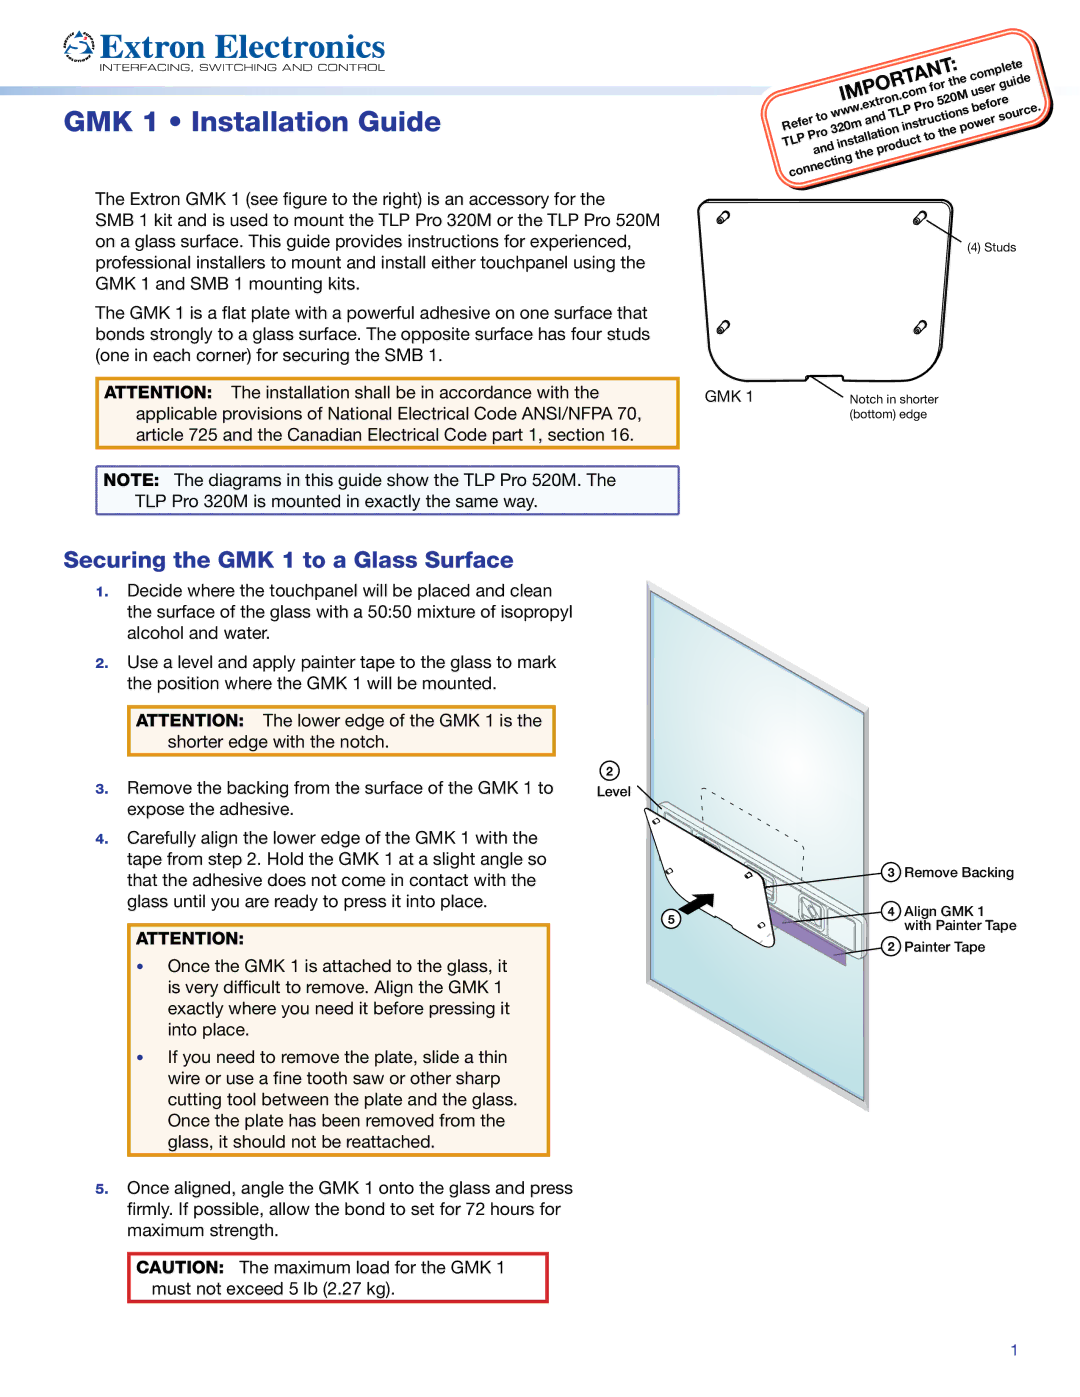
The Extron GMK 1 (see figure to the right) is an accessory for the
SMB 1 kit and is used to mount the TLP Pro 320M or the TLP Pro 520M on a glass surface. This guide provides instructions for experienced, professional installers to mount and install either touchpanel using the GMK 1 and SMB 1 mounting kits.
The GMK 1 is a flat plate with a powerful adhesive on one surface that bonds strongly to a glass surface. The opposite surface has four studs (one in each corner) for securing the SMB 1.
ATTENTION: The installation shall be in accordance with the applicable provisions of National Electrical Code ANSI/NFPA 70, article 725 and the Canadian Electrical Code part 1, section 16.
NOTE: The diagrams in this guide show the TLP Pro 520M. The |
TLP Pro 320M is mounted in exactly the same way. |
Securing the GMK 1 to a Glass Surface
|
|
|
|
|
|
|
|
|
|
|
|
| the | complete |
| ||||
|
|
|
|
|
|
|
|
|
| mfor | userguide |
| |||||||
|
|
|
|
|
|
|
|
|
|
|
|
| |||||||
|
|
|
|
|
|
|
| .co | o520M |
|
|
|
|
| |||||
|
|
|
|
|
|
| on |
|
|
| before |
| . | ||||||
|
|
| w | .extr | TLP | Pr |
| ns |
| ||||||||||
|
|
|
|
|
|
|
|
|
|
| ce | ||||||||
|
| to |
| ww |
|
|
|
|
|
| tio |
|
|
|
| ||||
|
|
|
|
| and |
|
|
|
|
|
|
| sour |
| |||||
Refer | o320m |
| instruc |
| power |
|
|
| |||||||||||
|
| ation |
|
|
| the |
|
|
|
|
|
| |||||||
| Pr |
|
|
|
|
| to |
|
|
|
|
|
|
|
| ||||
TLP | and | instal |
| oduct |
|
|
|
|
|
|
|
|
| ||||||
|
| the | pr |
|
|
|
|
|
|
|
|
|
|
| |||||
| necting |
|
|
|
|
|
|
|
|
|
|
|
|
| |||||
|
|
|
|
|
|
|
|
|
|
|
|
|
|
|
| ||||
con |
|
|
|
|
|
|
|
|
|
|
|
|
|
|
|
|
|
| |
(4) Studs
GMK 1 | Notch in shorter |
| (bottom) edge |
1.Decide where the touchpanel will be placed and clean the surface of the glass with a 50:50 mixture of isopropyl alcohol and water.
2.Use a level and apply painter tape to the glass to mark the position where the GMK 1 will be mounted.
ATTENTION: The lower edge of the GMK 1 is the shorter edge with the notch.
3.Remove the backing from the surface of the GMK 1 to expose the adhesive.
4.Carefully align the lower edge of the GMK 1 with the tape from step 2. Hold the GMK 1 at a slight angle so that the adhesive does not come in contact with the glass until you are ready to press it into place.
ATTENTION:
•Once the GMK 1 is attached to the glass, it is very difficult to remove. Align the GMK 1 exactly where you need it before pressing it into place.
•If you need to remove the plate, slide a thin wire or use a fine tooth saw or other sharp cutting tool between the plate and the glass. Once the plate has been removed from the glass, it should not be reattached.
5.Once aligned, angle the GMK 1 onto the glass and press firmly. If possible, allow the bond to set for 72 hours for maximum strength.
CAUTION: The maximum load for the GMK 1 must not exceed 5 lb (2.27 kg).
2
Level 
5
3 Remove Backing
4 Align GMK 1
with Painter Tape
![]() 2 Painter Tape
2 Painter Tape
1