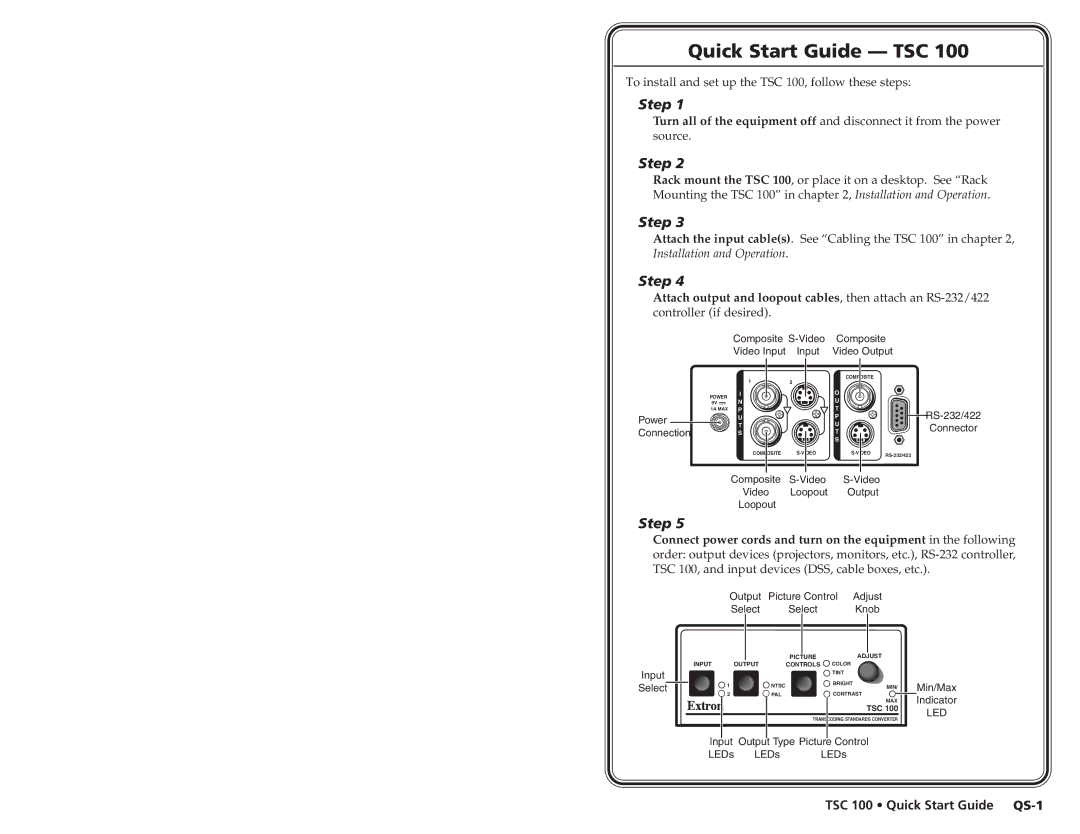
Quick Start Guide — TSC 100
To install and set up the TSC 100, follow these steps:
Step 1
Turn all of the equipment off and disconnect it from the power source.
Step 2
Rack mount the TSC 100, or place it on a desktop. See “Rack Mounting the TSC 100” in chapter 2, Installation and Operation.
Step 3
Attach the input cable(s). See “Cabling the TSC 100” in chapter 2, Installation and Operation.
Step 4
Attach output and loopout cables, then attach an
Composite | Composite |
Video Input Input | Video Output |
| 1 | 2 |
POWER | I |
|
N |
| |
9V |
| |
1A MAX | P |
|
Power | U |
|
T |
| |
Connection |
| |
S |
| |
| COMPOSITE |
Composite
Video Loopout
Loopout
COMPOSITE |
|
O |
|
U |
|
T |
|
P |
|
U |
|
T |
|
S |
|
|
Output
Connector
Step 5
Connect power cords and turn on the equipment in the following order: output devices (projectors, monitors, etc.),
| Output | Picture Control Adjust |
| ||
| Select | Select | Knob |
| |
|
|
| PICTURE | ADJUST |
|
INPUT | OUTPUT | CONTROLS | COLOR |
| |
Input |
|
|
| TINT |
|
|
|
| BRIGHT |
| |
Select | 1 |
| NTSC | Min/Max | |
| MIN/ | ||||
|
|
| |||
| 2 |
| PAL | CONTRAST | Indicator |
|
|
|
| MAX | |
|
|
|
| TSC 100 | LED |
|
|
| TRANSCODING STANDARDS CONVERTER | ||
|
|
|
| ||
Input Output Type Picture Control |
| ||||
LEDs | LEDs | LEDs |
| ||
TSC 100 • Quick Start Guide