
630003949 specifications
The Faber 630003949 is a top-tier kitchen ventilation solution designed for homeowners seeking elegance and functionality in their culinary space. This model exemplifies Faber's commitment to innovation and quality, boasting features that enhance cooking efficiency while maintaining a stylish aesthetic.One of the standout characteristics of the Faber 630003949 is its powerful extraction capability. Equipped with a high-performance motor, this range hood can efficiently remove smoke, odors, and grease from the kitchen, keeping the air clean and fresh. The adjustable fan speeds allow users to customize airflow according to their cooking needs, whether grilling, boiling, or frying.
In terms of design, the Faber 630003949 showcases a sleek, modern finish that complements various kitchen styles. Its stainless steel construction not only adds a touch of sophistication but also ensures durability and ease of maintenance. The streamlined body is designed to fit seamlessly above the cooking area, providing a neat visual appeal without overwhelming the kitchen decor.
The technology behind the Faber 630003949 includes advanced lighting features that enhance the cooking experience. Integrated LED lights illuminate the cooking surface, providing excellent visibility while conserving energy. This is particularly useful when preparing meals at night or in dimly lit spaces.
Moreover, the Faber 630003949 incorporates a user-friendly control panel that simplifies operation. With intuitive buttons and settings, users can quickly adjust the hood's performance or activate the lighting. Some models even feature a remote control for added convenience, allowing adjustments without interrupting the cooking process.
Another essential aspect of the Faber 630003949 is its noise-reduction technology. Designed to operate quietly, this range hood minimizes distractions in the kitchen, allowing for a more enjoyable cooking atmosphere. This feature is particularly valued in open-concept spaces where noise can easily travel.
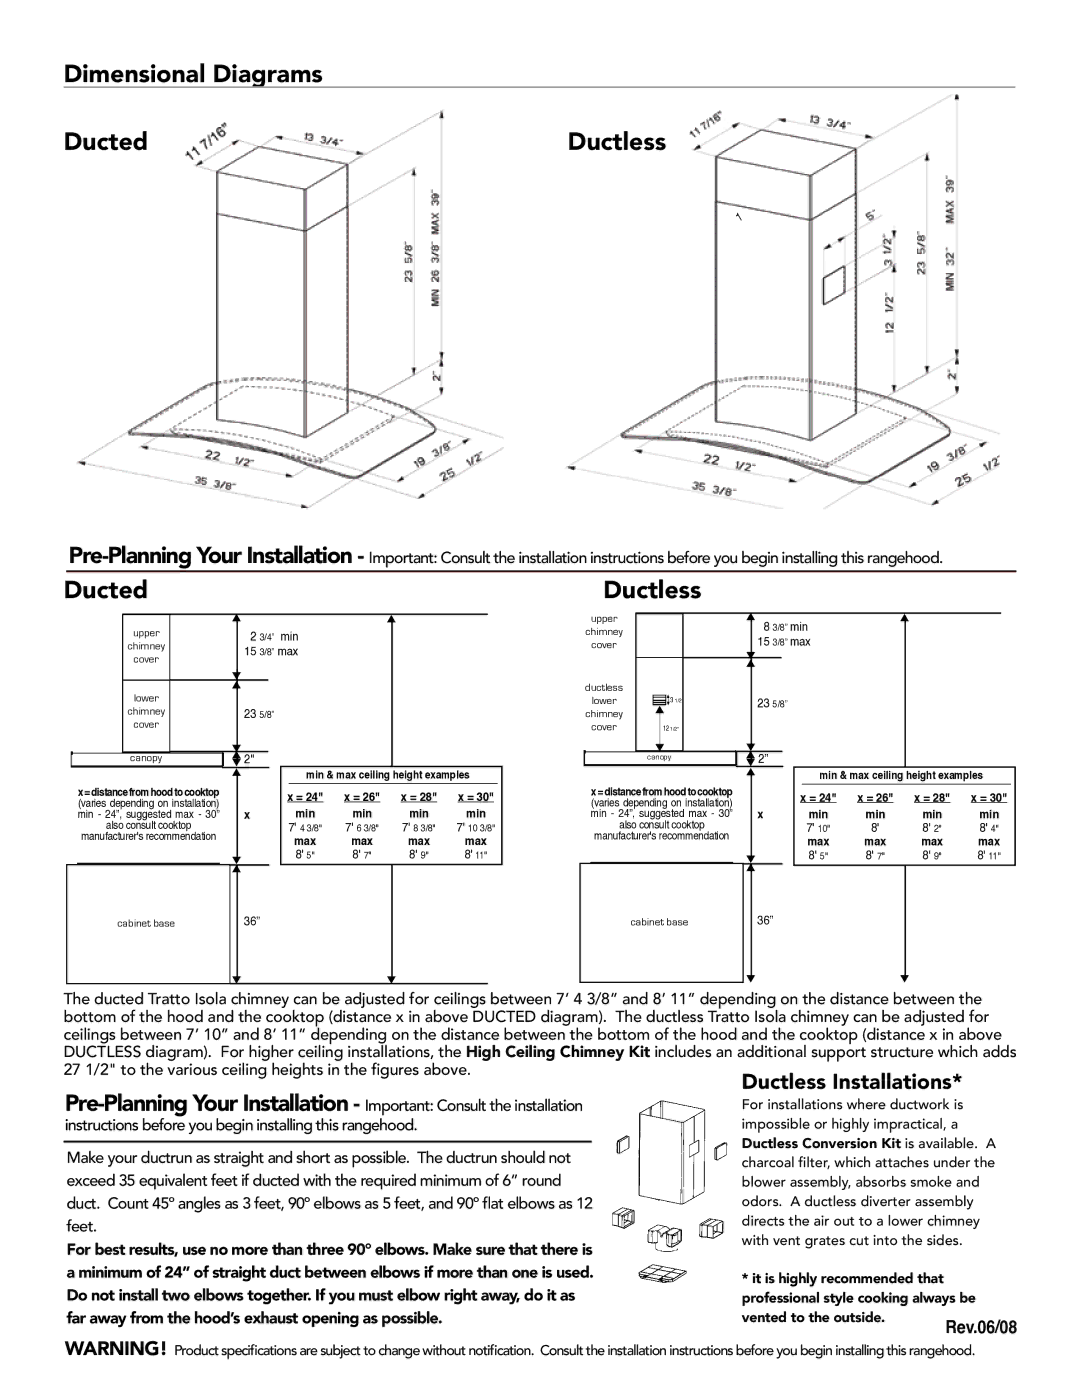
Installation of the Faber 630003949 is straightforward, with options available for both ducted and recirculating setups. This flexibility ensures that homeowners can choose the best configuration for their specific kitchen layout and ventilation requirements.
In summary, the Faber 630003949 is a sophisticated kitchen appliance that combines style, functionality, and technological advancements. Its powerful extraction, energy-efficient lighting, user-friendly operation, and quiet performance make it an exceptional choice for anyone looking to elevate their cooking environment. With Faber's reputation for quality, this range hood stands out as an essential tool for modern kitchens.