For ductless installations:
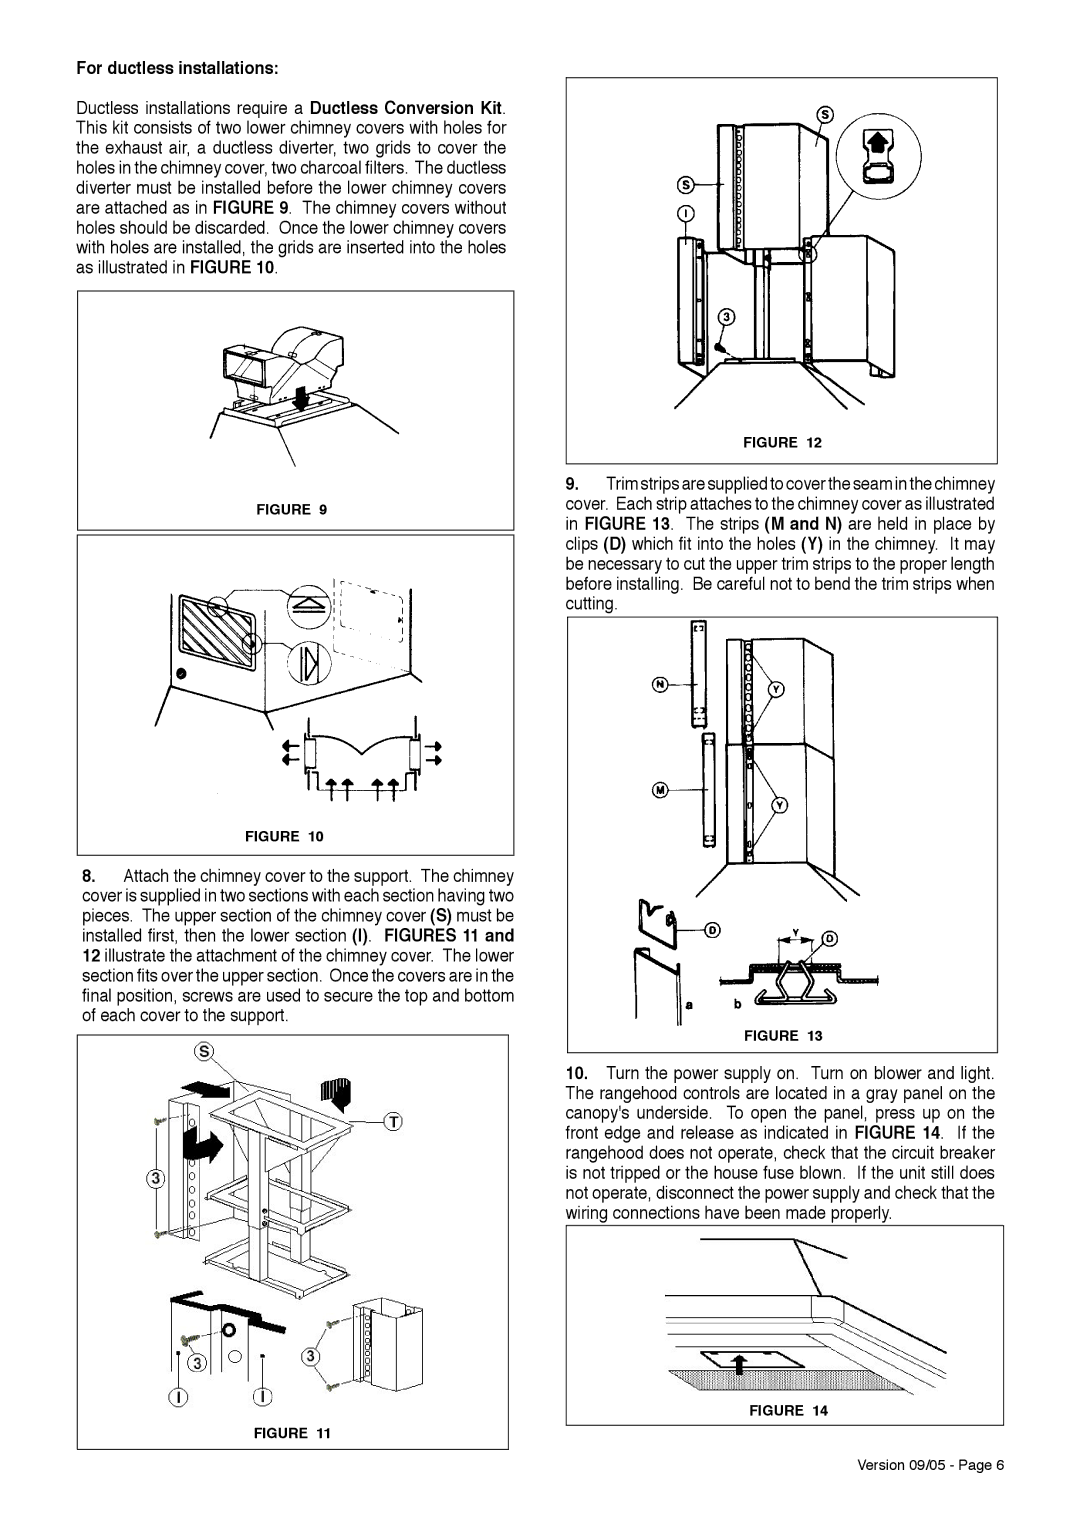
Ductless installations require a Ductless Conversion Kit. This kit consists of two lower chimney covers with holes for the exhaust air, a ductless diverter, two grids to cover the holes in the chimney cover, two charcoal filters. The ductless diverter must be installed before the lower chimney covers are attached as in FIGURE 9. The chimney covers without holes should be discarded. Once the lower chimney covers with holes are installed, the grids are inserted into the holes as illustrated in FIGURE 10.
FIGURE 9
FIGURE 10
8.Attach the chimney cover to the support. The chimney cover is supplied in two sections with each section having two pieces. The upper section of the chimney cover (S) must be installed first, then the lower section (I). FIGURES 11 and
12illustrate the attachment of the chimney cover. The lower section fits over the upper section. Once the covers are in the final position, screws are used to secure the top and bottom of each cover to the support.
FIGURE 11
FIGURE 12
9.Trim strips are supplied to cover the seam in the chimney cover. Each strip attaches to the chimney cover as illustrated in FIGURE 13. The strips (M and N) are held in place by clips (D) which fit into the holes (Y) in the chimney. It may be necessary to cut the upper trim strips to the proper length before installing. Be careful not to bend the trim strips when cutting.
FIGURE 13
10.Turn the power supply on. Turn on blower and light. The rangehood controls are located in a gray panel on the canopy's underside. To open the panel, press up on the front edge and release as indicated in FIGURE 14. If the rangehood does not operate, check that the circuit breaker is not tripped or the house fuse blown. If the unit still does not operate, disconnect the power supply and check that the wiring connections have been made properly.
FIGURE 14
Version 09/05 - Page 6
