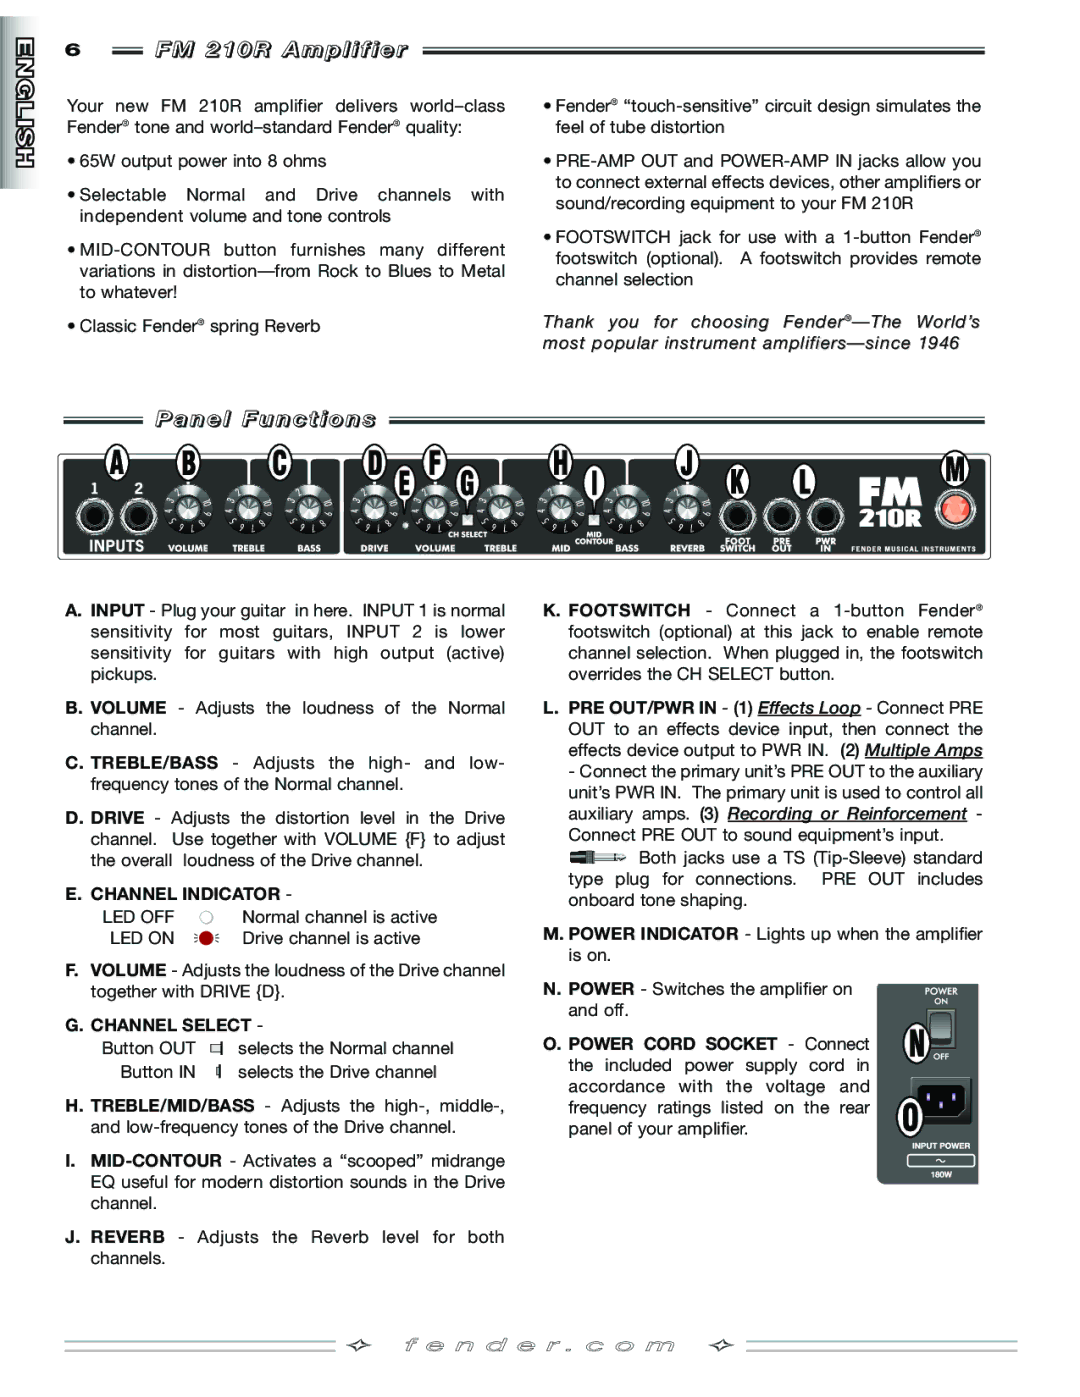
210R specifications
The Fender 210R is a prime example of Fender's commitment to creating high-quality amplifiers that cater to various playing styles and genres. This 2-channel amplifier combines vintage warmth with modern versatility, making it an excellent choice for musicians of all levels, from novice players to seasoned professionals.One of the standout features of the Fender 210R is its power and volume. With 100 watts of power, this amp provides plenty of headroom, allowing for clean, powerful tones even at higher volumes. It is equipped with two 10-inch speakers that deliver a punchy, dynamic sound, perfect for both rhythm and lead playing. The 210R's design allows for a well-balanced tone that captures the essence of the classic Fender sound while offering modern tonal flexibility.
The amplifier features dual channels: Clean and Drive. The Clean channel brings out the rich, sparkling tones that Fender amplifiers are known for. This channel is ideal for those who appreciate classic clean sounds, whether for jazz, country, or rock. The Drive channel, on the other hand, allows players to explore a range of overdriven tones. This channel can easily transition from a subtle breakup to a full-on, saturated distortion, accommodating heavier styles of music such as hard rock and metal.
Another key aspect of the Fender 210R is its built-in reverb, which adds depth and ambiance to the tone. The reverb can be adjusted to suit individual preferences, making it an essential feature for creating lush soundscapes or adding a touch of ambience to solos.
In terms of connectivity, the 210R is equipped with a range of inputs and outputs. Guitarists can connect their instruments through the standard instrument input, while the effects loop allows for the integration of external pedals and effects units. Additionally, there’s a headphone output for silent practice, making the amplifier versatile and user-friendly.
The Fender 210R also boasts a sturdy construction and a classic aesthetic that Fender is known for. The cabinet is built to withstand the rigors of gigging while still looking great on stage.
Overall, the Fender 210R is a versatile, powerful amplifier that excels in delivering both clean and distorted sounds. With its intuitive controls, exceptional audio quality, and robust build, it's a reliable choice for any guitarist looking to elevate their sound. Whether in the studio or on stage, the Fender 210R is sure to impress with its performance and tonal variety.