REASSEMBLE HUMIDIFIER: (FIGURES 6 & 7)
1. Place evaporator assembly and pan into humidifier body making sure evaporator shaft fits into drive hub.
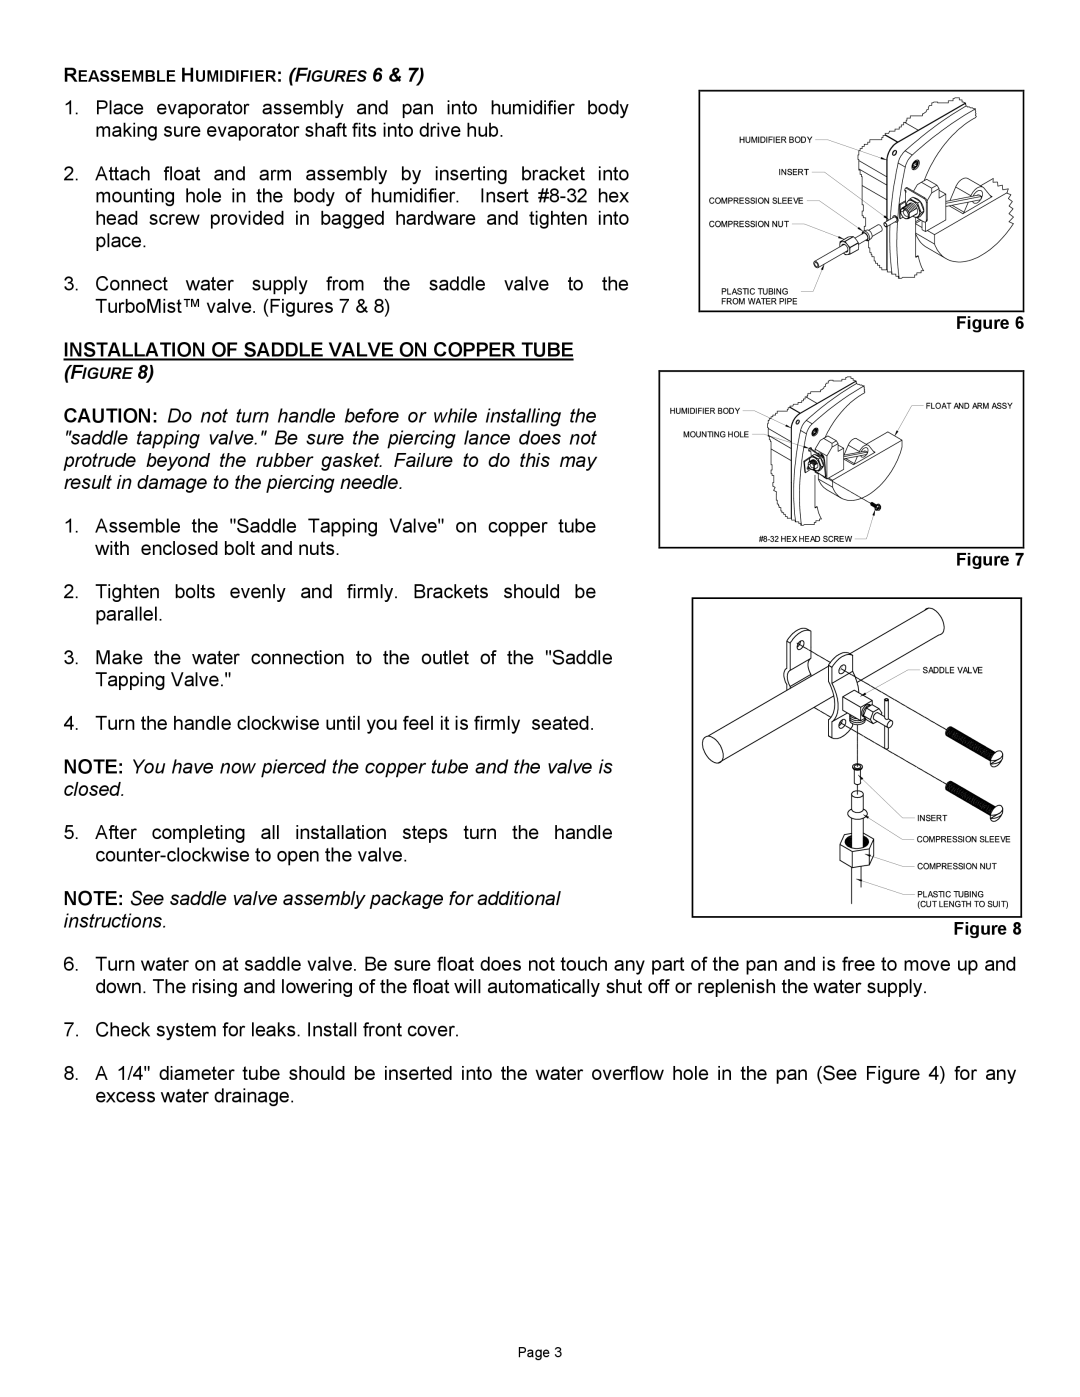
2. Attach float and arm assembly by inserting bracket into mounting hole in the body of humidifier. Insert
3. Connect water supply from the saddle valve to the TurboMist™ valve. (Figures 7 & 8)
Figure 6
INSTALLATION OF SADDLE VALVE ON COPPER TUBE (FIGURE 8)
CAUTION: Do not turn handle before or while installing the "saddle tapping valve." Be sure the piercing lance does not protrude beyond the rubber gasket. Failure to do this may result in damage to the piercing needle.
1.Assemble the "Saddle Tapping Valve" on copper tube with enclosed bolt and nuts.
2.Tighten bolts evenly and firmly. Brackets should be parallel.
3.Make the water connection to the outlet of the "Saddle Tapping Valve."
4.Turn the handle clockwise until you feel it is firmly seated.
NOTE: You have now pierced the copper tube and the valve is closed.
5.After completing all installation steps turn the handle
NOTE: See saddle valve assembly package for additional instructions.
Figure 7
Figure 8
6.Turn water on at saddle valve. Be sure float does not touch any part of the pan and is free to move up and down. The rising and lowering of the float will automatically shut off or replenish the water supply.
7.Check system for leaks. Install front cover.
8.A 1/4" diameter tube should be inserted into the water overflow hole in the pan (See Figure 4) for any excess water drainage.
Page 3