Installation Instructions
Installation instructions
1 Check that the oven cavity is square and within the limits in the installation dimensions.
2 Remove the mains wiring access cover.
3 Connect the mains wiring and replace the access cover.
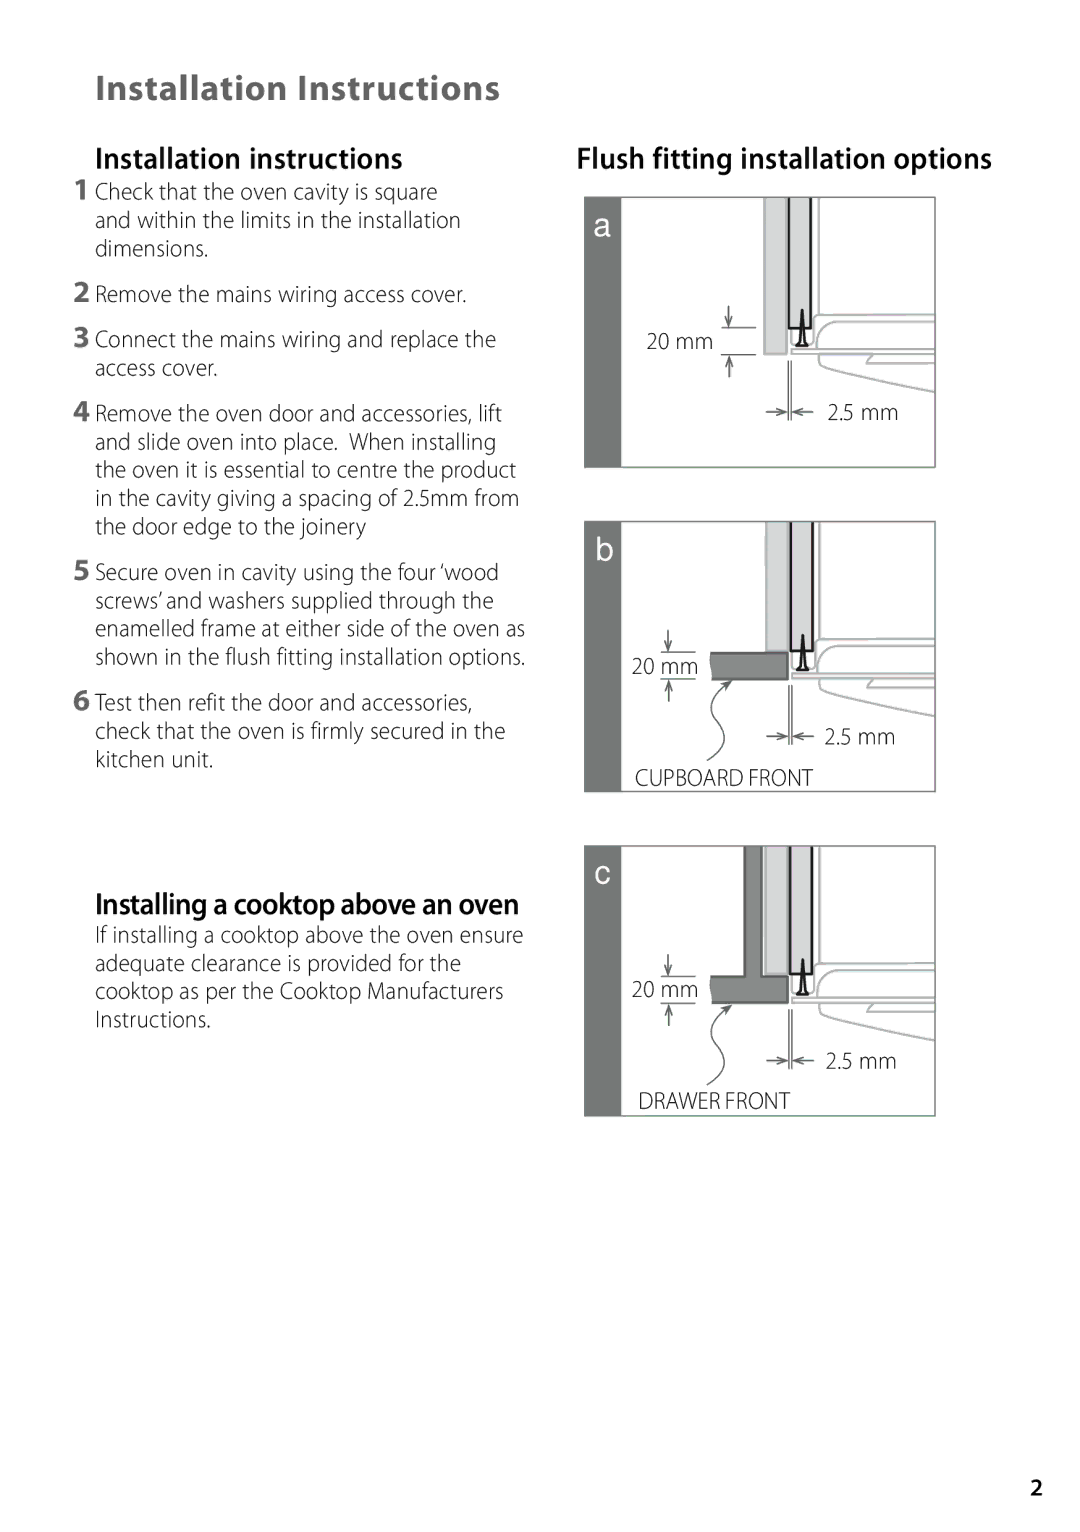
4 Remove the oven door and accessories, lift and slide oven into place. When installing the oven it is essential to centre the product in the cavity giving a spacing of 2.5mm from the door edge to the joinery
5 Secure oven in cavity using the four ‘wood screws’ and washers supplied through the enamelled frame at either side of the oven as shown in the flush fitting installation options.
6 Test then refit the door and accessories, check that the oven is firmly secured in the kitchen unit.
Flush fitting installation options
a
20 mm
2.5 mm
b
20 mm ![]()
![]()
![]()
![]() 2.5 mm
2.5 mm
CUPBOARD FRONT
Installing a cooktop above an oven
If installing a cooktop above the oven ensure adequate clearance is provided for the cooktop as per the Cooktop Manufacturers Instructions.
c
20 mm ![]()
2.5 mm
DRAWER FRONT
2