Installation
Unpacking
■Only remove the packaging at the customer’s premises.
■This will ensure the appliance arrives in pristine condition and reduces the risk of transport damage.
■Make sure the dryer is in a suitable location for installation.
■Consider installing the dryer before the washing machine in a side by side installation, this will allow better access to electrical and exhaust connections.
Remove Packaging
1.
2. |
3. |
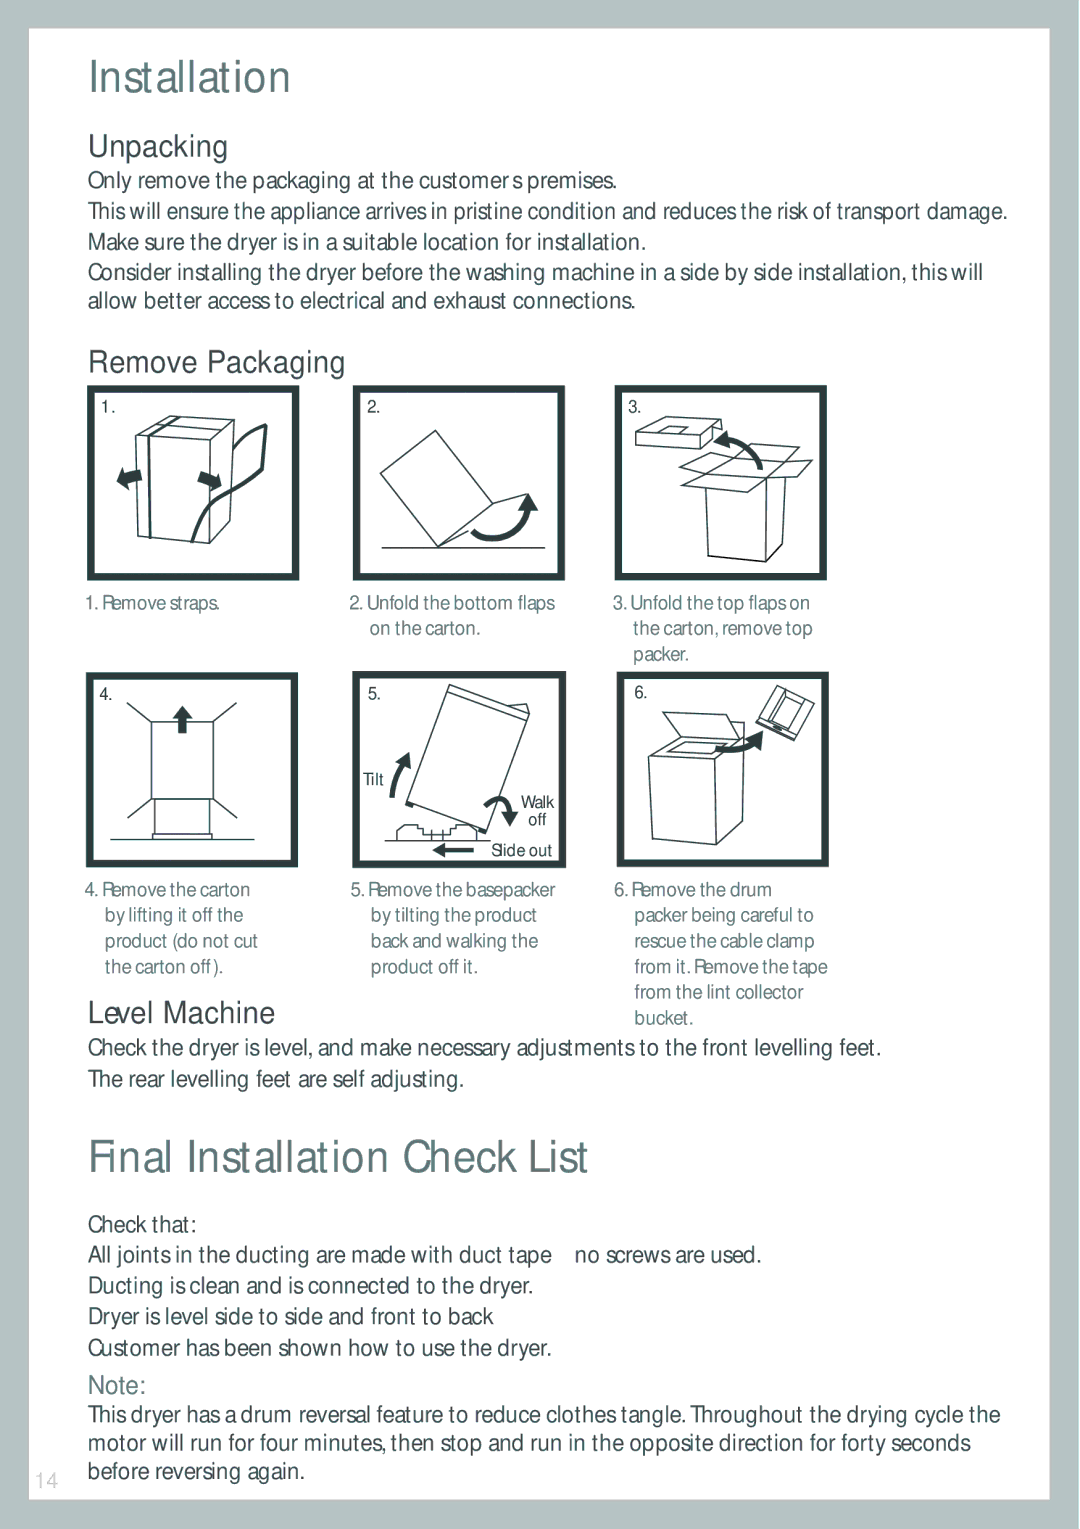
1.Remove straps.
4.
2.Unfold the bottom flaps on the carton.
5.
Tilt
Walk
off
Slide out
3.Unfold the top flaps on the carton, remove top packer.
6. |
4.Remove the carton by lifting it off the product (do not cut the carton off).
Level Machine
5.Remove the basepacker by tilting the product back and walking the product off it.
6.Remove the drum packer being careful to rescue the cable clamp from it. Remove the tape from the lint collector bucket.
■Check the dryer is level, and make necessary adjustments to the front levelling feet.
■The rear levelling feet are self adjusting.
Final Installation Check List
Check that:
■All joints in the ducting are made with duct tape – no screws are used.
■Ducting is clean and is connected to the dryer.
■Dryer is level side to side and front to back
■Customer has been shown how to use the dryer.
Note:
This dryer has a drum reversal feature to reduce clothes tangle. Throughout the drying cycle the motor will run for four minutes, then stop and run in the opposite direction for forty seconds
14before reversing again.