3
Remove the Lens
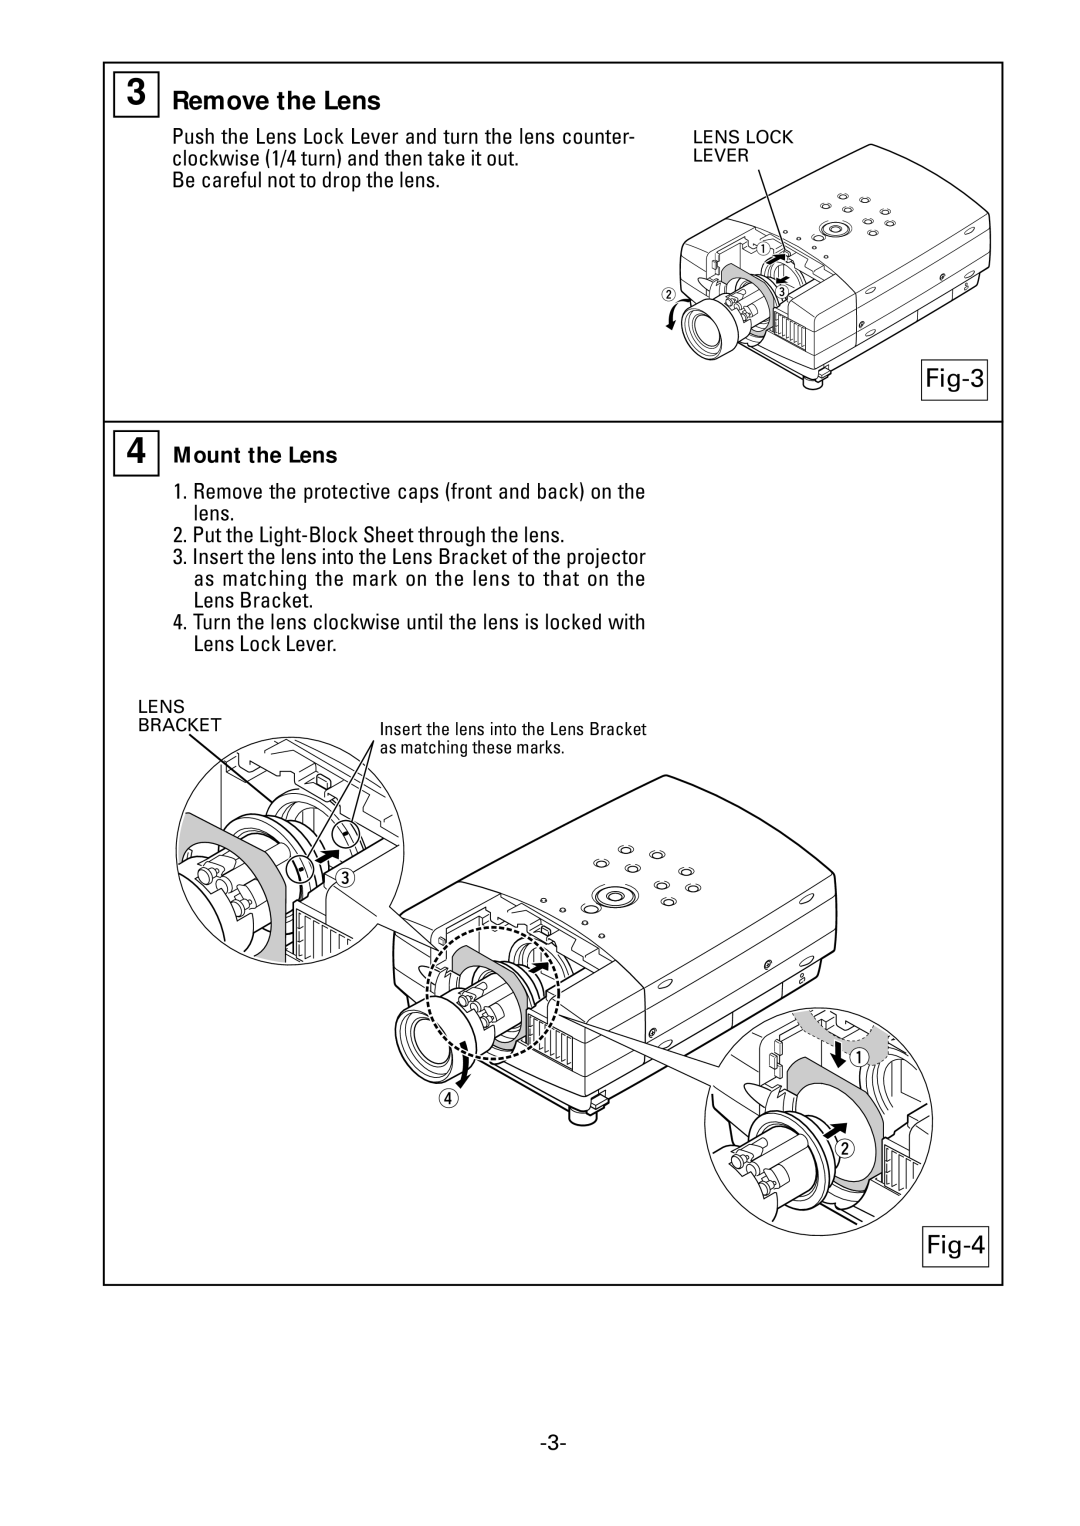
Push the Lens Lock Lever and turn the lens counter- clockwise (1/4 turn) and then take it out.
Be careful not to drop the lens.
LENS LOCK
LEVER
Fig-3
4
Mount the Lens
1.Remove the protective caps (front and back) on the lens.
2.Put the
3.Insert the lens into the Lens Bracket of the projector as matching the mark on the lens to that on the Lens Bracket.
4.Turn the lens clockwise until the lens is locked with Lens Lock Lever.
LENS
BRACKETInsert the lens into the Lens Bracket as matching these marks.
