BATTERY INSTALLATION (OPTIONAL)
The transmitter and receiver operate with either the AC adaptors (included) or by battery power.
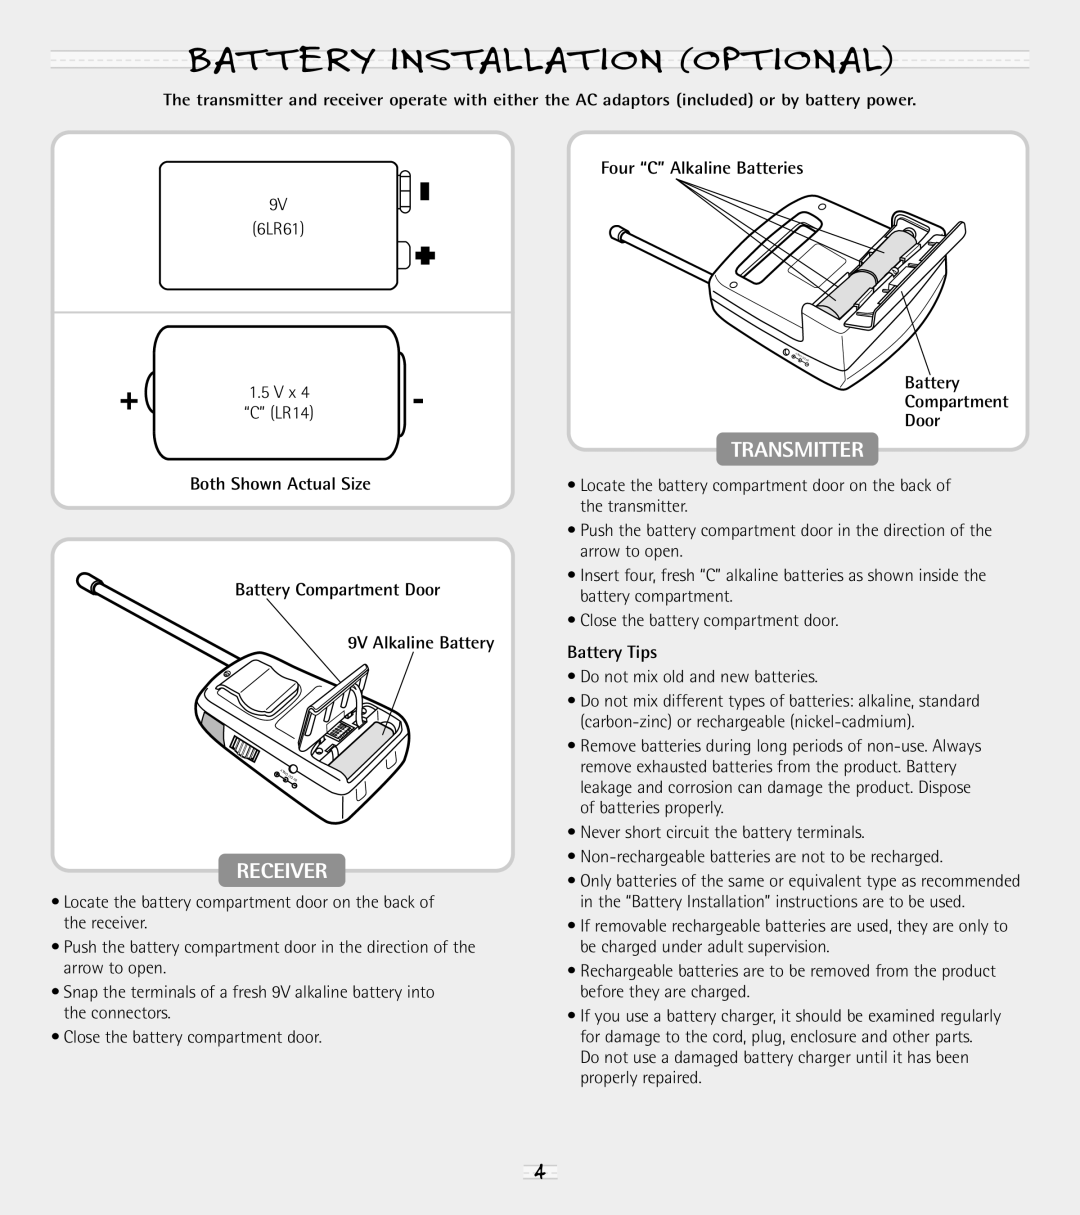
Four “C” Alkaline Batteries
9V
(6LR61)
+ | 1.5 V x 4 | - |
“C” (LR14) | ||
| Both Shown Actual Size |
|
Battery Compartment Door
9V Alkaline Battery
5 4 3 2 1
LY |
|
|
NO | CD |
|
| 9V | |
|
|
RECEIVER
•Locate the battery compartment door on the back of the receiver.
•Push the battery compartment door in the direction of the arrow to open.
•Snap the terminals of a fresh 9V alkaline battery into the connectors.
•Close the battery compartment door.
YL | NO |
|
|
|
| CD | V9 |
Battery
Compartment
Door
TRANSMITTER
•Locate the battery compartment door on the back of the transmitter.
•Push the battery compartment door in the direction of the arrow to open.
•Insert four, fresh “C” alkaline batteries as shown inside the battery compartment.
•Close the battery compartment door.
Battery Tips
•Do not mix old and new batteries.
•Do not mix different types of batteries: alkaline, standard
•Remove batteries during long periods of
•Never short circuit the battery terminals.
•
•Only batteries of the same or equivalent type as recommended in the “Battery Installation” instructions are to be used.
•If removable rechargeable batteries are used, they are only to be charged under adult supervision.
•Rechargeable batteries are to be removed from the product before they are charged.
•If you use a battery charger, it should be examined regularly for damage to the cord, plug, enclosure and other parts.
Do not use a damaged battery charger until it has been properly repaired.
4
