Label Decoration | Attaching the Seat |
12
1413
| 10 |
| (Label 8 |
3 | opposite side) |
![]() 7 2
7 2 ![]()
![]()
17 (Label 18 opposite side)
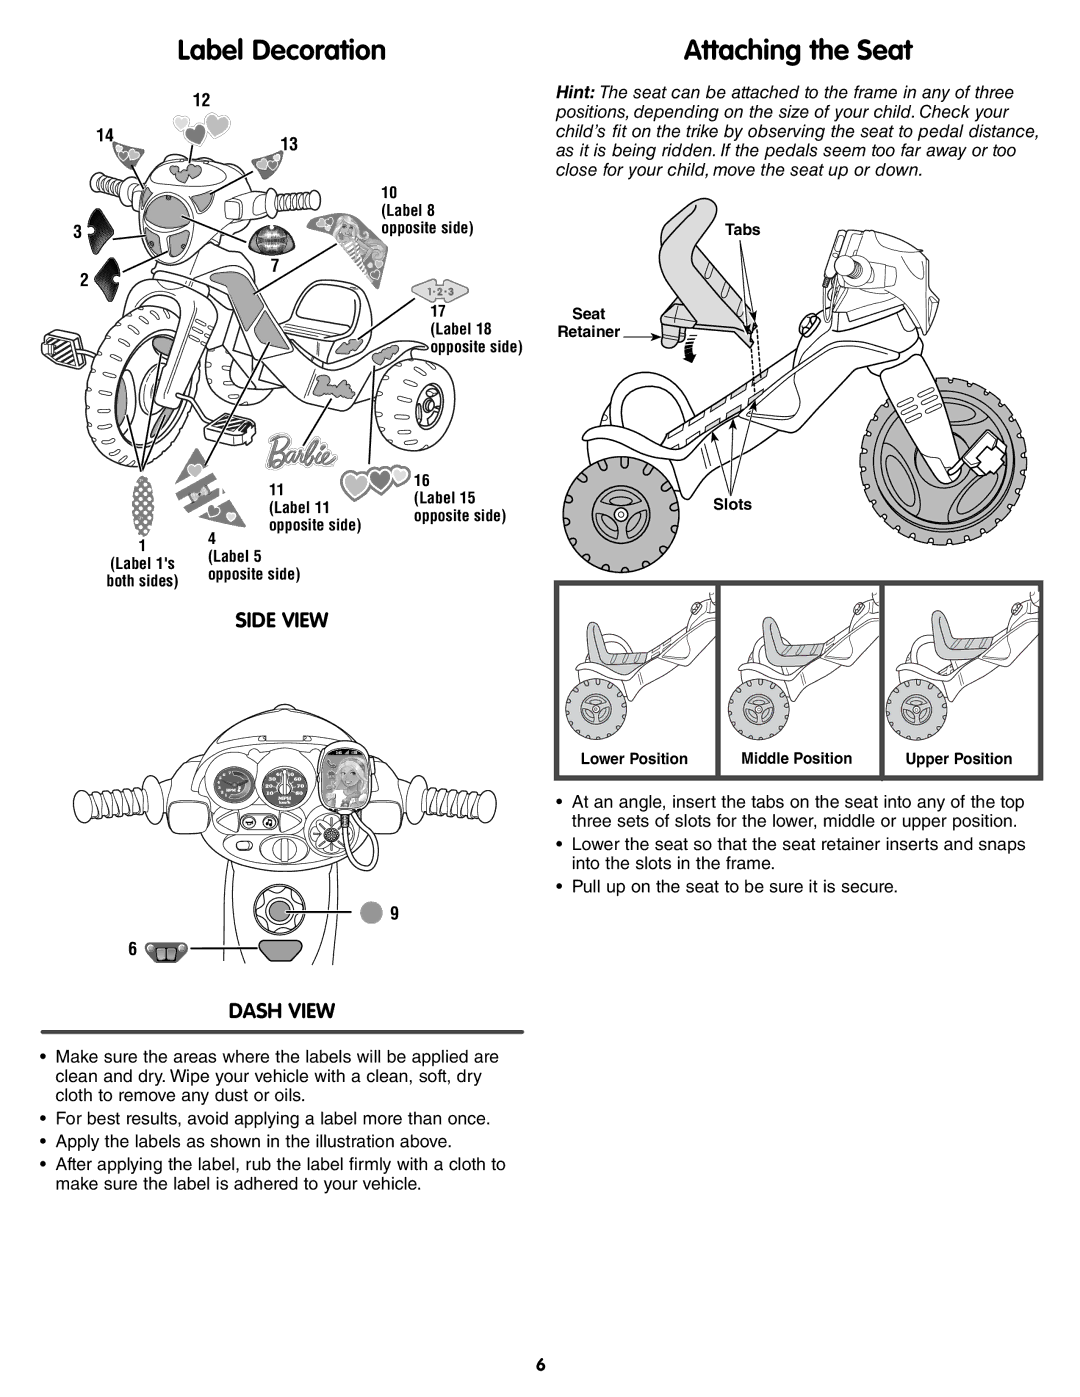
Hint: The seat can be attached to the frame in any of three positions, depending on the size of your child. Check your child’s fi t on the trike by observing the seat to pedal distance, as it is being ridden. If the pedals seem too far away or too close for your child, move the seat up or down.
Tabs
Seat
Retainer
| TM |
|
1 | 11 | 16 |
(Label 15 | ||
| (Label 11 | opposite side) |
| opposite side) | |
|
|
1 | 4 | |
(Label 5 | ||
(Label 1's | ||
opposite side) | ||
both sides) | ||
|
SIDE VIEW
![]() 9
9
6 ![]()
DASH VIEW
•Make sure the areas where the labels will be applied are clean and dry. Wipe your vehicle with a clean, soft, dry cloth to remove any dust or oils.
•For best results, avoid applying a label more than once.
•Apply the labels as shown in the illustration above.
•After applying the label, rub the label fi rmly with a cloth to make sure the label is adhered to your vehicle.
Slots
Lower Position | Middle Position | Upper Position |
|
|
|
•At an angle, insert the tabs on the seat into any of the top three sets of slots for the lower, middle or upper position.
•Lower the seat so that the seat retainer inserts and snaps into the slots in the frame.
•Pull up on the seat to be sure it is secure.
6