Assembly Instructions
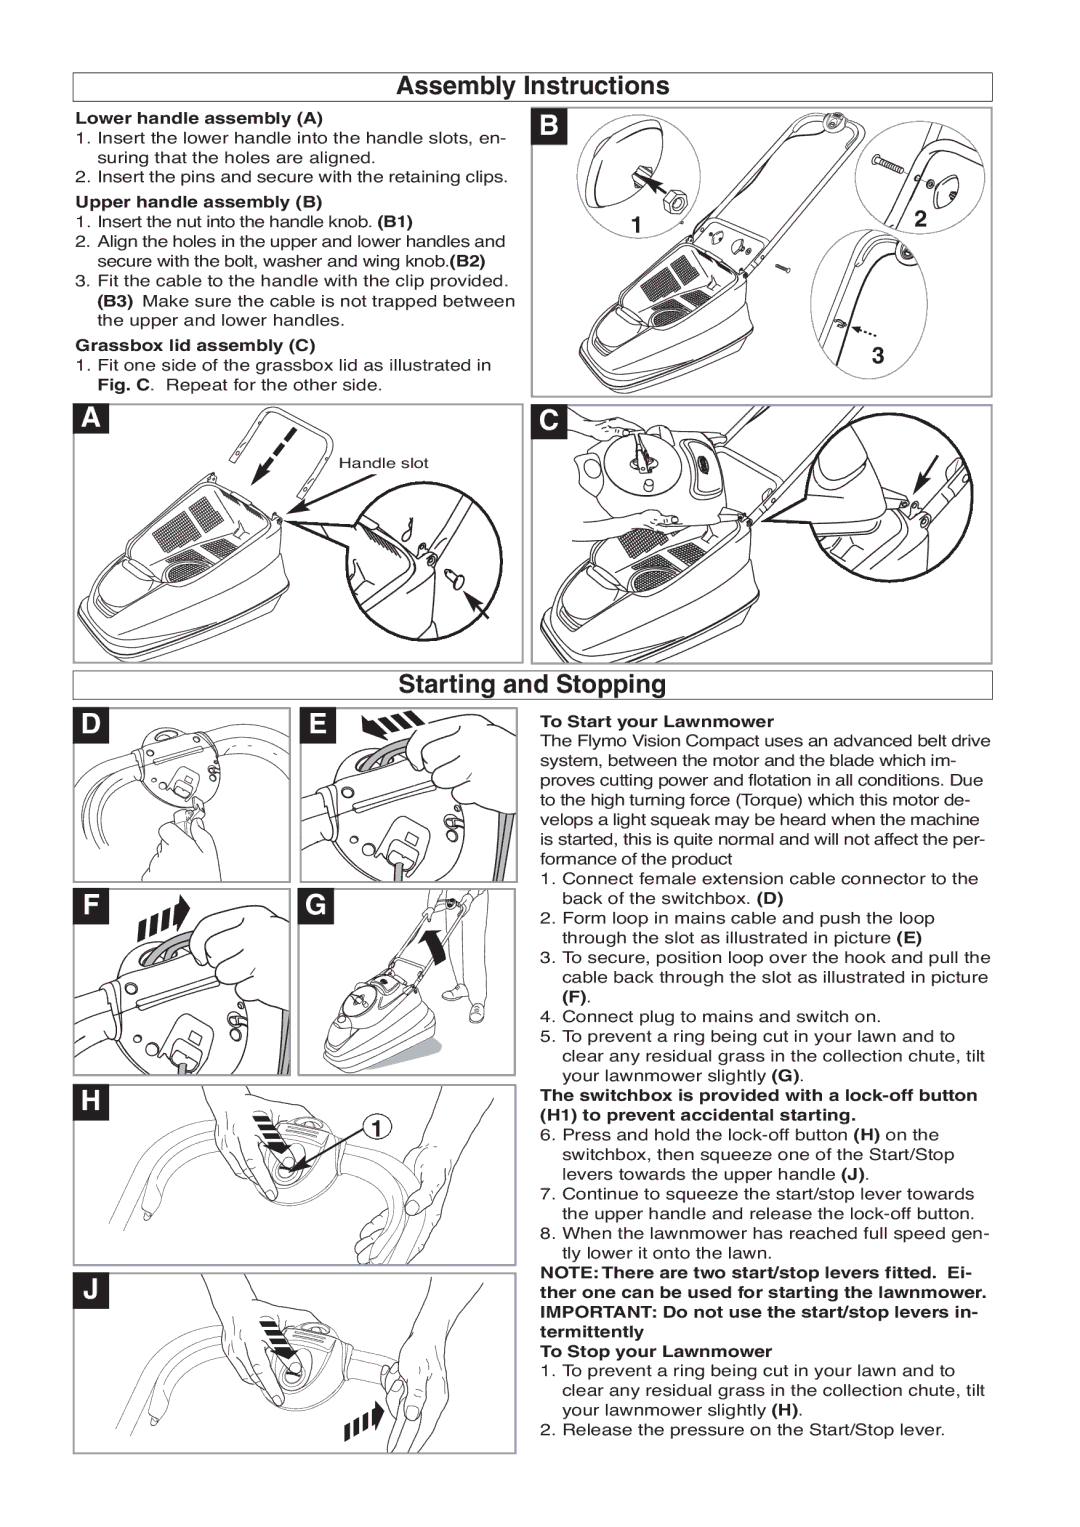
Lower handle assembly (A)
1.Insert the lower handle into the handle slots, en- suring that the holes are aligned.
2.Insert the pins and secure with the retaining clips.
Upper handle assembly (B)
1.Insert the nut into the handle knob. (B1)
2.Align the holes in the upper and lower handles and secure with the bolt, washer and wing knob.(B2)
3.Fit the cable to the handle with the clip provided. (B3) Make sure the cable is not trapped between the upper and lower handles.
Grassbox lid assembly (C)
1.Fit one side of the grassbox lid as illustrated in Fig. C. Repeat for the other side.
A |
Handle slot |
B
1 | 2 |
3 |
C |
Starting and Stopping
D |
F |
E |
G |
To Start your Lawnmower
The Flymo Vision Compact uses an advanced belt drive system, between the motor and the blade which im- proves cutting power and flotation in all conditions. Due to the high turning force (Torque) which this motor de- velops a light squeak may be heard when the machine is started, this is quite normal and will not affect the per- formance of the product
1.Connect female extension cable connector to the back of the switchbox. (D)
2.Form loop in mains cable and push the loop through the slot as illustrated in picture (E)
3.To secure, position loop over the hook and pull the cable back through the slot as illustrated in picture
(F).
4.Connect plug to mains and switch on.
5.To prevent a ring being cut in your lawn and to clear any residual grass in the collection chute, tilt your lawnmower slightly (G).
H |
1 |
J |
The switchbox is provided with a
6.Press and hold the
7.Continue to squeeze the start/stop lever towards the upper handle and release the
8.When the lawnmower has reached full speed gen- tly lower it onto the lawn.
NOTE: There are two start/stop levers fitted. Ei- ther one can be used for starting the lawnmower. IMPORTANT: Do not use the start/stop levers in- termittently
To Stop your Lawnmower
1.To prevent a ring being cut in your lawn and to clear any residual grass in the collection chute, tilt your lawnmower slightly (H).
2.Release the pressure on the Start/Stop lever.