Mini Trim specifications
The Flymo Mini Trim is a versatile and efficient tool designed for easy maintenance of garden edges, lawns, and flower beds. This lightweight and compact grass trimmer is favored by both novice gardeners and seasoned landscape professionals for its ease of use and remarkable performance.One of the standout features of the Flymo Mini Trim is its ergonomic design. Weighing in at just a few kilograms, it allows users to maneuver effortlessly around the garden, reducing fatigue during prolonged use. The adjustable shaft ensures that users of varying heights can operate the trimmer comfortably, while the cushioned handle provides added grip and control.
Powered by a robust electric motor, the Flymo Mini Trim offers consistent performance without the hassle of fuel. The electric power source means less environmental impact, making it an eco-friendly choice that contributes to sustainable gardening practices. Additionally, the trimmer comes equipped with a long power cord, allowing for extended reach without the frequent need for re-plugging.
One of the key technological advancements incorporated in the Flymo Mini Trim is its innovative line feed system. This system automatically advances the trimmer line when needed, eliminating the tedious task of manual line feeding. The dual-line cutting feature ensures an efficient cutting performance, enabling users to tackle larger areas quickly.
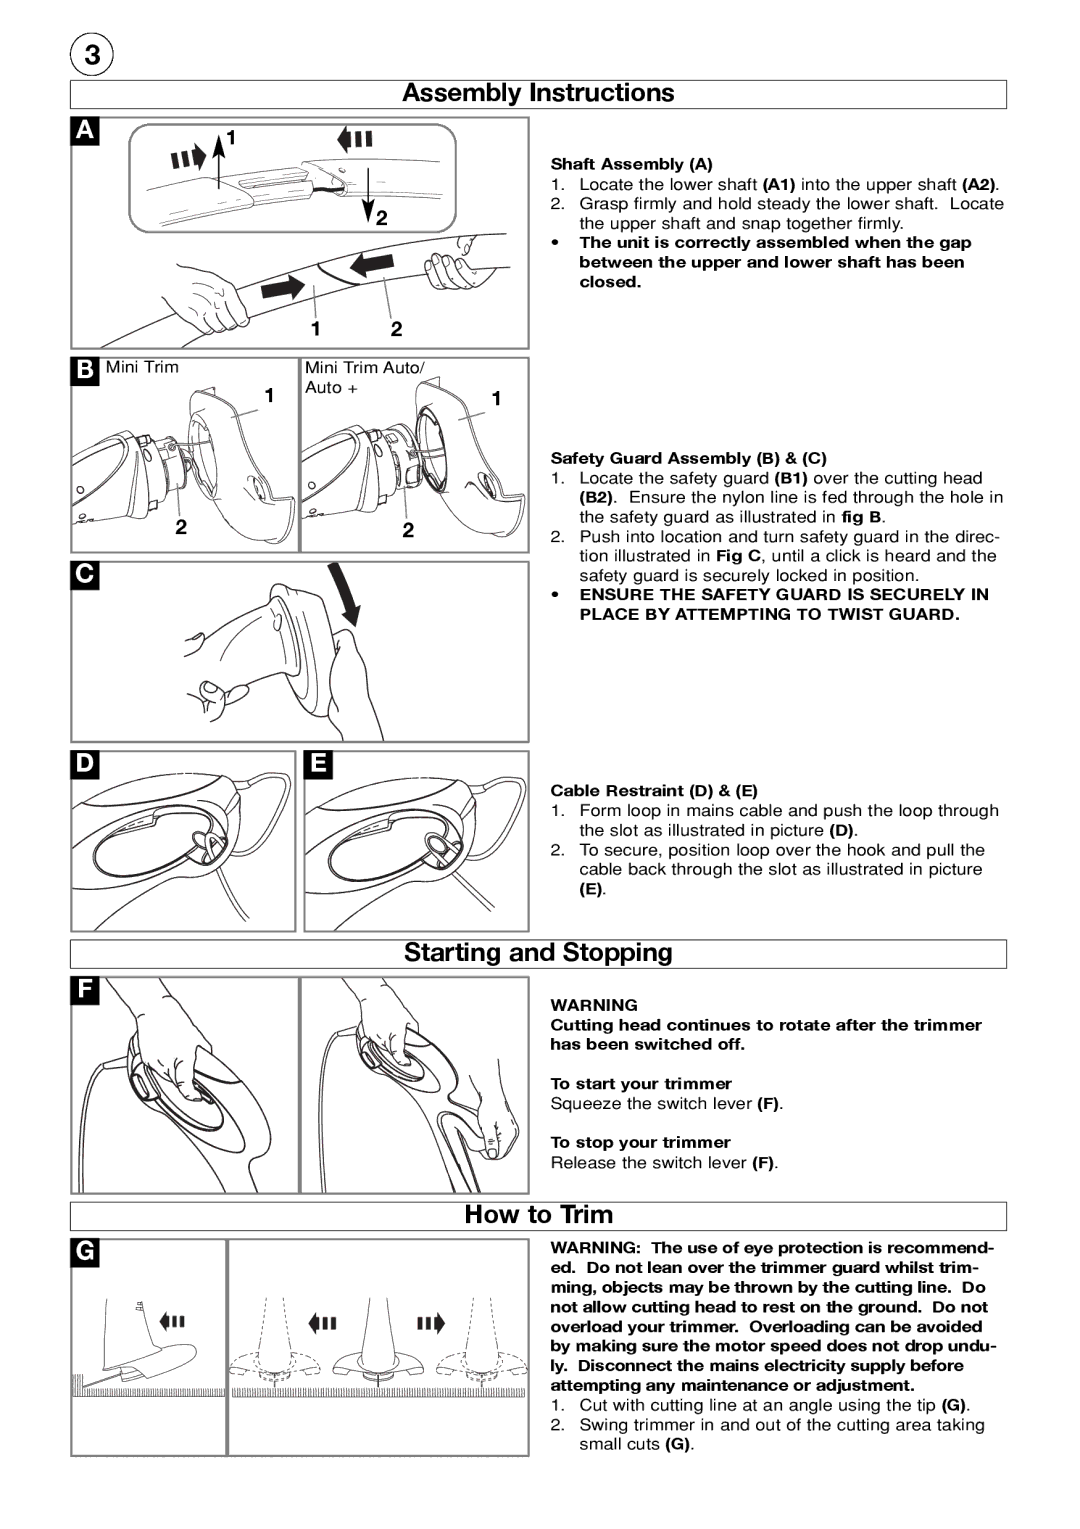
For added safety, the Flymo Mini Trim is equipped with protective features such as a safety guard that helps to prevent debris from scattering, and a power switch that is easily accessible. These safety measures ensure that gardeners can operate the tool safely while achieving a clean finish on their lawn edges and around flower beds.
Another characteristic that makes the Flymo Mini Trim a standout compared to other grass trimmers is its compact storage capability. The trimmer can be easily disassembled for convenient storage, making it ideal for those with limited space in their garden shed or garage.
In conclusion, the Flymo Mini Trim combines lightweight design, ergonomic comfort, and advanced technology to deliver a top-tier gardening experience. Whether you're maintaining a small garden, tidying up borders, or sculpting flower beds, the Flymo Mini Trim stands out as a reliable tool that efficiently meets the needs of any gardener. With its focus on usability and efficiency, it has earned a reputation as a go-to choice for effective lawn care.

