ADJUSTING THE DIRECTION OF AIR CIRCULATION
Instructions relating to heating (*) are applicable only to “HEAT & COOL MODEL” (Reverse Cycle).
Vertical
Vertical Air Direction Adjustment
Press the AIR FLOW DIRECTION VERTICAL SET button.
Each time the button is pressed, the air direction range will change as follows:
![]() DANGER!
DANGER!
Never place fingers or foreign objects inside the outlet ports, since the internal fan oper- ates at high speed and could cause personal injury.
1 ![]()
![]() 2
2 ![]()
![]() 3
3 ![]()
![]() 4
4 ![]()
![]() 5
5 ![]()
![]() 6
6 ![]()
![]() 7
7
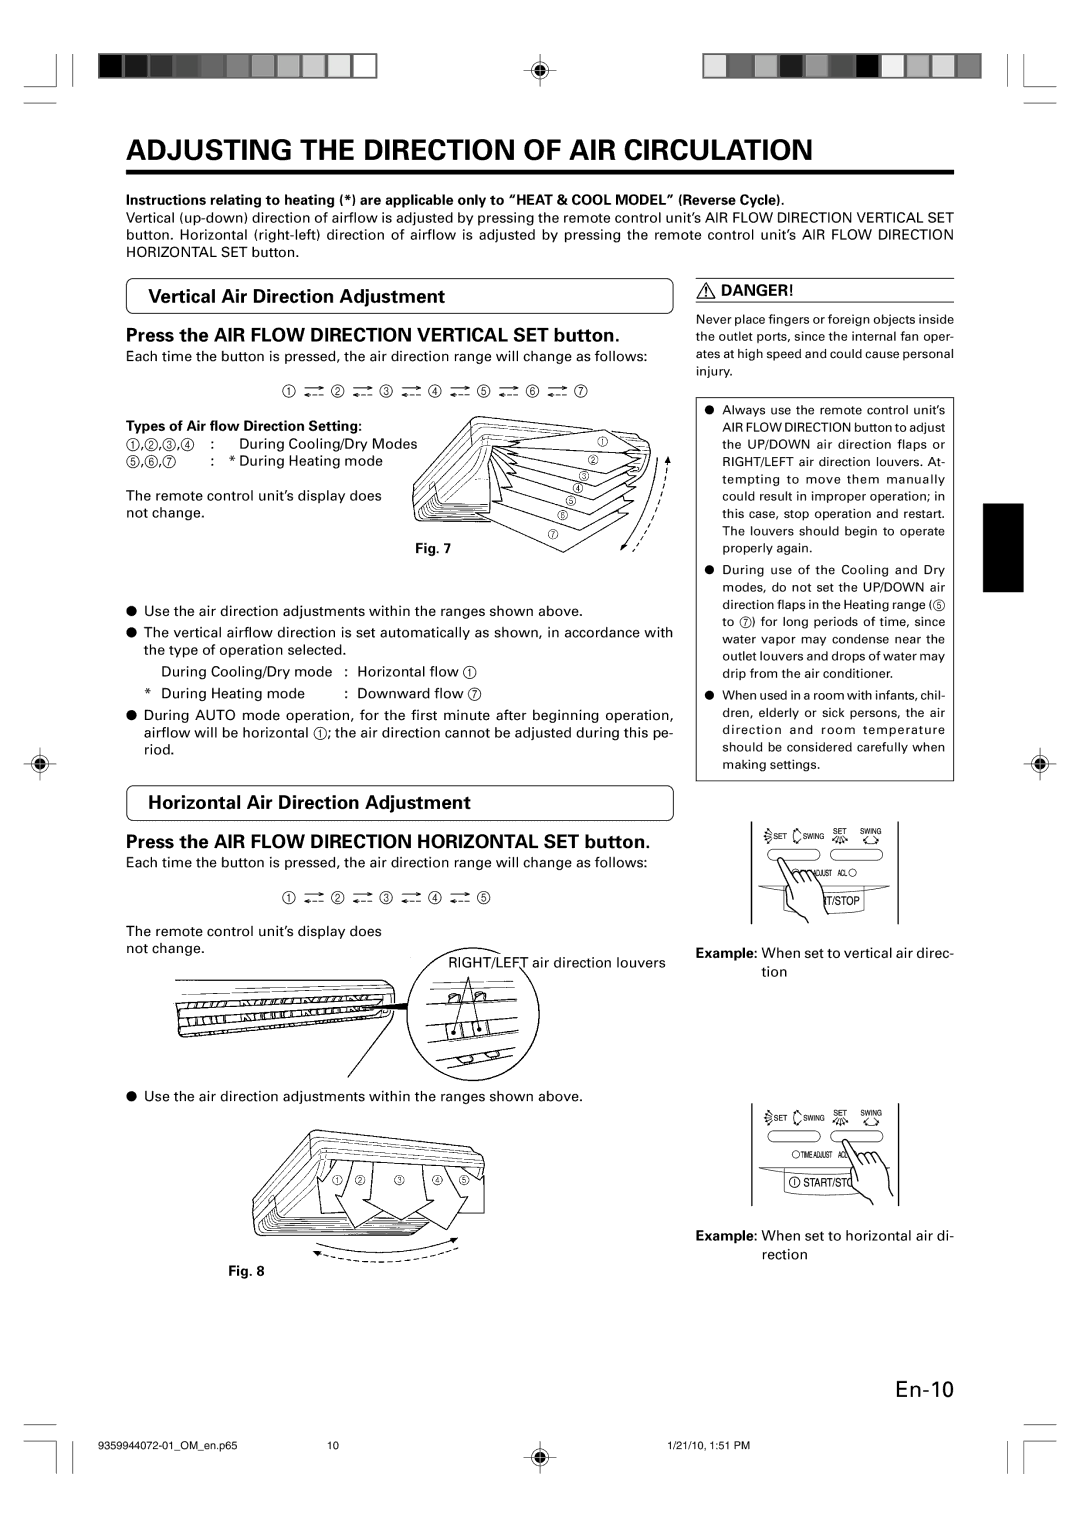
Types of Air flow Direction Setting:
1,2,3,4 : During Cooling/Dry Modes
5,6,7 : * During Heating mode
The remote control unit’s display does not change.
Fig. 7
●Use the air direction adjustments within the ranges shown above.
●The vertical airflow direction is set automatically as shown, in accordance with the type of operation selected.
During Cooling/Dry mode : Horizontal flow 1
* During Heating mode | : Downward flow 7 |
●During AUTO mode operation, for the first minute after beginning operation, airflow will be horizontal 1; the air direction cannot be adjusted during this pe- riod.
●Always use the remote control unit’s AIR FLOW DIRECTION button to adjust the UP/DOWN air direction flaps or RIGHT/LEFT air direction louvers. At- tempting to move them manually could result in improper operation; in this case, stop operation and restart. The louvers should begin to operate properly again.
●During use of the Cooling and Dry modes, do not set the UP/DOWN air direction flaps in the Heating range (5 to 7) for long periods of time, since water vapor may condense near the outlet louvers and drops of water may drip from the air conditioner.
●When used in a room with infants, chil- dren, elderly or sick persons, the air direction and room temperature should be considered carefully when making settings.
Horizontal Air Direction Adjustment
Press the AIR FLOW DIRECTION HORIZONTAL SET button.
Each time the button is pressed, the air direction range will change as follows:
1 ![]()
![]() 2
2 ![]()
![]() 3
3 ![]()
![]() 4
4 ![]()
![]() 5
5
The remote control unit’s display does
not change.Example: When set to vertical air direc- RIGHT/LEFT air direction louvers
tion
●Use the air direction adjustments within the ranges shown above.
Example: When set to horizontal air di- rection
Fig. 8
10 | 1/21/10, 1:51 PM |