Grill Assembly
IGNITER ASSEMBLY
1.The battery, spring and igniter cap must be installed before using.
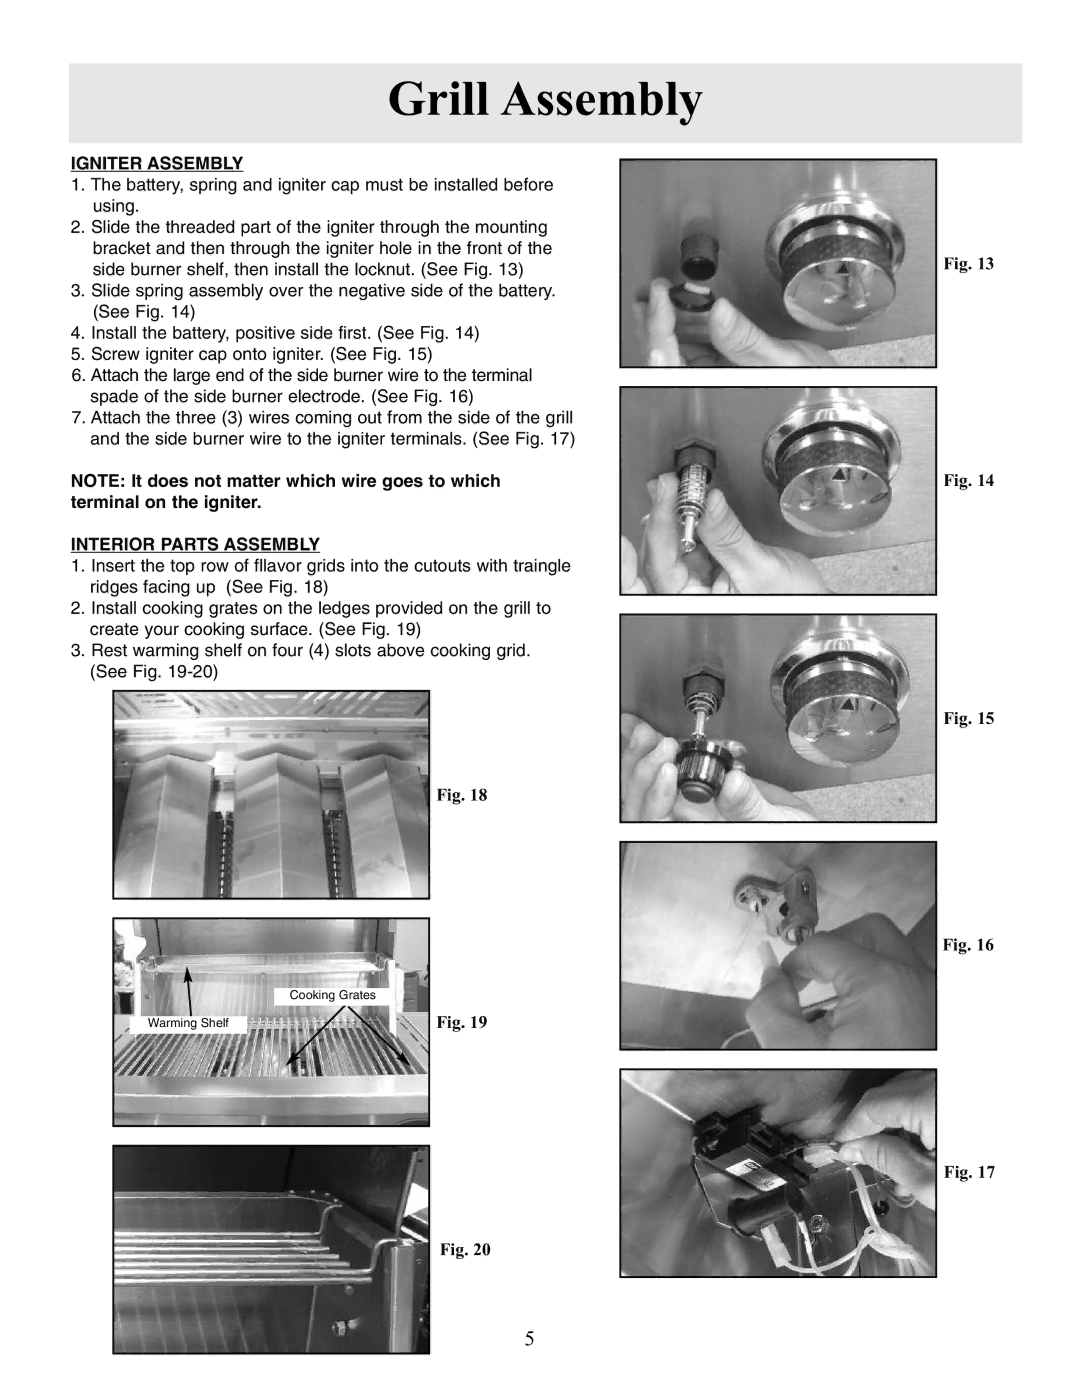
2.Slide the threaded part of the igniter through the mounting bracket and then through the igniter hole in the front of the side burner shelf, then install the locknut. (See Fig. 13)
3.Slide spring assembly over the negative side of the battery. (See Fig. 14)
4.Install the battery, positive side first. (See Fig. 14)
5.Screw igniter cap onto igniter. (See Fig. 15)
6.Attach the large end of the side burner wire to the terminal spade of the side burner electrode. (See Fig. 16)
7.Attach the three (3) wires coming out from the side of the grill and the side burner wire to the igniter terminals. (See Fig. 17)
NOTE: It does not matter which wire goes to which terminal on the igniter.
INTERIOR PARTS ASSEMBLY
1.Insert the top row of fllavor grids into the cutouts with traingle ridges facing up (See Fig. 18)
2.Install cooking grates on the ledges provided on the grill to create your cooking surface. (See Fig. 19)
3.Rest warming shelf on four (4) slots above cooking grid. (See Fig.
Fig. 18
|
|
|
|
|
|
|
|
| Cooking Grates |
| Fig. 19 |
|
|
|
|
| |
|
|
|
|
| |
| Warming Shelf |
|
|
| |
|
|
|
|
| |
|
|
|
|
|
|
|
|
|
|
|
|
Fig. 20
Fig. 13
Fig. 14
Fig. 15
Fig. 16
Fig. 17
5
