FFHS2322MM, FFHS2322MQ, FFUS2613LP, FFUS2613LE, FFUS2613LM specifications
The Frigidaire FFUS2613LP, FFUS2613LM, FFHS2322MM, FFHS2322MQ, and FFUS2613LE are standout appliances in the realm of refrigerators, packed with features and technologies designed to enhance user experience and convenience.Starting with the FFUS2613LP and FFUS2613LM, these models feature a sleek, side-by-side design that not only maximizes storage space but also offers easy access to both refrigerated and frozen items. The adjustable shelves allow for personalized organization, accommodating various sizes of containers and ensuring efficient use of space. These units utilize advanced cooling technologies, including a cooling system that maintains a consistent temperature, thereby preserving the freshness of food for longer periods.
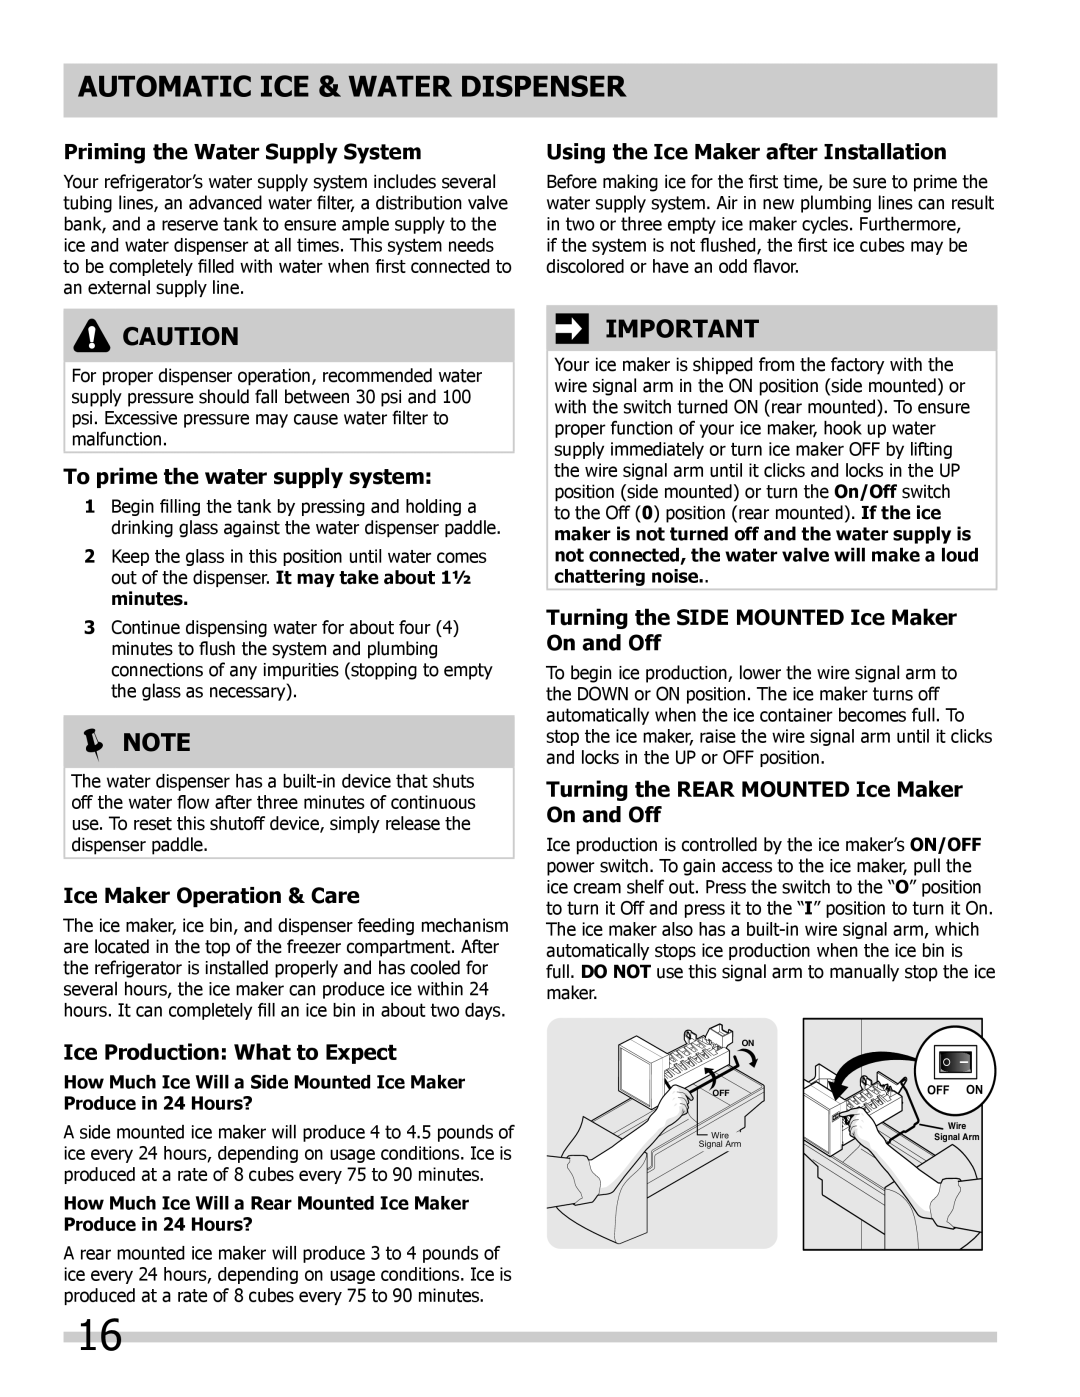
Both models come equipped with an exterior ice and water dispenser, providing easy access to icy cold water and fresh ice without having to open the fridge door. This feature helps minimize temperature fluctuations, further contributing to energy efficiency. Additionally, their energy-efficient design is compliant with ENERGY STAR standards, making them environmentally friendly options that help reduce electricity bills.
The FFHS2322MM and FFHS2322MQ models also offer impressive features, such as a spacious interior layout and additional storage options like door bins and humidity-controlled crisper drawers. These crisper drawers are particularly notable for their ability to maintain optimal humidity levels for fruits and vegetables, helping to extend their freshness.
The FFHS2322 series also integrates advanced filtration technology that ensures water and ice are not only cold but also free from impurities. The easy-to-replace water filter makes maintaining clean water simple and hassle-free. Both models emphasize user-friendly controls, allowing for straightforward adjustments to temperature settings and filter changes.
Finally, the FFUS2613LE is renowned for its unique fingerprint-resistant finish, which helps keep the surface looking clean and polished without the need for constant wiping. This model also showcases similar features to its counterparts, such as energy-efficient cooling and versatile shelving.
In conclusion, Frigidaire combines innovative technology with practical design in the FFUS2613LP, FFUS2613LM, FFHS2322MM, FFHS2322MQ, and FFUS2613LE refrigerators. Their advanced features, including customizable storage, water filtration, and energy efficiency, make them ideal appliances for any modern kitchen, catering to the needs of diverse households while prioritizing sustainability and convenience.