4. Procedure for Connecting to the User System
Before using the
Connect the header board directly to the adapter. Refer to the operation manual of the adapter for details on how to connect the adapter.
■Connecting
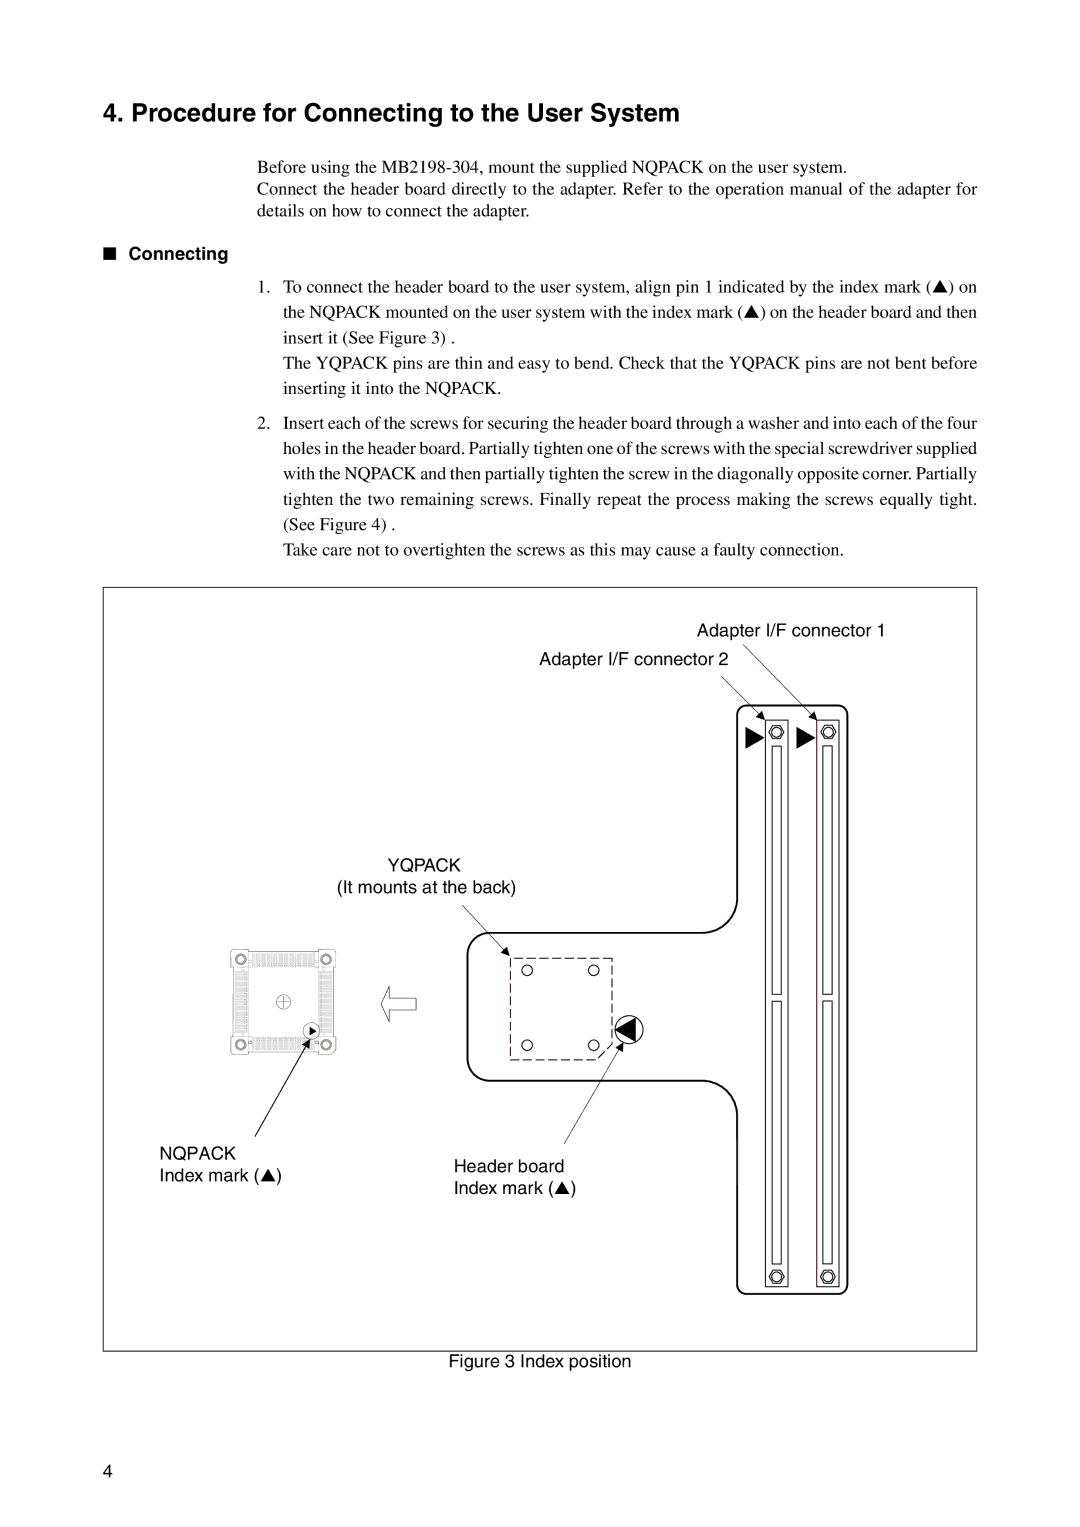
1.To connect the header board to the user system, align pin 1 indicated by the index mark (▲) on the NQPACK mounted on the user system with the index mark (▲) on the header board and then insert it (See Figure 3) .
The YQPACK pins are thin and easy to bend. Check that the YQPACK pins are not bent before inserting it into the NQPACK.
2.Insert each of the screws for securing the header board through a washer and into each of the four holes in the header board. Partially tighten one of the screws with the special screwdriver supplied with the NQPACK and then partially tighten the screw in the diagonally opposite corner. Partially tighten the two remaining screws. Finally repeat the process making the screws equally tight. (See Figure 4) .
Take care not to overtighten the screws as this may cause a faulty connection.
Adapter I/F connector 1
Adapter I/F connector 2
YQPACK
(It mounts at the back)
NQPACK | Header board | |
Index mark (▲) | ||
Index mark (▲) | ||
|
Figure 3 Index position
4
