
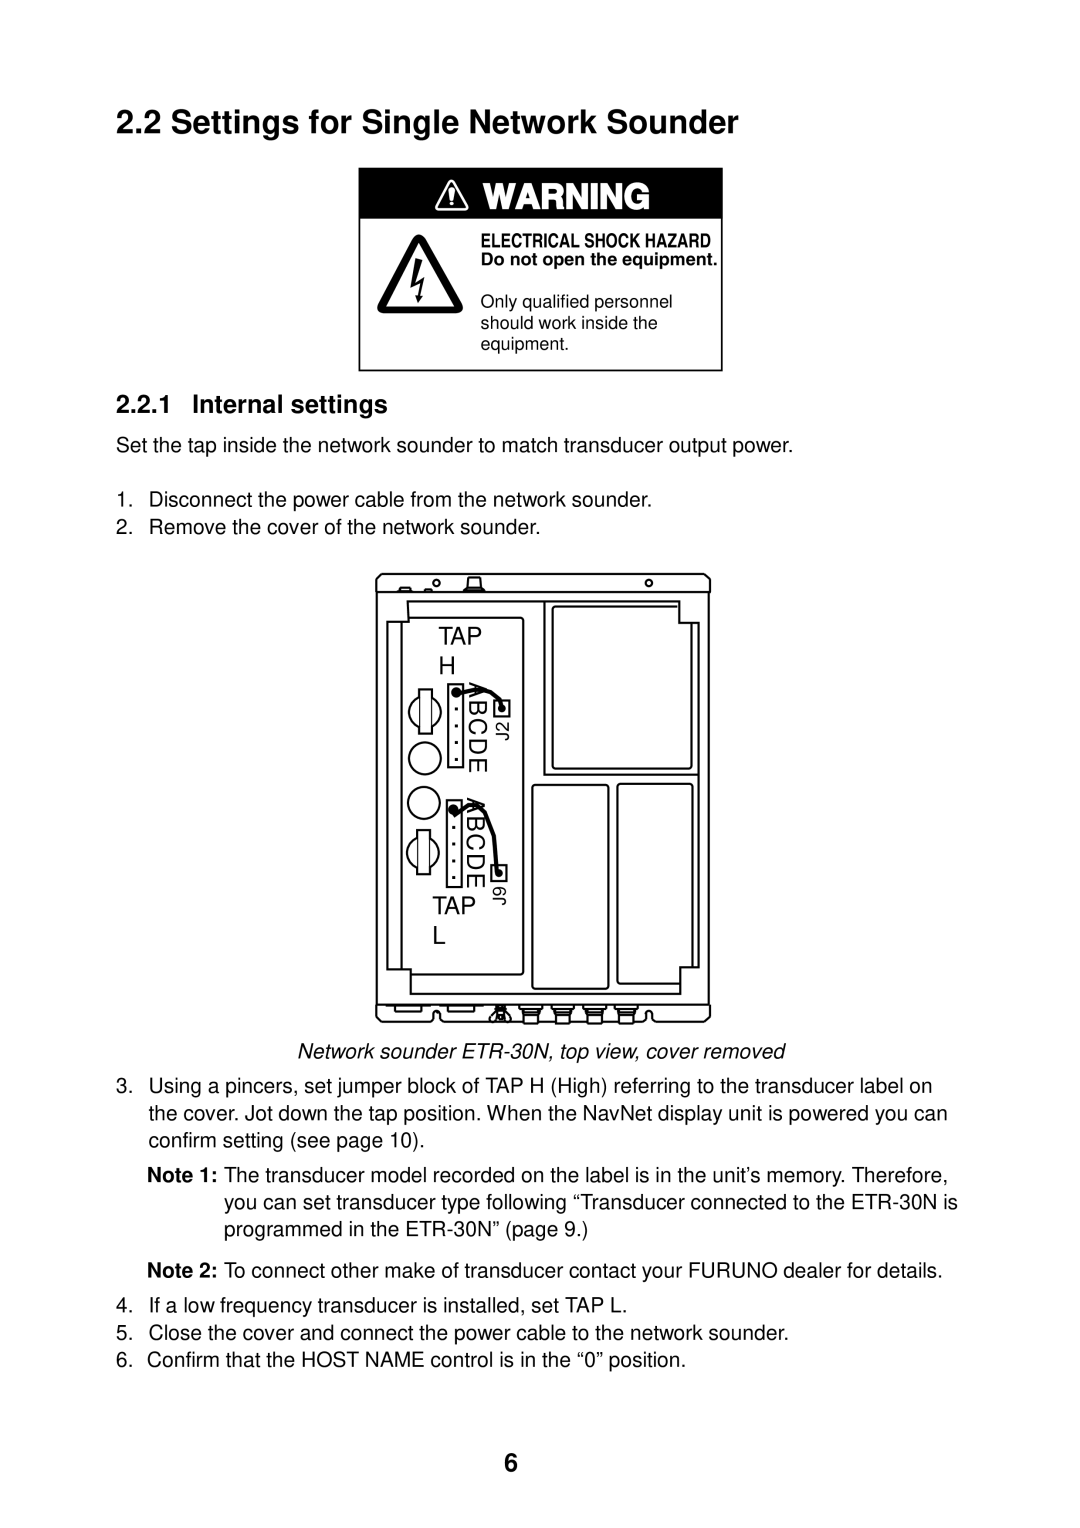
ETR-30N specifications
The Furuno ETR-30N is a state-of-the-art marine radar system that is designed to be robust, reliable, and efficient for a wide range of maritime applications. This advanced radar solution is particularly favored by commercial vessels, fishing boats, and leisure crafts due to its high performance levels and user-friendly interface.One of the primary features of the ETR-30N is its ability to provide high-resolution images of the surrounding environment. It utilizes an advanced pulse compression technology that enhances target detection capabilities, allowing for easier identification of other vessels, navigation aids, and potential obstacles in busy waterways. With its long-range capability, operators can monitor targets far in the distance and take strategic actions as necessary.
Another standout characteristic of the ETR-30N is its inclusion of a cutting-edge digital signal processing unit. This technology serves to eliminate clutter caused by waves, rain, and other interference, ensuring that the display remains clear and focused on relevant targets. The radar is also capable of automatic gain control, adjusting the signal strength based on environmental conditions and the distances of detected objects.
The ETR-30N features a user-friendly control interface, complete with intuitive menus and a touch screen option. This design allows for easy operation under a variety of conditions, ensuring that crew members can quickly learn the system without extensive training. The display can be customized to show different data, including navigation aids, target tracking information, and various radar modes.
In addition to its impressive radar capabilities, the ETR-30N is equipped with integrated AIS (Automatic Identification System) functionality, which provides real-time information about other vessels in the vicinity. This enhances situational awareness and significantly contributes to safety out on the water.
When it comes to installation and maintenance, the ETR-30N is designed with ease of use in mind. The compact design allows for flexibility in mounting, while the robust construction ensures longevity and reliability in harsh sea conditions. With its combination of high-tech features and practical design, the Furuno ETR-30N stands out as a leading choice for mariners seeking a dependable radar solution that meets both professional and recreational needs.