G
Information | .Always unplug the pump first before working on it. |
| .Before assembling system extensions first unscrew the pre- |
assembled cascade of the pump and then screw one of the water jets on again.
.Follow the Safety and Assembly Information attached to the operating instructions.
Operation
Positioning the pump | .Put the pump into the water and arrange excess cabling below |
| the pump into a ring. This prevents the pump from floating to |
| the edge of the pond. |
| .If the pump does not float level on the water, then it will need |
| to be balanced. |
| 1. Dismantle the pump as described in the paragraph |
| “Dismantling”. |
2.Use the knife supplied to carefully cut off a section of the float (white styrofoam
ring). The right balance can be found by turning the float.
Pay attention to | The pump must be able to float freely in the water. |
minimum water depth | The water should be at least 20 cm deep. |
Starting the pump | Put the plug connection into a free socket of the transformer |
| and connect the power cable of the transformer with a 230 V AC |
| socket. |
| A Caution! Pump will start running immediately! |
Avoid dry operation | Avoid dry operation of the pump as dry running will produce |
| undesirable heat and destroy the pump. |
Care Instructions
G
| How to clean: |
| .Pull the plug connections out of the transformer and dis- |
| connect it! |
| .Remove the pump as a whole from the water and use a water |
| jet and a soft brush to clean it. |
| ➔ Take care that all outlets are free of dirt. |
| .If there are deposits of dirt inside the pump then dismantle the |
| casing (➔ see „Dismantling”) and carefully clean the interior |
| fittings with water. |
| Information: Do not use any hard objects or strong detergents! |
Blocked feed impeller | If the feed impeller becomes blocked, the pump and the filter |
| should be cleaned (see above). |
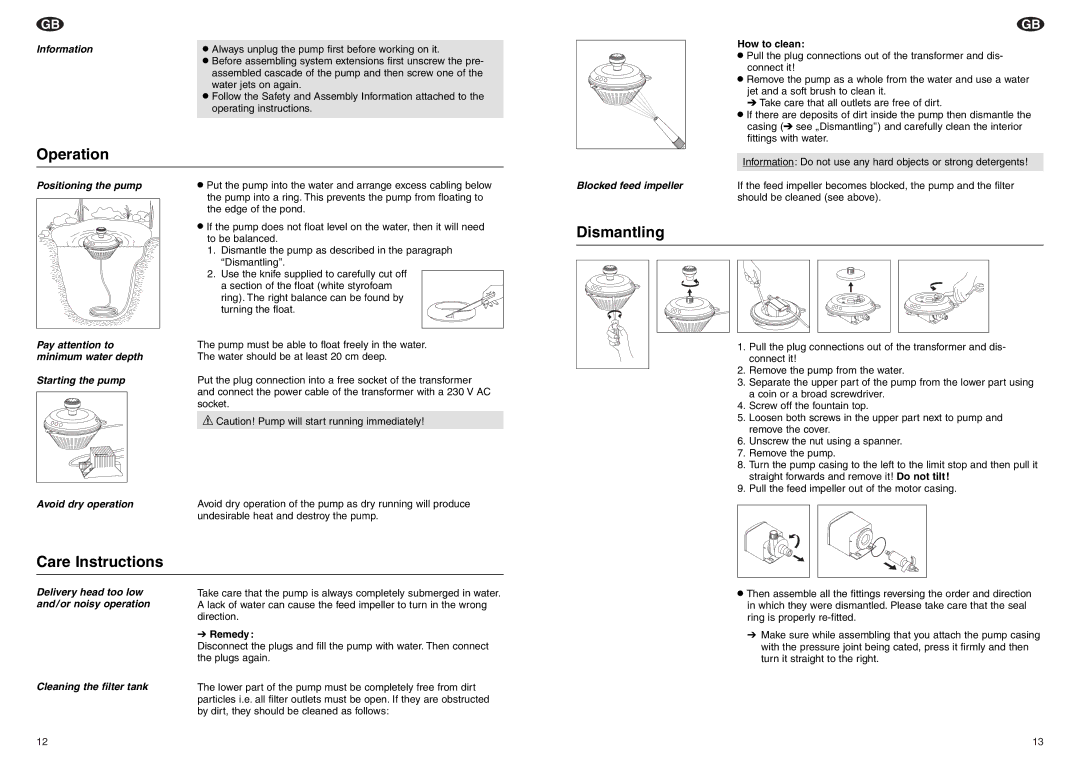
Dismantling
1.Pull the plug connections out of the transformer and dis- connect it!
2.Remove the pump from the water.
3.Separate the upper part of the pump from the lower part using a coin or a broad screwdriver.
4.Screw off the fountain top.
5.Loosen both screws in the upper part next to pump and remove the cover.
6.Unscrew the nut using a spanner.
7.Remove the pump.
8.Turn the pump casing to the left to the limit stop and then pull it straight forwards and remove it! Do not tilt!
9.Pull the feed impeller out of the motor casing.
Delivery head too low and/or noisy operation
Cleaning the filter tank
Take care that the pump is always completely submerged in water. A lack of water can cause the feed impeller to turn in the wrong direction.
➔Remedy :
Disconnect the plugs and fill the pump with water. Then connect the plugs again.
The lower part of the pump must be completely free from dirt particles i.e. all filter outlets must be open. If they are obstructed by dirt, they should be cleaned as follows:
.Then assemble all the fittings reversing the order and direction in which they were dismantled. Please take care that the seal ring is properly
➔Make sure while assembling that you attach the pump casing with the pressure joint being cated, press it firmly and then turn it straight to the right.
12 | 13 |
