Do not touch battery acid.
If acid comes in contact with the eyes, wash
out immediately with water and send for a doctor.
3. Assembly
GB
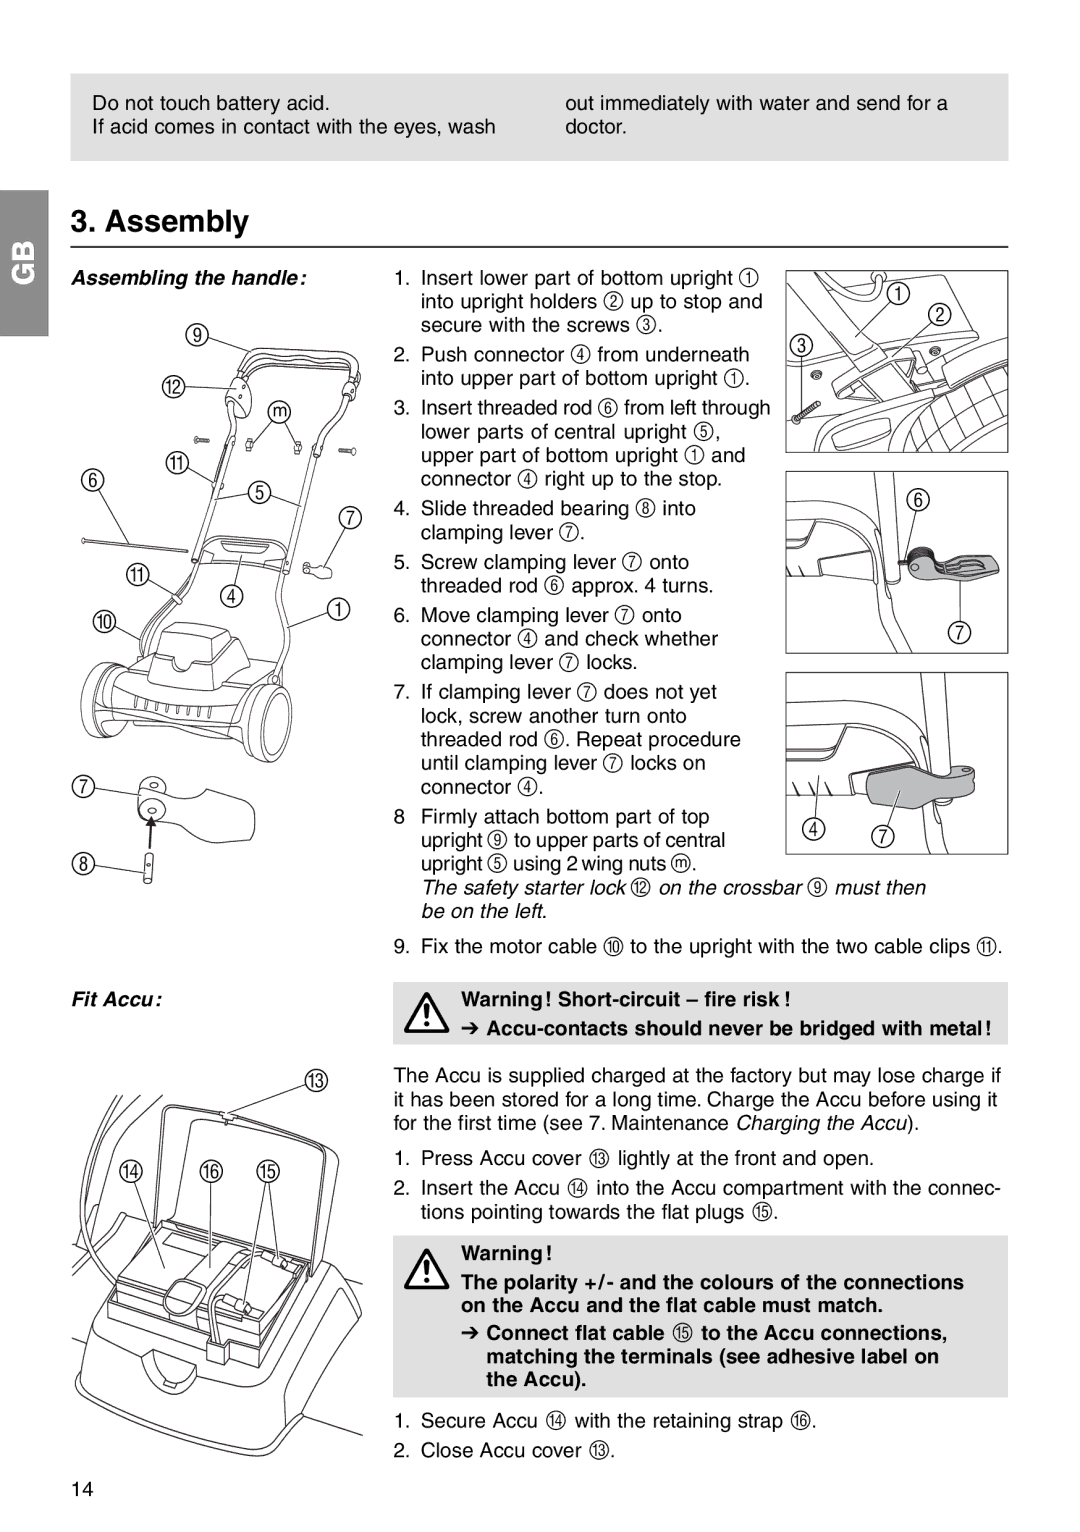
Assembling the handle:
9 |
B |
m |
z |
6 | A | |
5 | ||
|
7 |
| A |
|
| 4 | 1 |
0 |
| |
|
|
7 |
8 |
1. | Insert lower part of bottom upright 1 | 1 |
|
| into upright holders 2 up to stop and | 2 | |
|
| ||
| secure with the screws 3. |
| |
| 3 |
| |
2. | Push connector 4 from underneath |
| |
| into upper part of bottom upright 1. |
|
|
3. | Insert threaded rod 6 from left through |
| |
| lower parts of central upright 5, |
| |
| upper part of bottom upright 1 and |
| |
| connector 4 right up to the stop. | 6 | |
4. | Slide threaded bearing 8 into | ||
| |||
| clamping lever 7. |
|
5. Screw clamping lever 7 onto threaded rod 6 approx. 4 turns.
6. Move clamping lever 7 onto | 7 |
connector 4 and check whether | |
clamping lever 7 locks. |
|
7.If clamping lever 7 does not yet lock, screw another turn onto threaded rod 6. Repeat procedure
until clamping lever 7 locks on
connector 4.
8 Firmly attach bottom part of top
upright 9 to upper parts of central 4 7 upright 5 using 2 wing nuts zm .
The safety starter lock B on the crossbar 9 must then be on the left.
9. Fix the motor cable 0 to the upright with the two cable clips A.
Fit Accu: | Warning! |
AV Accu-contacts should never be bridged with metal!
C | The Accu is supplied charged at the factory but may lose charge if |
| it has been stored for a long time. Charge the Accu before using it |
| for the first time (see 7. Maintenance Charging the Accu). |
D | F | E | 1. | Press Accu cover C lightly at the front and open. | |
2. | Insert the Accu D into the Accu compartment with the connec- | ||||
|
|
| |||
|
|
|
| tions pointing towards the flat plugs E. |
Warning !
AThe polarity +/ - and the colours of the connections on the Accu and the flat cable must match.
V Connect flat cable E to the Accu connections, matching the terminals (see adhesive label on the Accu).
1. Secure Accu D with the retaining strap F.
2. Close Accu cover C.
14