Hotspot Gateway Ticket Printer Setup - QUICK START GUIDE
Download the product manual at:
The Guest Internet
All guest Internet gateway products have a ticket printer interface. You may need to request a new firmware upgrade to get this feature for your product.
Switch
GIS-TP1
Internet
DSL/
Cable
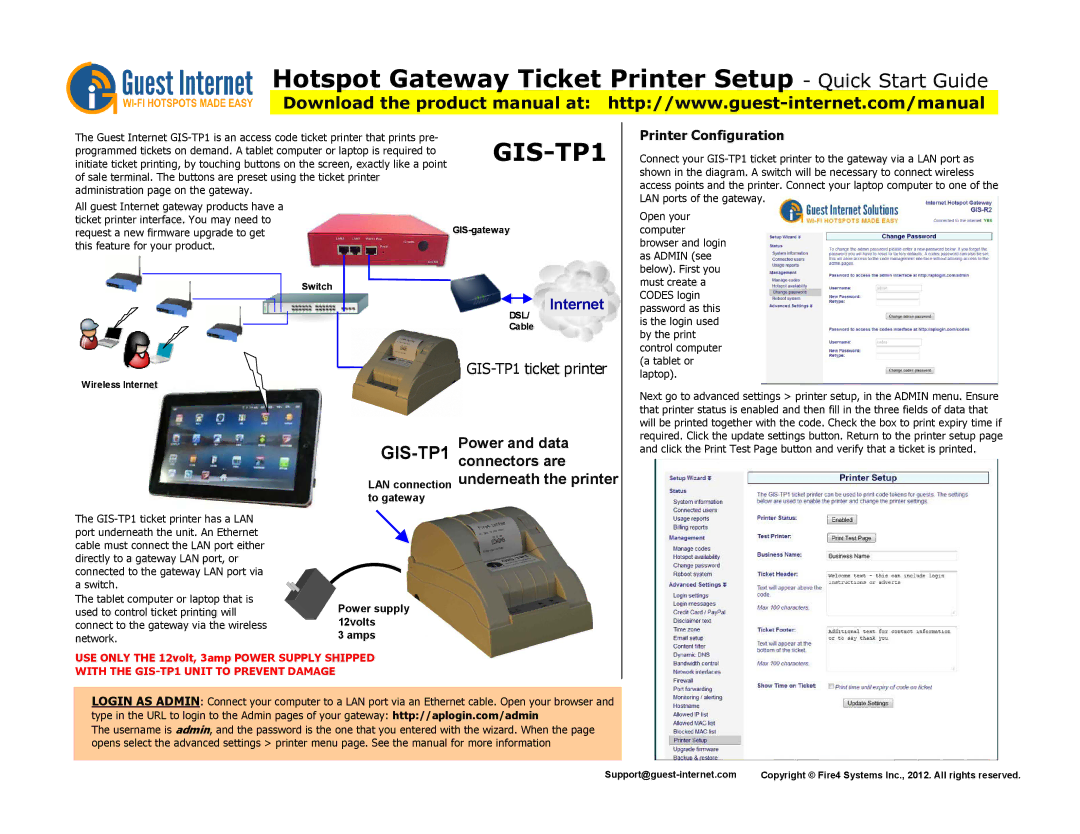
Printer Configuration
Connect your
Open your computer browser and login as ADMIN (see below). First you must create a CODES login password as this is the login used by the print control computer (a tablet or
Wireless Internet
GIS-TP1
GIS-TP1 ticket printer
Power and data connectors are underneath the printer
laptop).
Next go to advanced settings > printer setup, in the ADMIN menu. Ensure that printer status is enabled and then fill in the three fields of data that will be printed together with the code. Check the box to print expiry time if required. Click the update settings button. Return to the printer setup page and click the Print Test Page button and verify that a ticket is printed.
The
The tablet computer or laptop that is used to control ticket printing will connect to the gateway via the wireless network.
LAN connection to gateway
Power supply 12volts
3 amps
USE ONLY THE 12volt, 3amp POWER SUPPLY SHIPPED
WITH THE GIS-TP1 UNIT TO PREVENT DAMAGE
LOGIN AS ADMIN: Connect your computer to a LAN port via an Ethernet cable. Open your browser and
type in the URL to login to the Admin pages of your gateway: http://aplogin.com/admin
The username is admin, and the password is the one that you entered with the wizard. When the page opens select the advanced settings > printer menu page. See the manual for more information