Hotspot Gateway Ticket Printer Setup - QUICK START GUIDE
Download the product manual at:
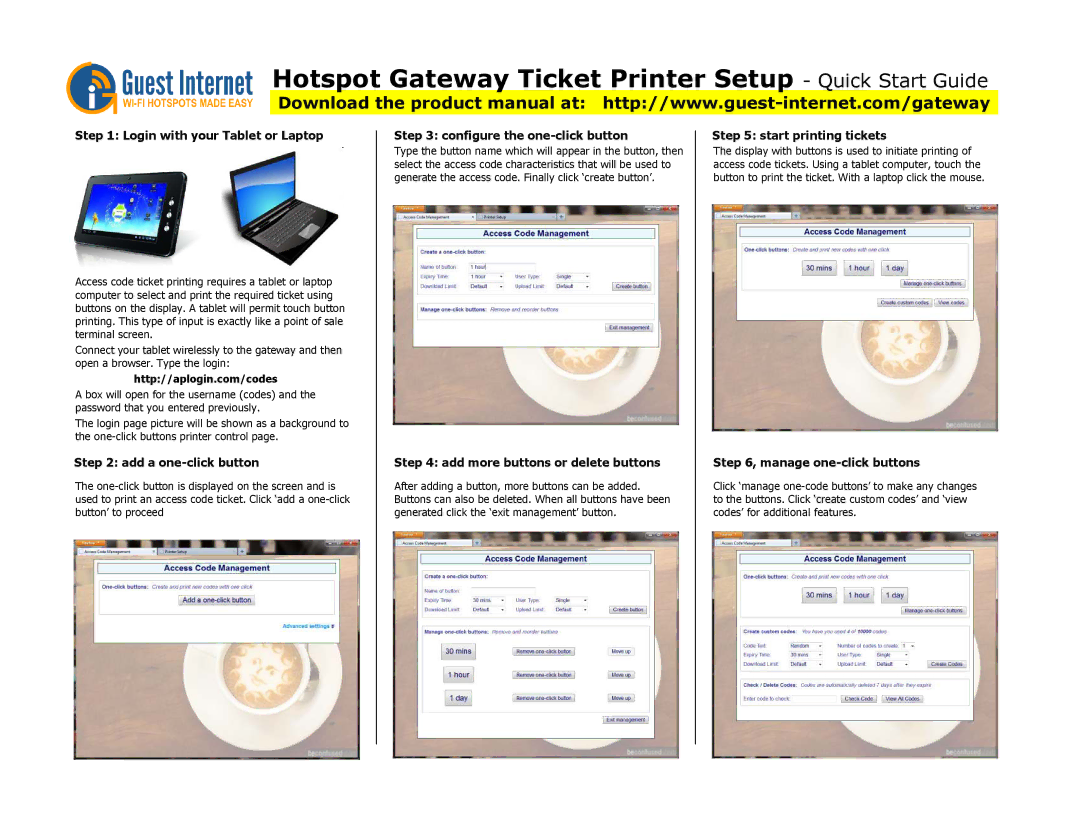
Step 1: Login with your Tablet or Laptop
Access code ticket printing requires a tablet or laptop computer to select and print the required ticket using buttons on the display. A tablet will permit touch button printing. This type of input is exactly like a point of sale terminal screen.
Connect your tablet wirelessly to the gateway and then open a browser. Type the login:
http://aplogin.com/codes
A box will open for the username (codes) and the password that you entered previously.
The login page picture will be shown as a background to the
Step 2: add a one-click button
The
Step 3: configure the one-click button
Type the button name which will appear in the button, then select the access code characteristics that will be used to generate the access code. Finally click ‘create button’.
Step 4: add more buttons or delete buttons
After adding a button, more buttons can be added. Buttons can also be deleted. When all buttons have been generated click the ‘exit management’ button.
Step 5: start printing tickets
The display with buttons is used to initiate printing of access code tickets. Using a tablet computer, touch the button to print the ticket. With a laptop click the mouse.
Step 6, manage one-click buttons
Click ‘manage