Using the Recorder
Insert or Remove a Microcassette
1.Press the STOP EJECT button to stop recorder or to open cassette carry door and remove microcassette. Note that when in play or record mode you must press STOP EJECT once to turn player off and again to open the cassette carry door.
2.Insert microcassette into the cassette carry door with the side to be used visible through cassette door window. Face exposed tape outward and close door. Note that Rim drive and capstan drive tapes look alike, but only CAPSTAN DRIVE MICROCASSETTE tapes will work in this recorder.
TIP: Always push STOP EJECT button before storing. This will relieve pressure on certain parts in the recorder that might deform after long periods of time.
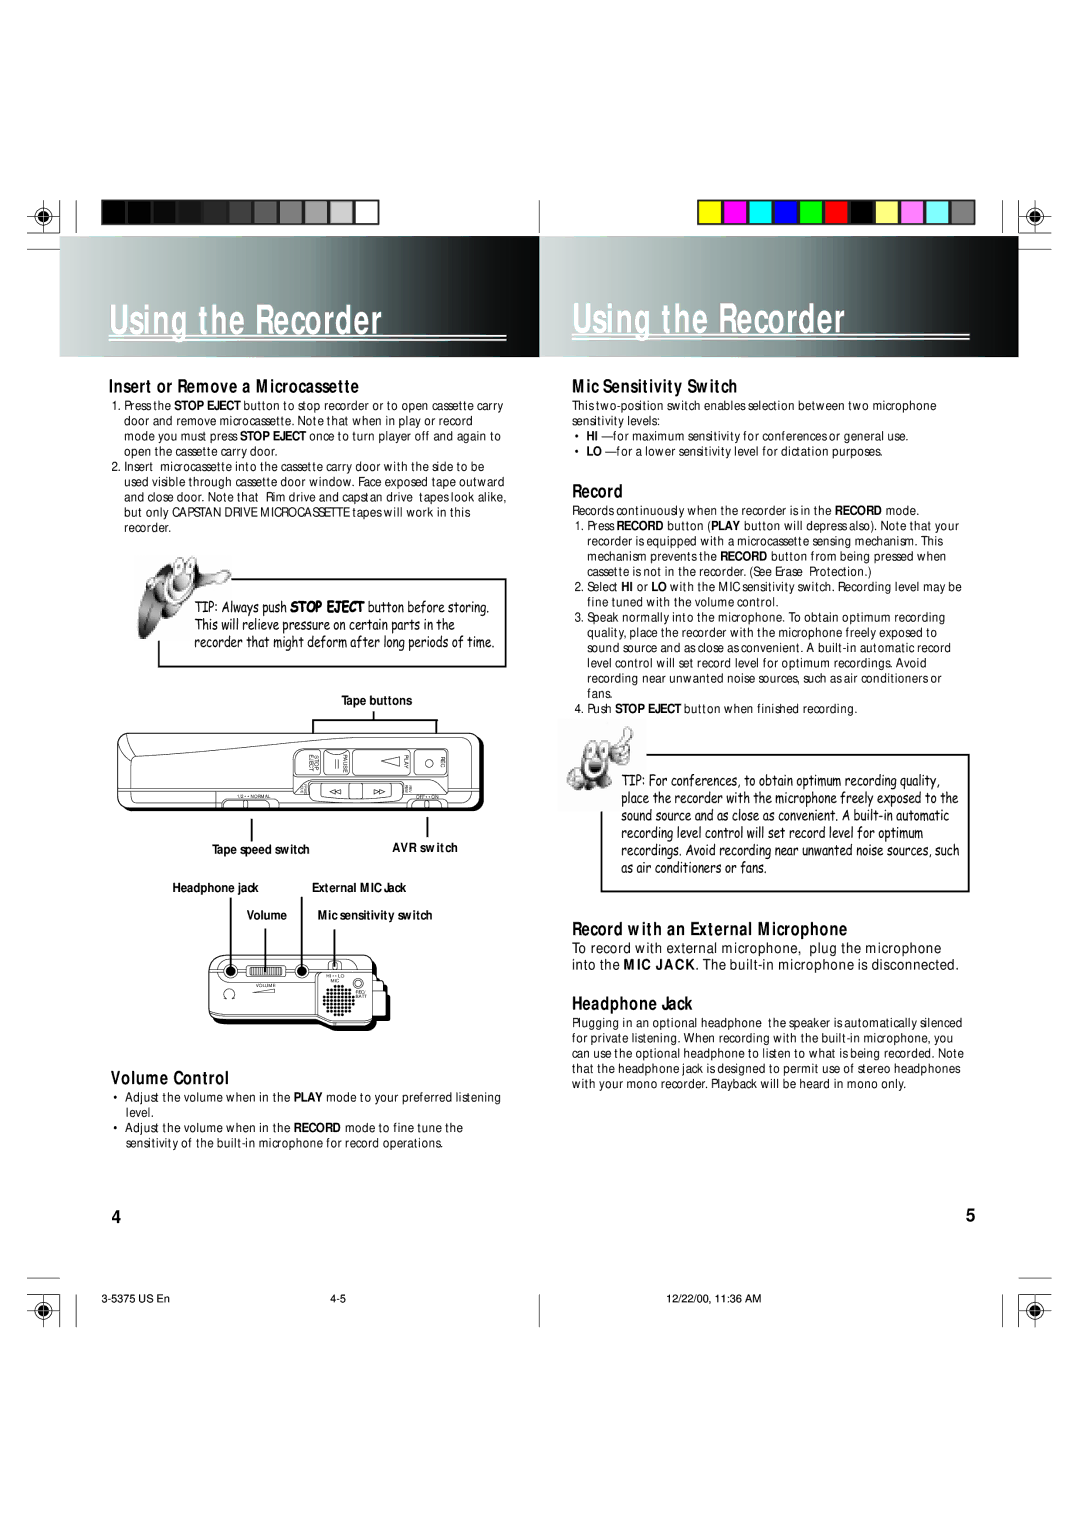
Tape buttons
STOP EJECT | PAUSE | PLAY | REC |
FFWD CUE |
| REW | REV |
1/2 • • NORMAL |
|
| OFF • • ON |
Tape speed switch | AVR switch |
Headphone jack | External MIC Jack |
Volume | Mic sensitivity switch |
| HI • • LO |
VOLUME | MIC |
| |
| REC/ |
| BATT |
Volume Control
•Adjust the volume when in the PLAY mode to your preferred listening level.
•Adjust the volume when in the RECORD mode to fine tune the sensitivity of the
Using the Recorder
Mic Sensitivity Switch
This
•HI
•LO
Record
Records continuously when the recorder is in the RECORD mode.
1.Press RECORD button (PLAY button will depress also). Note that your recorder is equipped with a microcassette sensing mechanism. This mechanism prevents the RECORD button from being pressed when cassette is not in the recorder. (See Erase Protection.)
2.Select HI or LO with the MIC sensitivity switch. Recording level may be fine tuned with the volume control.
3.Speak normally into the microphone. To obtain optimum recording quality, place the recorder with the microphone freely exposed to sound source and as close as convenient. A
4.Push STOP EJECT button when finished recording.
TIP: For conferences, to obtain optimum recording quality, place the recorder with the microphone freely exposed to the sound source and as close as convenient. A
Record with an External Microphone
To record with external microphone, plug the microphone into the MIC JACK. The
Headphone Jack
Plugging in an optional headphone the speaker is automatically silenced for private listening. When recording with the
4 | 5 |
12/22/00, 11:36 AM