Recording Operation
Only the basic steps were discussed in the “First Time Operation” section to set up your camcorder. This section explains in detail how to make a recording.
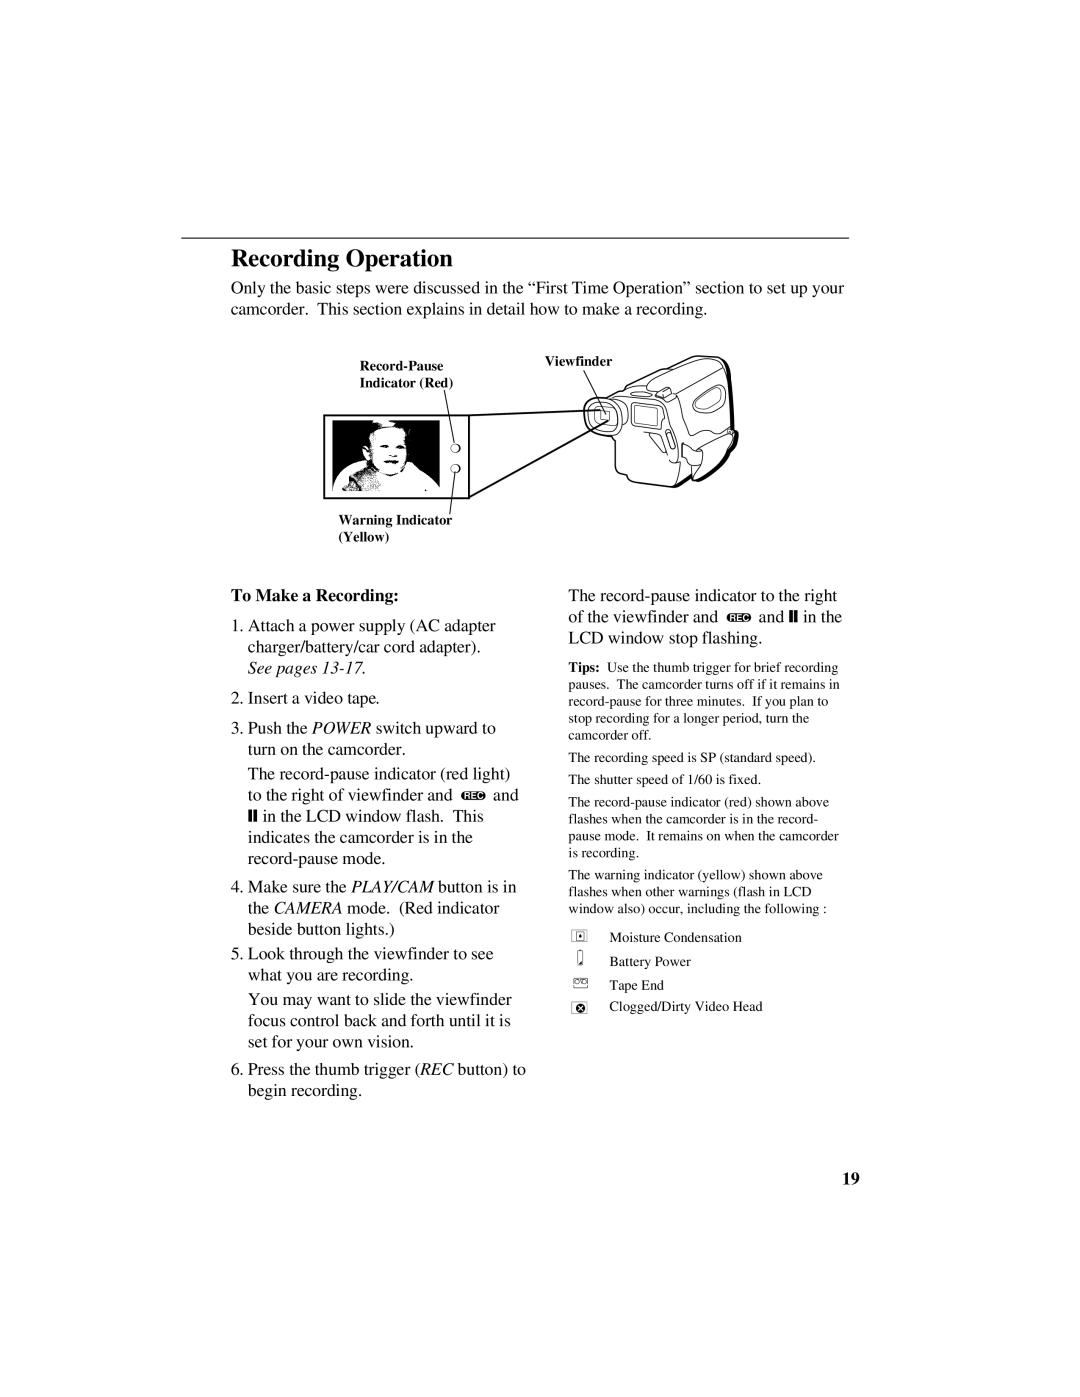
Indicator (Red)
❍
❍
Warning Indicator (Yellow)
To Make a Recording:
1.Attach a power supply (AC adapter charger/battery/car cord adapter). See pages
2.Insert a video tape.
3.Push the POWER switch upward to turn on the camcorder.
The
Tips: Use the thumb trigger for brief recording pauses. The camcorder turns off if it remains in
The recording speed is SP (standard speed).
The
❙❙ in the LCD window flash. This indicates the camcorder is in the
4.Make sure the PLAY/CAM button is in the CAMERA mode. (Red indicator beside button lights.)
The shutter speed of 1/60 is fixed.
The
The warning indicator (yellow) shown above flashes when other warnings (flash in LCD window also) occur, including the following :
Moisture Condensation
5.Look through the viewfinder to see what you are recording.
You may want to slide the viewfinder focus control back and forth until it is set for your own vision.
6.Press the thumb trigger (REC button) to begin recording.
Battery Power
Tape End
Clogged/Dirty Video Head
19