1. | Turn OFF the icemaker (if attached to | |
| the system). | |
2. | Turn off water supply to the system. | |
3. | Turn ON faucet to drain tank (may take | |
| several minutes). Turn OFF faucet | |
| when tank is empty. | |
4. | Remove the prefilter, postfilter and | |
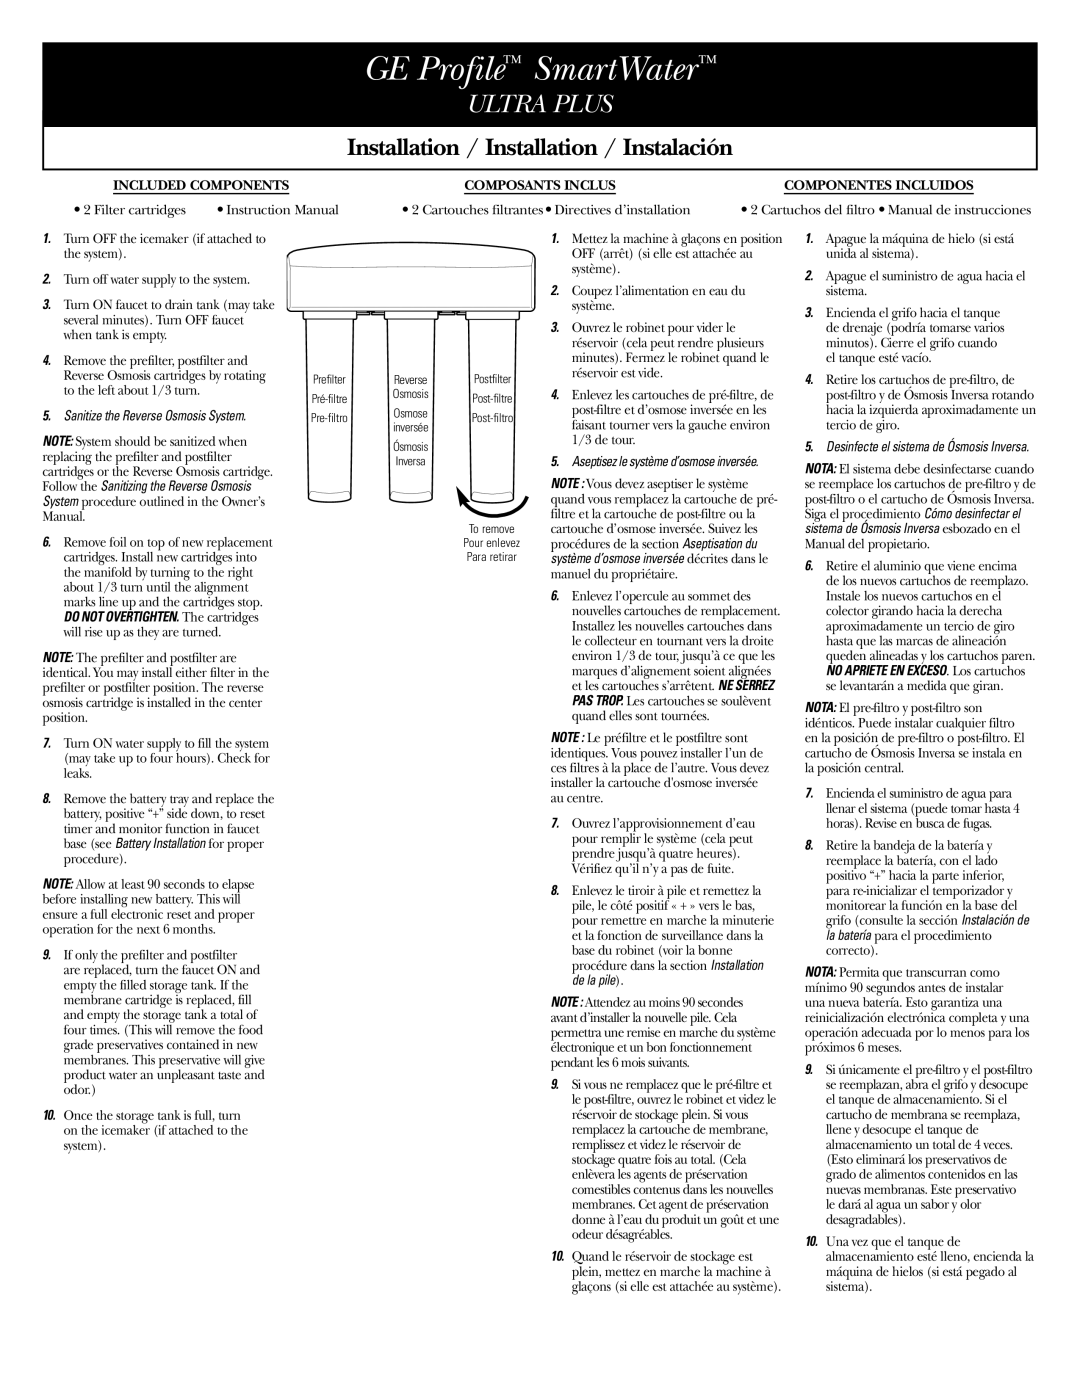
| Reverse Osmosis cartridges by rotating | Prefilter |
| to the left about 1/3 turn. | Pré-filtre |
| |
5. | Sanitize the Reverse Osmosis System. | Pre-filtro |
NOTE: System should be sanitized when replacing the prefilter and postfilter cartridges or the Reverse Osmosis cartridge. Follow the Sanitizing the Reverse Osmosis System procedure outlined in the Owner’s Manual.
6. Remove foil on top of new replacement cartridges. Install new cartridges into the manifold by turning to the right about 1/3 turn until the alignment marks line up and the cartridges stop. DO NOT OVERTIGHTEN. The cartridges will rise up as they are turned.
NOTE: The prefilter and postfilter are identical. You may install either filter in the prefilter or postfilter position. The reverse osmosis cartridge is installed in the center position.
7.Turn ON water supply to fill the system (may take up to four hours). Check for leaks.
8.Remove the battery tray and replace the battery, positive “+” side down, to reset timer and monitor function in faucet base (see Battery Installation for proper procedure).
NOTE: Allow at least 90 seconds to elapse before installing new battery. This will ensure a full electronic reset and proper operation for the next 6 months.
9.If only the prefilter and postfilter are replaced, turn the faucet ON and empty the filled storage tank. If the membrane cartridge is replaced, fill and empty the storage tank a total of four times. (This will remove the food grade preservatives contained in new membranes. This preservative will give product water an unpleasant taste and odor.)
10.Once the storage tank is full, turn on the icemaker (if attached to the system).
Reverse Postfilter
Osmosis Post-filtre
Osmose Post-filtro inversée
Ósmosis
Inversa
To remove
Pour enlevez
Para retirar
1.Mettez la machine à glaçons en position OFF (arrêt) (si elle est attachée au système).
2.Coupez l’alimentation en eau du système.
3.Ouvrez le robinet pour vider le réservoir (cela peut rendre plusieurs minutes). Fermez le robinet quand le réservoir est vide.
4.Enlevez les cartouches de pré-filtre, de post-filtre et d’osmose inversée en les faisant tourner vers la gauche environ 1/3 de tour.
5.Aseptisez le système d’osmose inversée.
NOTE : Vous devez aseptiser le système quand vous remplacez la cartouche de pré- filtre et la cartouche de post-filtre ou la cartouche d’osmose inversée. Suivez les procédures de la section Aseptisation du système d’osmose inversée décrites dans le manuel du propriétaire.
6.Enlevez l’opercule au sommet des nouvelles cartouches de remplacement. Installez les nouvelles cartouches dans le collecteur en tournant vers la droite environ 1/3 de tour, jusqu’à ce que les marques d’alignement soient alignées et les cartouches s’arrêtent. NE SERREZ PAS TROP. Les cartouches se soulèvent quand elles sont tournées.
NOTE : Le préfiltre et le postfiltre sont identiques. Vous pouvez installer l’un de ces filtres à la place de l’autre. Vous devez installer la cartouche d'osmose inversée au centre.
7.Ouvrez l’approvisionnement d’eau pour remplir le système (cela peut prendre jusqu’à quatre heures).
Vérifiez qu’il n’y a pas de fuite.
8.Enlevez le tiroir à pile et remettez la pile, le côté positif « + » vers le bas, pour remettre en marche la minuterie et la fonction de surveillance dans la base du robinet (voir la bonne procédure dans la section Installation de la pile).
NOTE : Attendez au moins 90 secondes avant d’installer la nouvelle pile. Cela permettra une remise en marche du système électronique et un bon fonctionnement pendant les 6 mois suivants.
9.Si vous ne remplacez que le pré-filtre et le post-filtre, ouvrez le robinet et videz le réservoir de stockage plein. Si vous remplacez la cartouche de membrane, remplissez et videz le réservoir de stockage quatre fois au total. (Cela enlèvera les agents de préservation comestibles contenus dans les nouvelles membranes. Cet agent de préservation donne à l’eau du produit un goût et une odeur désagréables.
10.Quand le réservoir de stockage est plein, mettez en marche la machine à glaçons (si elle est attachée au système).
1.Apague la máquina de hielo (si está unida al sistema).
2.Apague el suministro de agua hacia el sistema.
3.Encienda el grifo hacia el tanque de drenaje (podría tomarse varios minutos). Cierre el grifo cuando el tanque esté vacío.
4.Retire los cartuchos de pre-filtro, de post-filtro y de Ósmosis Inversa rotando hacia la izquierda aproximadamente un tercio de giro.
5.Desinfecte el sistema de Ósmosis Inversa.
NOTA: El sistema debe desinfectarse cuando se reemplace los cartuchos de pre-filtro y de post-filtro o el cartucho de Ósmosis Inversa. Siga el procedimiento Cómo desinfectar el sistema de Ósmosis Inversa esbozado en el Manual del propietario.
6.Retire el aluminio que viene encima de los nuevos cartuchos de reemplazo. Instale los nuevos cartuchos en el colector girando hacia la derecha aproximadamente un tercio de giro hasta que las marcas de alineación queden alineadas y los cartuchos paren.
NO APRIETE EN EXCESO. Los cartuchos se levantarán a medida que giran.
NOTA: El pre-filtro y post-filtro son idénticos. Puede instalar cualquier filtro en la posición de pre-filtro o post-filtro. El cartucho de Ósmosis Inversa se instala en la posición central.
7.Encienda el suministro de agua para llenar el sistema (puede tomar hasta 4 horas). Revise en busca de fugas.
8.Retire la bandeja de la batería y reemplace la batería, con el lado positivo “+” hacia la parte inferior, para re-inicializar el temporizador y monitorear la función en la base del grifo (consulte la sección Instalación de la batería para el procedimiento correcto).
NOTA: Permita que transcurran como mínimo 90 segundos antes de instalar una nueva batería. Esto garantiza una reinicialización electrónica completa y una operación adecuada por lo menos para los próximos 6 meses.
9.Si únicamente el pre-filtro y el post-filtro se reemplazan, abra el grifo y desocupe el tanque de almacenamiento. Si el cartucho de membrana se reemplaza, llene y desocupe el tanque de almacenamiento un total de 4 veces. (Esto eliminará los preservativos de grado de alimentos contenidos en las nuevas membranas. Este preservativo le dará al agua un sabor y olor desagradables).
10.Una vez que el tanque de almacenamiento esté lleno, encienda la máquina de hielos (si está pegado al sistema).