Installation Instructions
2 PREPARE THE OPENING
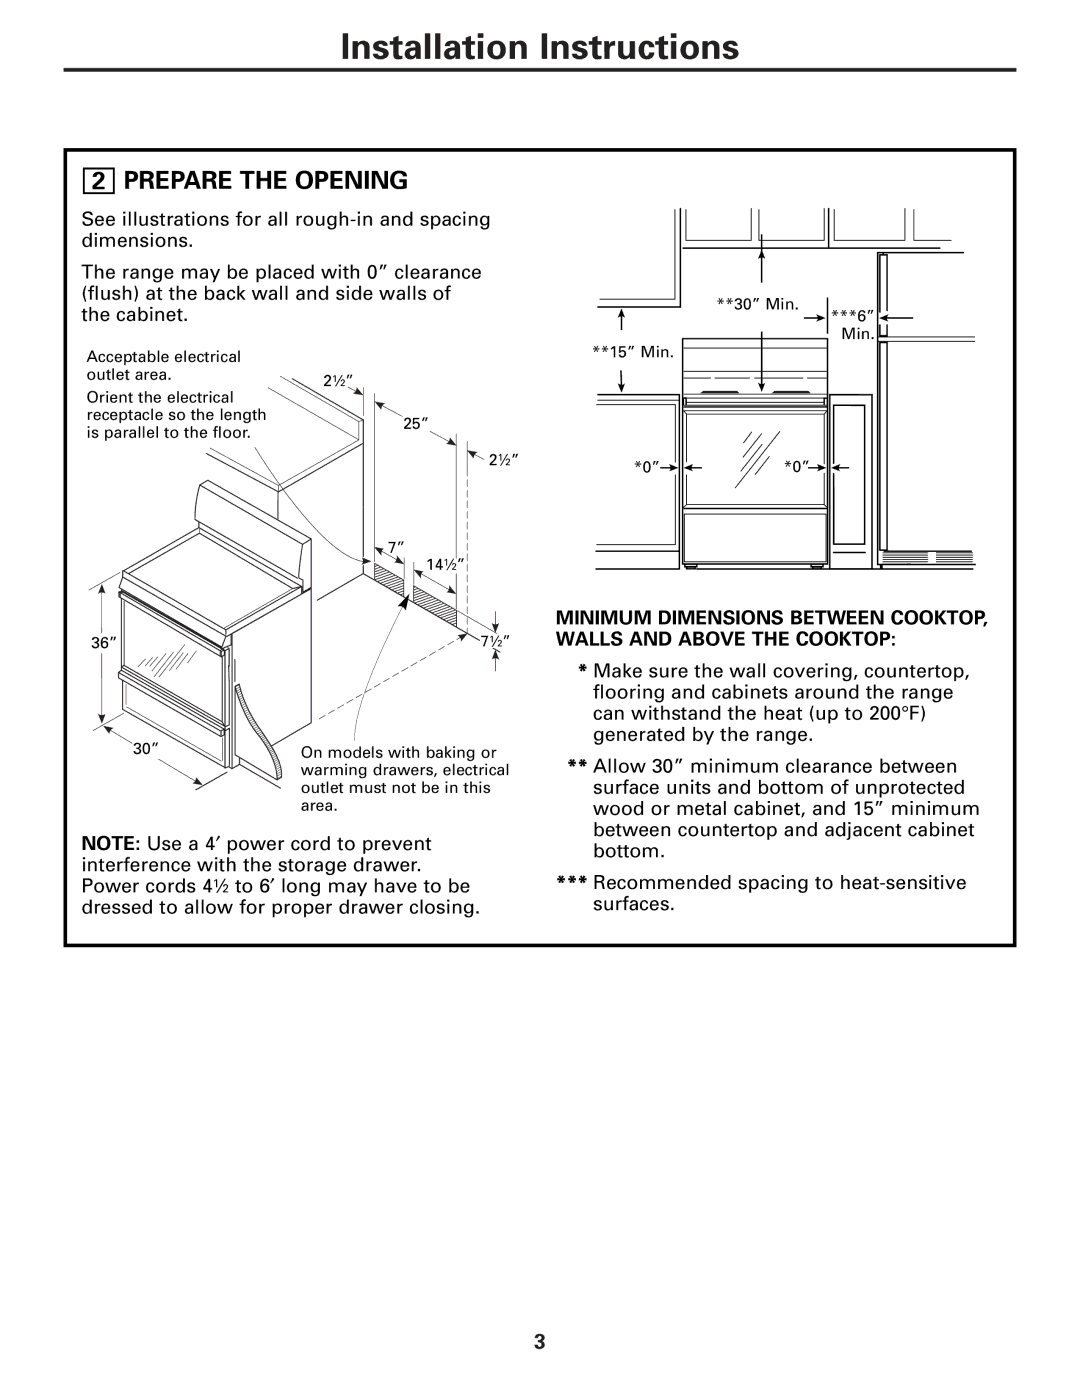
See illustrations for all
The range may be placed with 0” clearance (flush) at the back wall and side walls of the cabinet.
**30” Min.
![]() ***6”
***6” ![]()
Min. ![]()
Acceptable electrical |
|
outlet area. | 21⁄2” |
Orient the electrical receptacle so the length is parallel to the floor.
25”
![]() 21⁄2”
21⁄2”
![]() 7”
7”
141⁄2”
**15” Min.
*0”![]()
![]() *0”
*0”![]()
![]()
36”71⁄2”
30” | On models with baking or |
| warming drawers, electrical |
| outlet must not be in this |
| area. |
NOTE: Use a 4′ power cord to prevent interference with the storage drawer. Power cords 41⁄2 to 6′ long may have to be dressed to allow for proper drawer closing.
MINIMUM DIMENSIONS BETWEEN COOKTOP, WALLS AND ABOVE THE COOKTOP:
*** Make sure the wall covering, countertop, flooring and cabinets around the range can withstand the heat (up to 200°F) generated by the range.
*** Allow 30” minimum clearance between surface units and bottom of unprotected wood or metal cabinet, and 15” minimum between countertop and adjacent cabinet bottom.
***Recommended spacing to
3