Reversing the door swing.
STEP-BY-STEP INSTRUCTIONS (cont.)
Remove Door Assembly
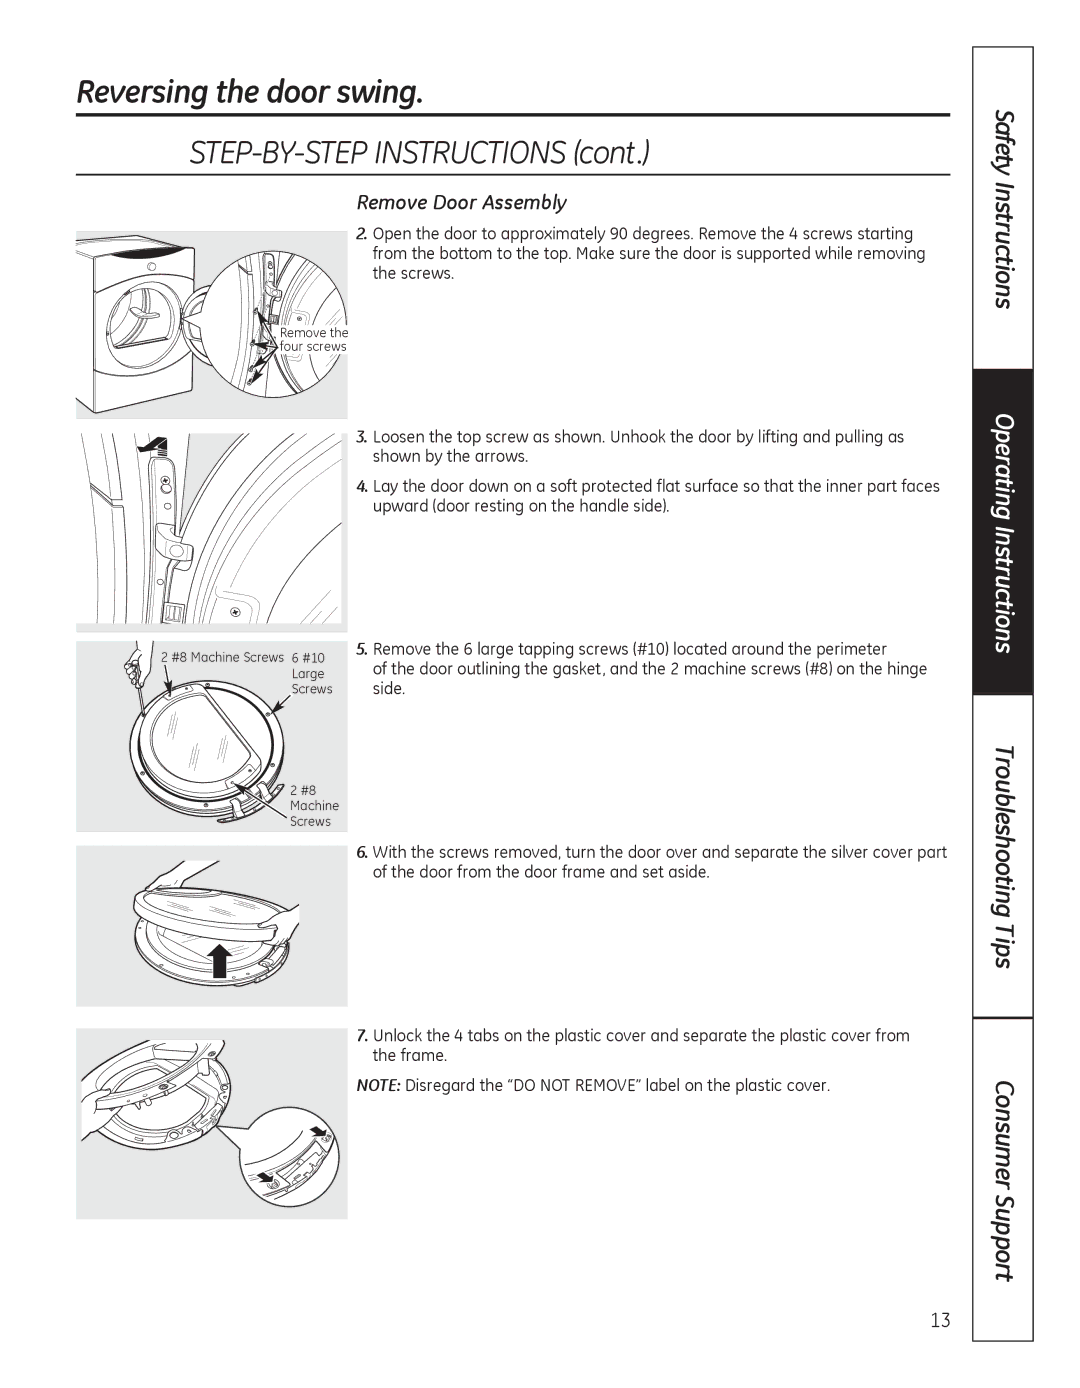
2.Open the door to approximately 90 degrees. Remove the 4 screws starting
from the bottom to the top. Make sure the door is supported while removing the screws.
Remove the |
four screws |
Safety Instructions
2 #8 Machine Screws 6 #10
Large
Screws
2 #8 Machine Screws
3.Loosen the top screw as shown. Unhook the door by lifting and pulling as shown by the arrows.
4.Lay the door down on a soft protected flat surface so that the inner part faces upward (door resting on the handle side).
5.Remove the 6 large tapping screws (#10) located around the perimeter
of the door outlining the gasket, and the 2 machine screws (#8) on the hinge side.
6.With the screws removed, turn the door over and separate the silver cover part of the door from the door frame and set aside.
Operating Instructions
Troubleshooting Tips
7.Unlock the 4 tabs on the plastic cover and separate the plastic cover from the frame.
NOTE: Disregard the “DO NOT REMOVE” label on the plastic cover.
13
Consumer Support
