Installation Instructions.
Installing the Tubing
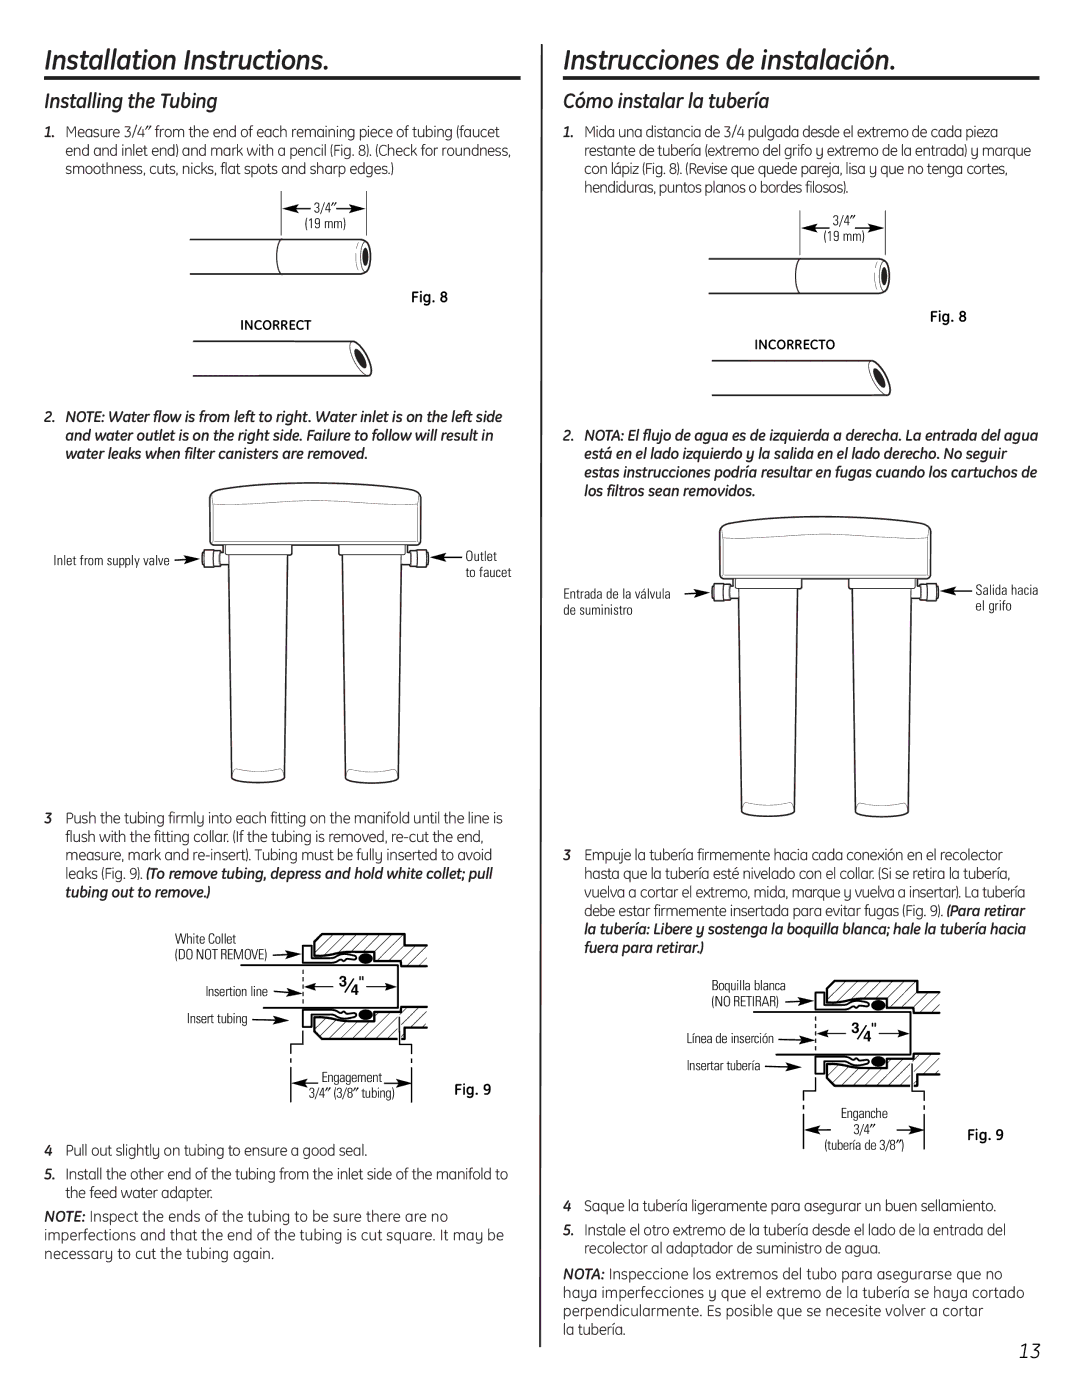
1.Measure 3/4″ from the end of each remaining piece of tubing (faucet end and inlet end) and mark with a pencil (Fig. 8). (Check for roundness, smoothness, cuts, nicks, flat spots and sharp edges.)
![]() 3/4″
3/4″![]() (19 mm)
(19 mm)
Fig. 8
INCORRECT
2.NOTE: Water flow is from left to right. Water inlet is on the left side and water outlet is on the right side. Failure to follow will result in water leaks when filter canisters are removed.
Inlet from supply valve | Outlet |
| to faucet |
3Push the tubing firmly into each fitting on the manifold until the line is flush with the fitting collar. (If the tubing is removed,
White Collet
(DO NOT REMOVE) ![]()
Insertion line |
| 3 4" |
|
Insert tubing ![]()
Engagement
″ | ″ | tubing) | Fig. 9 |
3/4 | (3/8 |
|
4Pull out slightly on tubing to ensure a good seal.
5.Install the other end of the tubing from the inlet side of the manifold to the feed water adapter.
NOTE: Inspect the ends of the tubing to be sure there are no imperfections and that the end of the tubing is cut square. It may be necessary to cut the tubing again.
Instrucciones de instalación.
Cómo instalar la tubería
1.Mida una distancia de 3/4 pulgada desde el extremo de cada pieza restante de tubería (extremo del grifo y extremo de la entrada) y marque con lápiz (Fig. 8). (Revise que quede pareja, lisa y que no tenga cortes, hendiduras, puntos planos o bordes filosos).
3/4″
(19 mm)
Fig. 8
INCORRECTO
2.NOTA: El flujo de agua es de izquierda a derecha. La entrada del agua está en el lado izquierdo y la salida en el lado derecho. No seguir estas instrucciones podría resultar en fugas cuando los cartuchos de los filtros sean removidos.
Entrada de la válvula | Salida hacia |
de suministro | el grifo |
3Empuje la tubería firmemente hacia cada conexión en el recolector hasta que la tubería esté nivelado con el collar. (Si se retira la tubería, vuelva a cortar el extremo, mida, marque y vuelva a insertar). La tubería debe estar firmemente insertada para evitar fugas (Fig. 9). (Para retirar la tubería: Libere y sostenga la boquilla blanca; hale la tubería hacia fuera para retirar.)
Boquilla blanca
(NO RETIRAR) ![]()
Línea de inserción | 3 4" |
|
Insertar tubería |
|
|
| Enganche |
|
| 3/4″ | Fig. 9 |
| (tubería de 3/8″) |
|
4Saque la tubería ligeramente para asegurar un buen sellamiento.
5.Instale el otro extremo de la tubería desde el lado de la entrada del recolector al adaptador de suministro de agua.
NOTA: Inspeccione los extremos del tubo para asegurarse que no haya imperfecciones y que el extremo de la tubería se haya cortado perpendicularmente. Es posible que se necesite volver a cortar
la tubería.
13