Installation Instructions
8FOR 31⁄4″ X 10″ RECTANGULAR
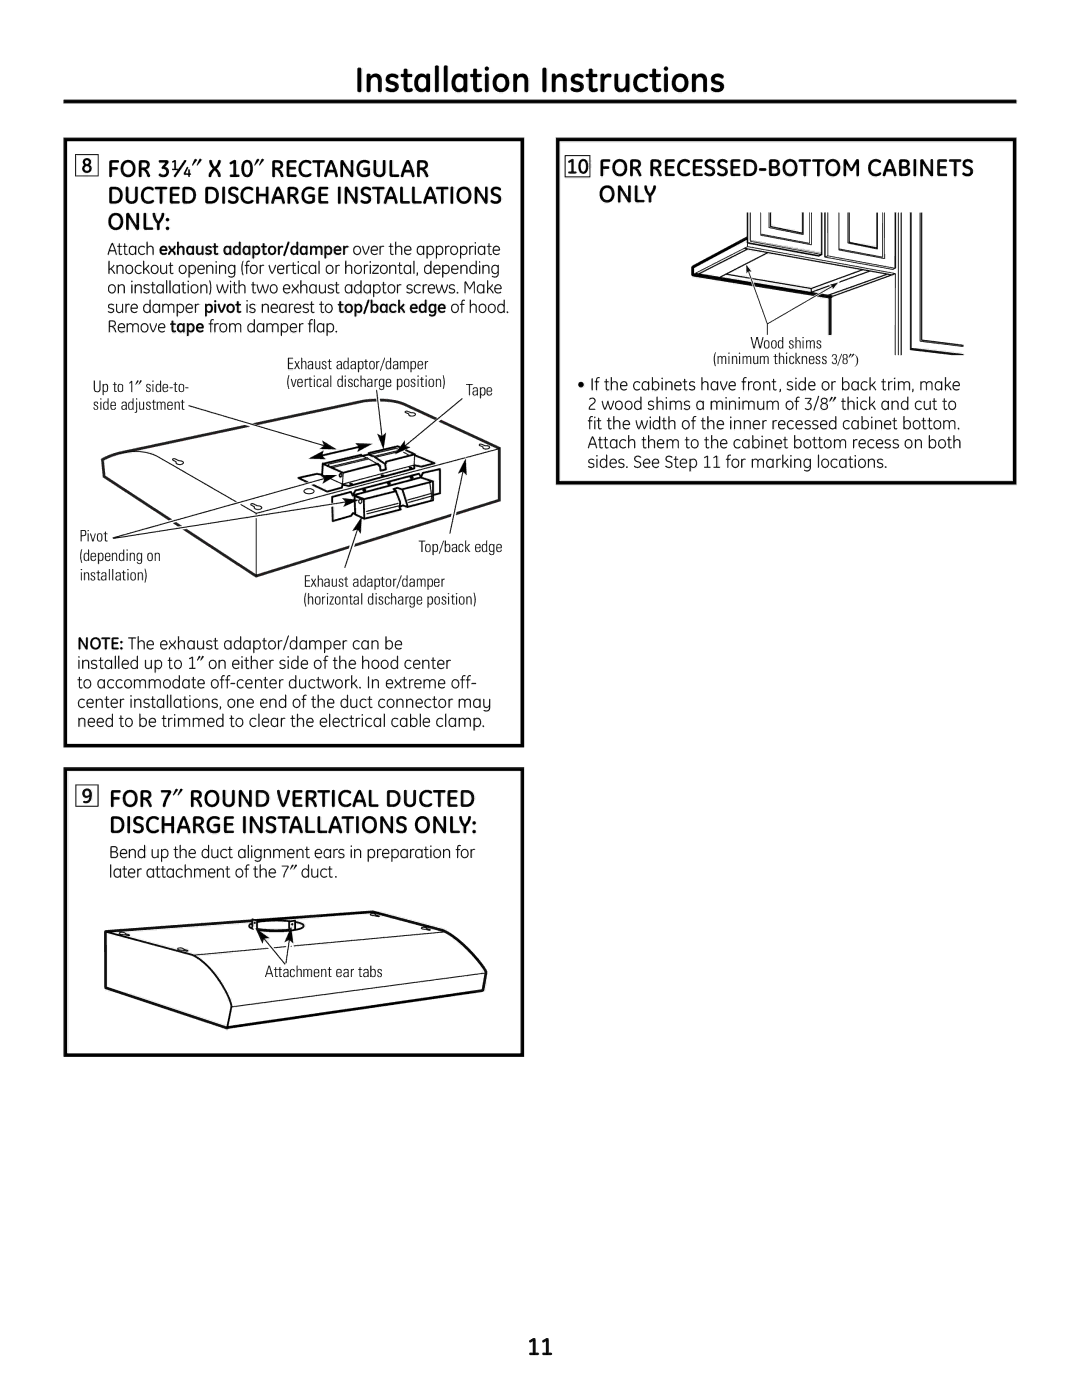
DUCTED DISCHARGE INSTALLATIONS
ONLY:
Attach exhaust adaptor/damper over the appropriate knockout opening (for vertical or horizontal, depending on installation) with two exhaust adaptor screws. Make sure damper pivot is nearest to top/back edge of hood. Remove tape from damper flap.
| Exhaust adaptor/damper |
|
Up to 1″ | (vertical discharge position) | Tape |
side adjustment |
|
|
Pivot ![]()
![]()
Top/back edge
(depending on
installation)Exhaust adaptor/damper (horizontal discharge position)
NOTE: The exhaust adaptor/damper can be installed up to 1″ on either side of the hood center to accommodate
9FOR 7″ ROUND VERTICAL DUCTED
DISCHARGE INSTALLATIONS ONLY:
Bend up the duct alignment ears in preparation for later attachment of the 7″ duct.
Attachment ear tabs
10FOR RECESSED-BOTTOM CABINETS
ONLY
Wood shims
(minimum thickness 3/8″)
•If the cabinets have front, side or back trim, make 2 wood shims a minimum of 3/8″ thick and cut to fit the width of the inner recessed cabinet bottom. Attach them to the cabinet bottom recess on both sides. See Step 11 for marking locations.
11