Installation Instructions
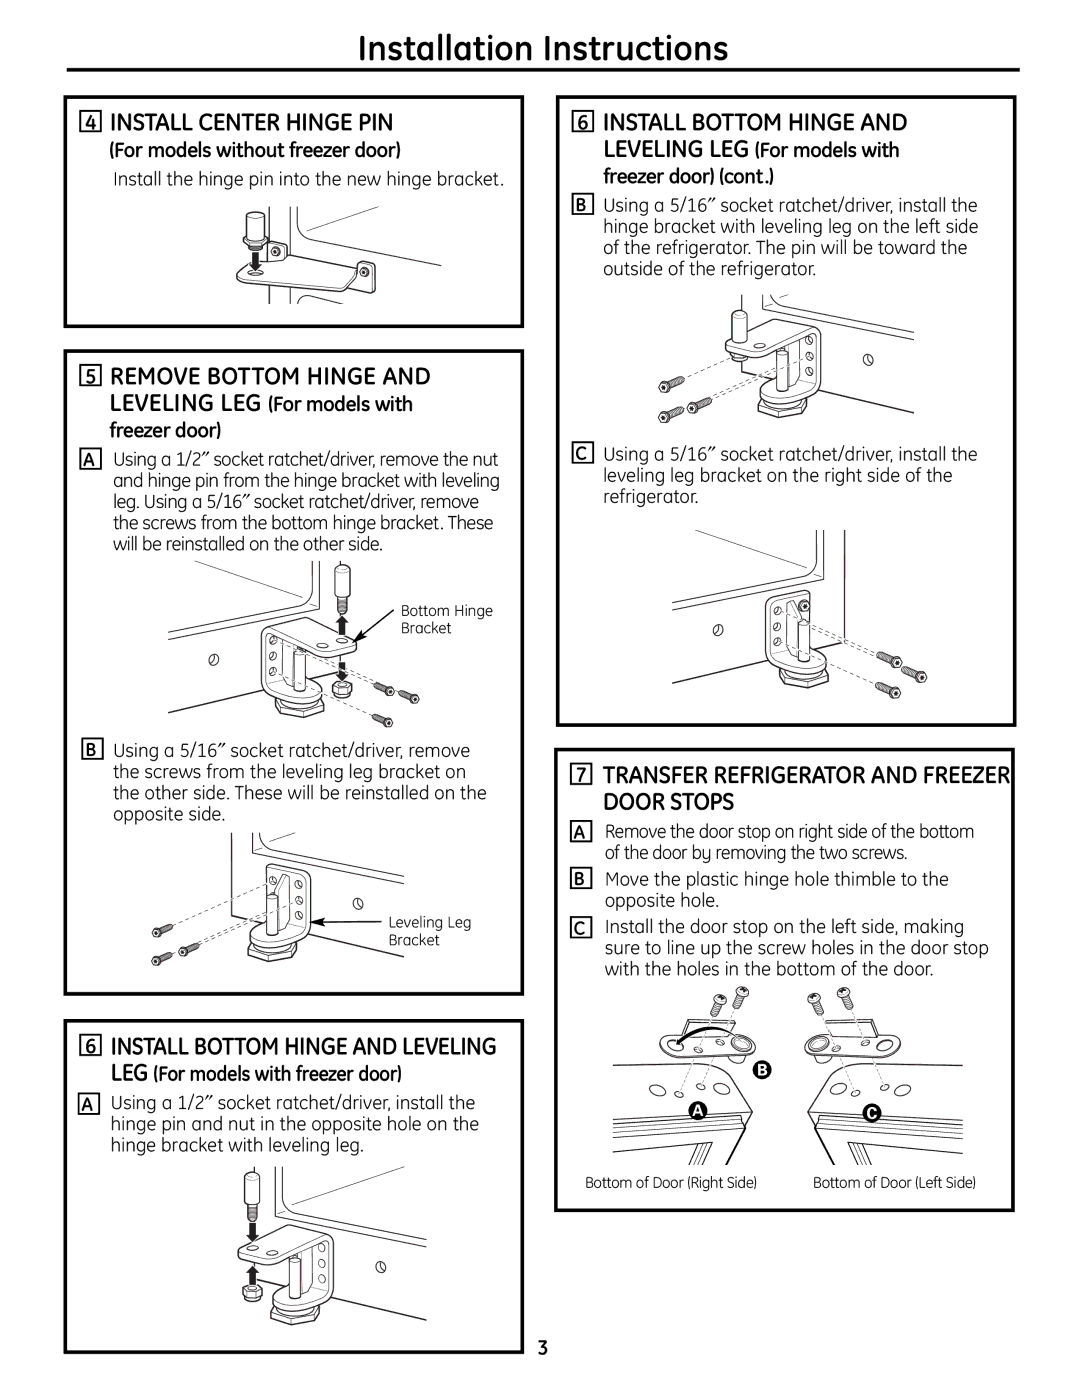
4INSTALL CENTER HINGE PIN
(For models without freezer door)
Install the hinge pin into the new hinge bracket.
5REMOVE BOTTOM HINGE AND LEVELING LEG (For models with
freezer door)
AUsing a 1/2″ socket ratchet/driver, remove the nut
and hinge pin from the hinge bracket with leveling leg. Using a 5/16″ socket ratchet/driver, remove the screws from the bottom hinge bracket. These will be reinstalled on the other side.
Bottom Hinge
Bracket
BUsing a 5/16″ socket ratchet/driver, remove the screws from the leveling leg bracket on the other side. These will be reinstalled on the opposite side.
![]()
![]() Leveling Leg
Leveling Leg
Bracket
6INSTALL BOTTOM HINGE AND LEVELING LEG (For models with freezer door)
AUsing a 1/2″ socket ratchet/driver, install the hinge pin and nut in the opposite hole on the hinge bracket with leveling leg.
6INSTALL BOTTOM HINGE AND LEVELING LEG (For models with
freezer door) (cont.)
BUsing a 5/16″ socket ratchet/driver, install the hinge bracket with leveling leg on the left side of the refrigerator. The pin will be toward the outside of the refrigerator.
CUsing a 5/16″ socket ratchet/driver, install the leveling leg bracket on the right side of the refrigerator.
7TRANSFER REFRIGERATOR AND FREEZER DOOR STOPS
ARemove the door stop on right side of the bottom of the door by removing the two screws.
BMove the plastic hinge hole thimble to the opposite hole.
CInstall the door stop on the left side, making sure to line up the screw holes in the door stop with the holes in the bottom of the door.
A
Bottom of Door (Right Side) | Bottom of Door (Left Side) |
3