CONNECTING AND OPERATING THE 4X1 DVI DL SWITCHER
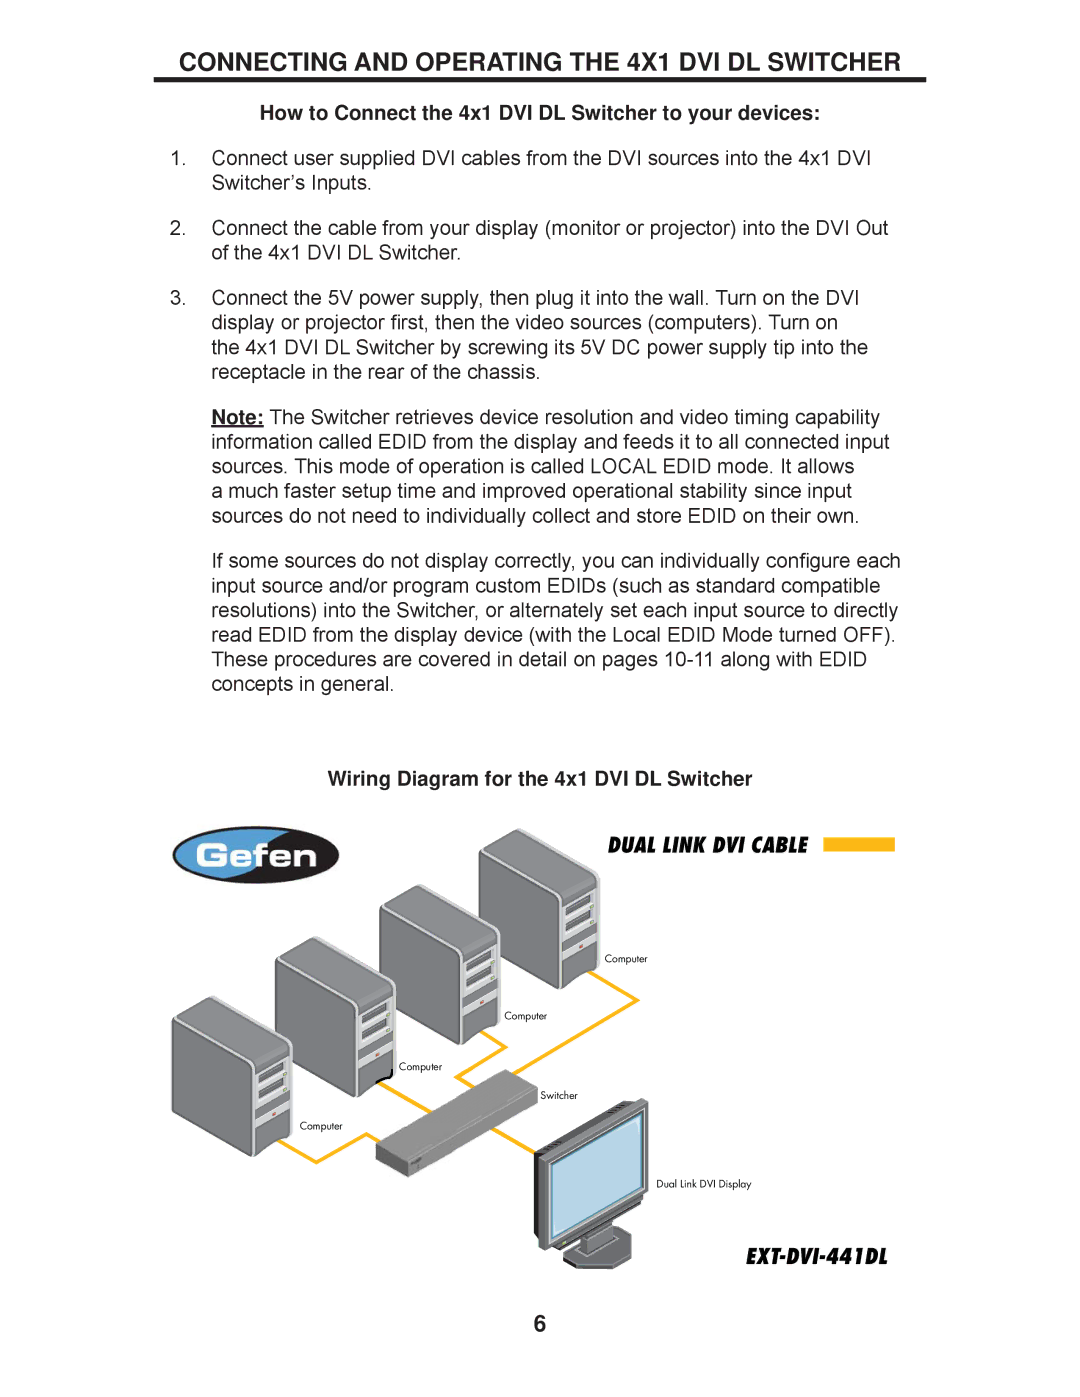
How to Connect the 4x1 DVI DL Switcher to your devices:
1.Connect user supplied DVI cables from the DVI sources into the 4x1 DVI Switcher’s Inputs.
2.Connect the cable from your display (monitor or projector) into the DVI Out of the 4x1 DVI DL Switcher.
3.Connect the 5V power supply, then plug it into the wall. Turn on the DVI display or projector first, then the video sources (computers). Turn on the 4x1 DVI DL Switcher by screwing its 5V DC power supply tip into the receptacle in the rear of the chassis.
Note: The Switcher retrieves device resolution and video timing capability information called EDID from the display and feeds it to all connected input sources. This mode of operation is called LOCAL EDID mode. It allows
a much faster setup time and improved operational stability since input sources do not need to individually collect and store EDID on their own.
If some sources do not display correctly, you can individually configure each input source and/or program custom EDIDs (such as standard compatible resolutions) into the Switcher, or alternately set each input source to directly read EDID from the display device (with the Local EDID Mode turned OFF). These procedures are covered in detail on pages
Wiring Diagram for the 4x1 DVI DL Switcher
DUAL LINK DVI CABLE
Computer
Computer
Computer
Switcher
Computer
Dual Link DVI Display
6
