Manuals
/
Gemini Industries
/
Home Audio
/
Turntable
Gemini Industries
TT-002MKII
manual
Introduction, Features, Precautions, Parts Checklist
Models:
TT-002MKII
1
4
16
16
Download
16 pages
27.44 Kb
1
2
3
4
5
6
7
8
Specs
Install
Montaje Y Configuración
Checklist
Page 4
Image 4
Page 3
Page 5
Page 4
Image 4
Page 3
Page 5
Contents
OPERATIONS MANUAL BEDIENUNGSHANDBUCH
DIRECT DRIVE STRAIGHT ARM TURNTABLE
MANUAL DEL OPERADOR MANUEL D’INSTRUCTIONS
MULTI LANGUAGE INSTRUCTIONS
PAGE
PAGE
PAGE
TT-02MKII
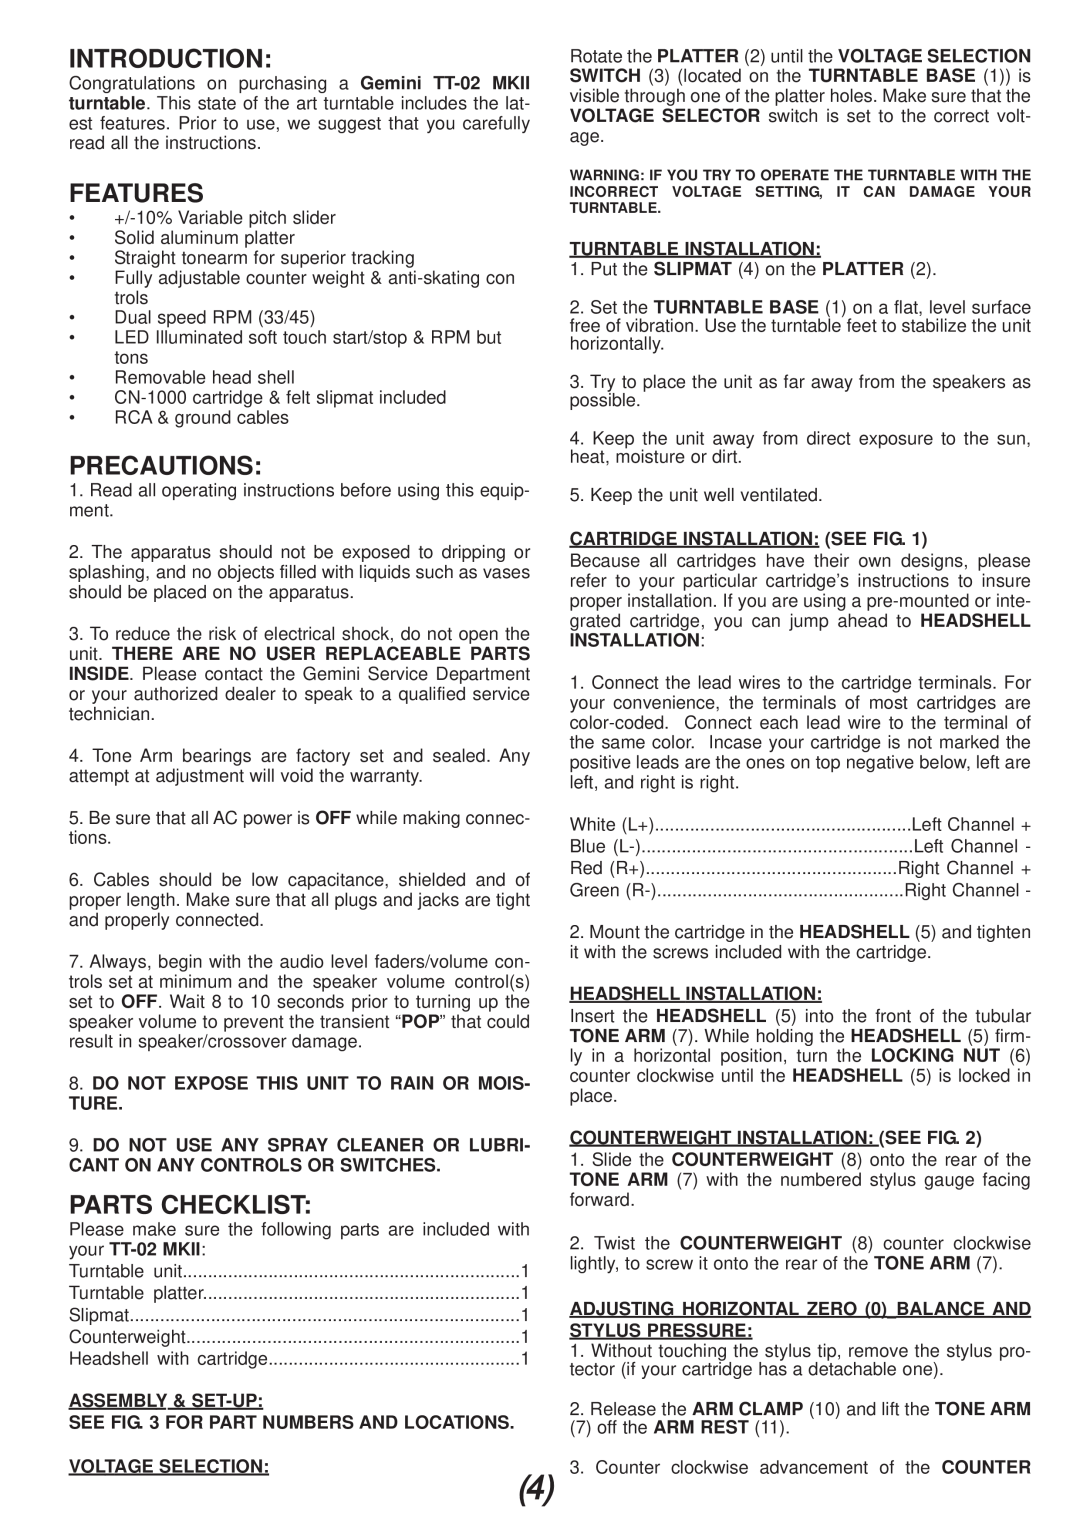
FEATURES
PRECAUTIONS
PARTS CHECKLIST
INTRODUCTION
SPECIFICATIONS
CONNECTIONS
OPERATING INSTRUCTIONS
ADJUSTING THE ANTI-SKATINGCONTROL
TEILE-CHECKLIST
EINLEITUNG
LEISTUNGSMERKMALE
VORSICHTSMANAHMEN
ANSCHLÜSSE
BEDIENUNGSANWEISUNGEN
Spezifikationen
REGULIERUNG DER TONHÖHENABSTIMMUNG
MONTAJE Y CONFIGURACIÓN
INTRODUCCIÓN
CARACTERÍSTICAS
PRECAUCIONES
CONEXIONES
CUADRO A
INSTRUCCIONES DE OPERACIÓN
AJUSTE DEL CONTROL DE PITCH
MONTAGE ET CONFIGURATION
INSTALLATION DE LA COQUILLE
INSTALLATION DU CONTREPOIDS
INSTALLATIONDELATABLETOURNANTE
REGLAGE DE LA COMMANDE DE LA HAUTEUR TONALE
CONNEXIONS
MODE D’EMPLOI
SPECIFICATIONS
Page
Page
Page
Page
IN THE USA IF YOU EXPERIENCE PROBLEMS WITH
GEMINI CUSTOMER SERVICE. DO NOT ATTEMPT TO
Tel 732 738-9003 Fax
THIS UNIT, CALL 1-732-738-9003FOR
Top
Page
Image
Contents