Gas Instructions
We utilize various LP tank manufacturers. Some of the | Note: This is a new type of connection. It tightens clockwise | |
and will not allow gas to flow unless the connection is tight. | ||
tanks have differing top collar assembles. (The top collar | ||
The connection requires tightening by hand only. | ||
is the metal protective ring around the valve.) One series | ||
WARNING: Do not use a wrench to tighten the | ||
of tanks mount with the valve facing front. The other tanks | ||
connection. Using a wrench could damage the | ||
mount with the valve facing away from the fuel scale. | ||
regulator coupling and could cause a leak. | ||
These types of tanks are illustrated below. | ||
5) Mix soap and water. | ||
You will need: LP cylinder, a soap and water solution and a | ||
| ||
rag or brush to apply it. |
| |
1) Turn the LP cylinder so the opening of the valve is |
| |
either to the front, side or rear of the Weber® gas |
| |
barbecue. Lift and hook the cylinder onto the fuel |
| |
gauge. |
|
| 6) | Turn on the cylinder valve. |
| 7) | Check for leaks by wetting the fitting with the soap and |
|
| water solution and watching for bubbles. If bubbles |
|
| form, or if a bubble grows, there is a leak. |
| If there is a leak, turn off the gas and tighten the fitting. Turn | |
2) Loosen the cylinder lock wing nut. Swing the cylinder | the gas back on and recheck with the soap and water | |
solution. | ||
lock down. Tighten the wing nut. | If leak does not stop, Contact the Customer Service | |
| Representative in your region using the contact information | |
| sheet provided with your manual. Do not use the barbecue. | |
| 8) | When leak checking is complete, turn gas supply OFF |
|
| at the source and rinse connections with water. |
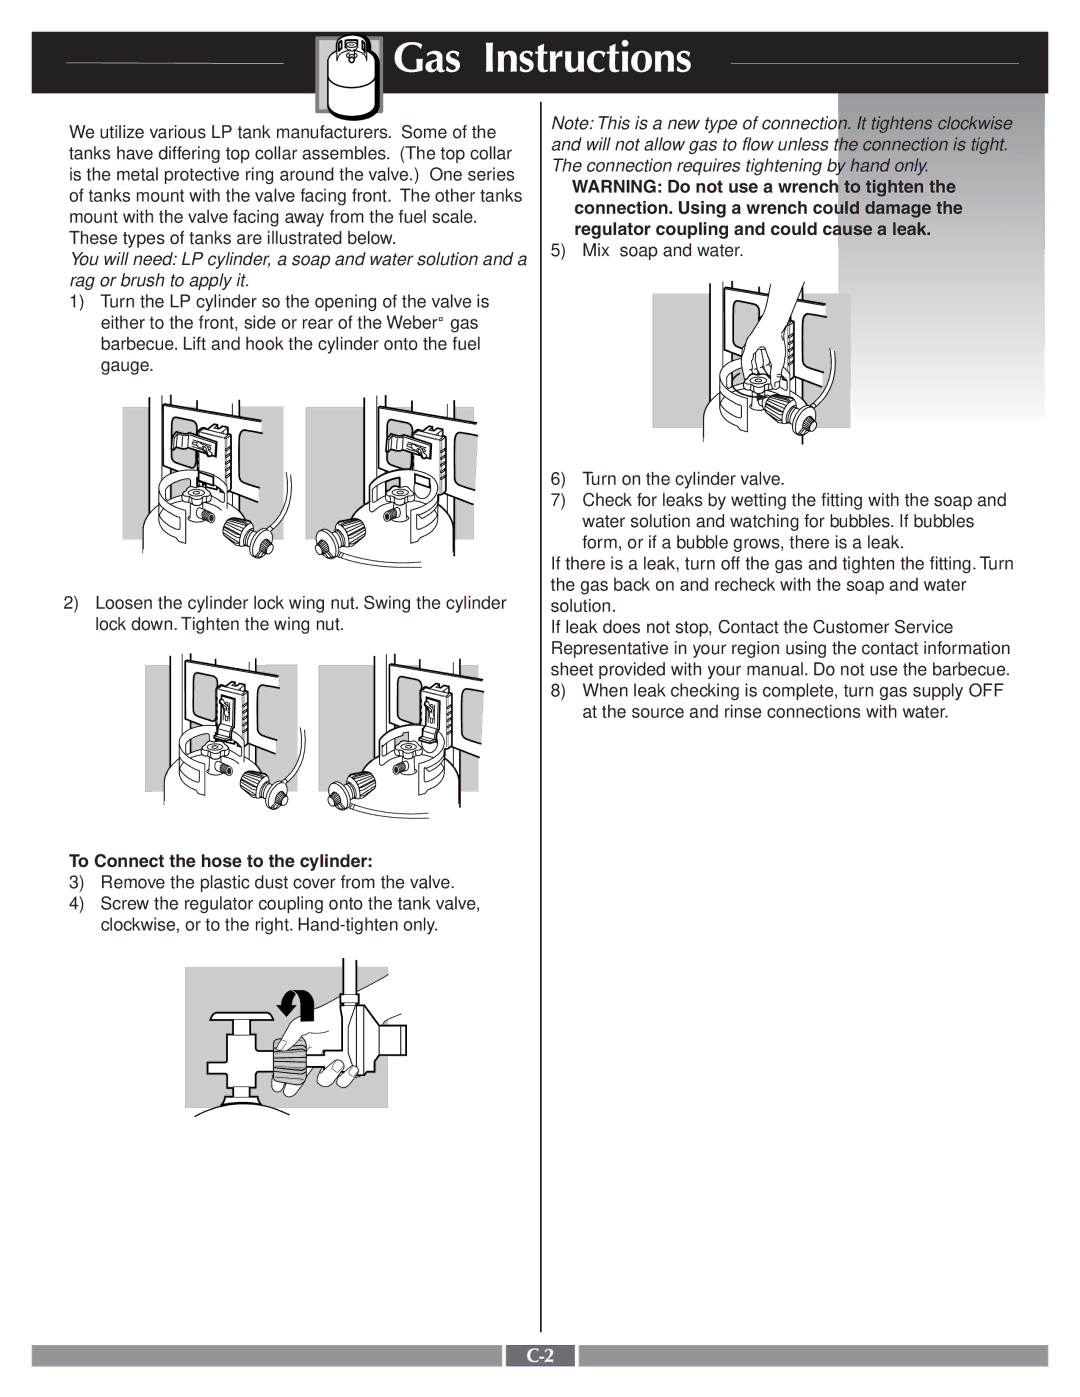
To Connect the hose to the cylinder:
3)Remove the plastic dust cover from the valve.
4)Screw the regulator coupling onto the tank valve, clockwise, or to the right.