English
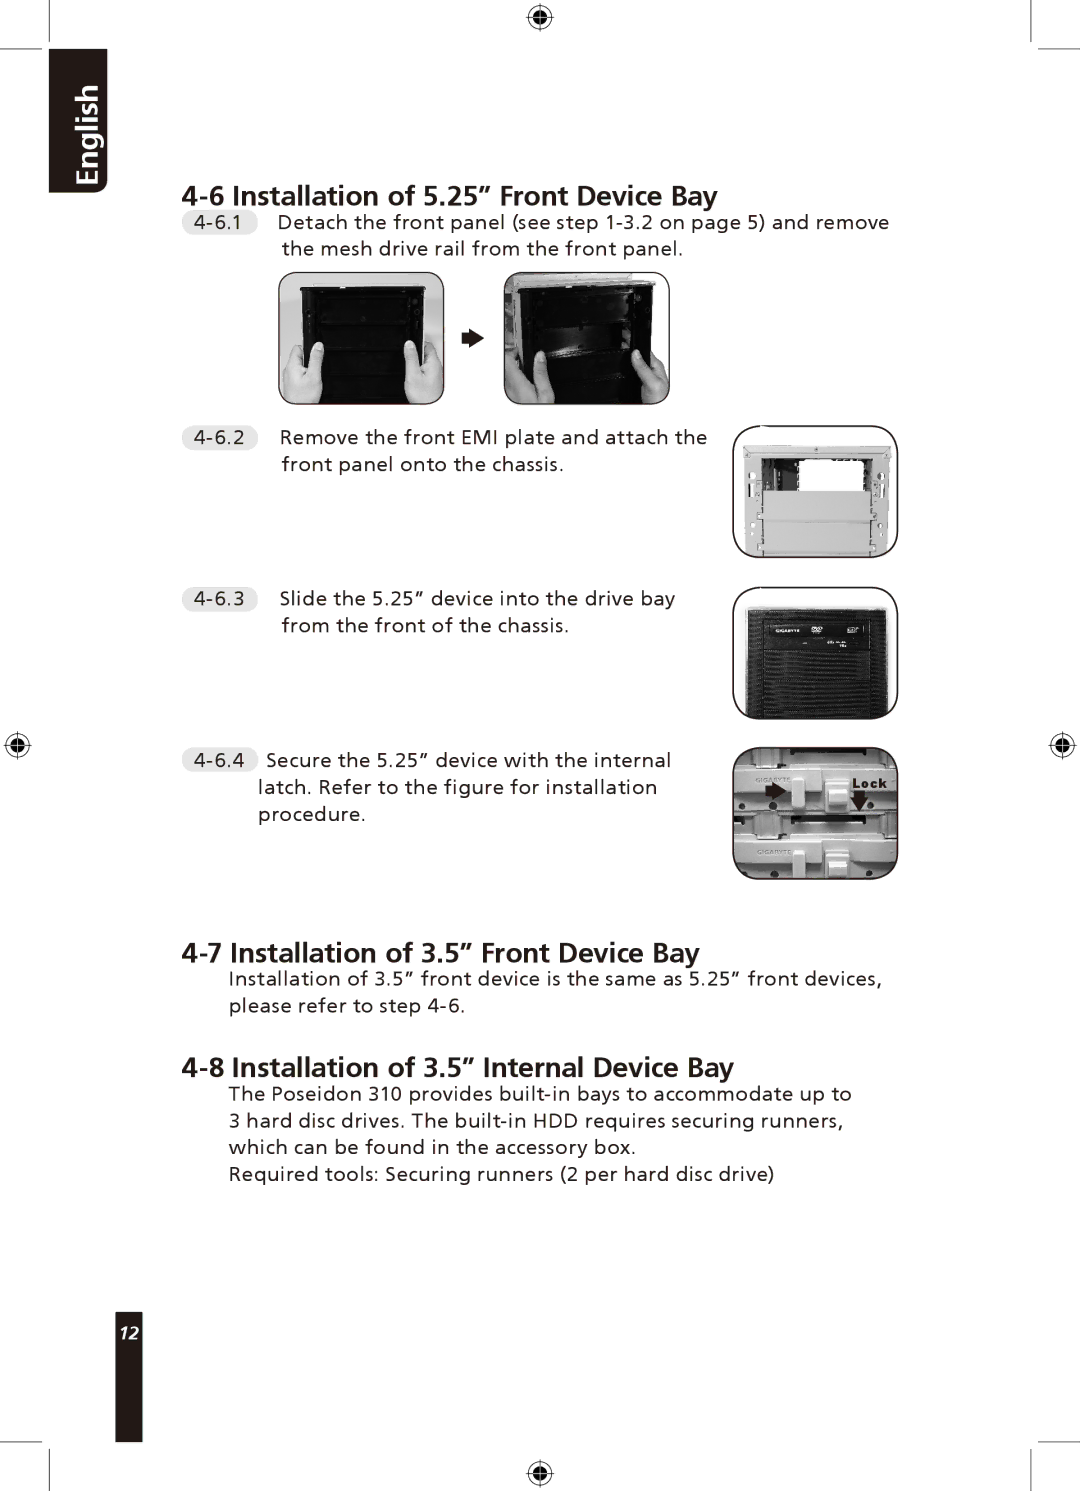
4-6 Installation of 5.25” Front Device Bay
Lock
4-7 Installation of 3.5” Front Device Bay
Installation of 3.5” front device is the same as 5.25” front devices, please refer to step
4-8 Installation of 3.5” Internal Device Bay
The Poseidon 310 provides
Required tools: Securing runners (2 per hard disc drive)
12