
GA-7vkml specifications
The Gigabyte GA-7VKML is a reliable and versatile motherboard that was designed to accommodate AMD-based systems during the early 2000s. This motherboard stands out for its compatibility with the Socket A (Socket 462) architecture, which was prevalent for AMD’s Athlon and Duron processors. The GA-7VKML is particularly notable for its Micro ATX form factor, offering a compact solution for users aiming to build a space-efficient yet powerful computer.One of the main features of the GA-7VKML is its support for a front-side bus (FSB) speed of up to 266 MHz, which enables better performance and faster data exchanges between the CPU and the system memory. The motherboard supports DDR SDRAM with a maximum capacity of 2 GB across its two DIMM slots, allowing users to choose between performance and cost when selecting their memory modules.
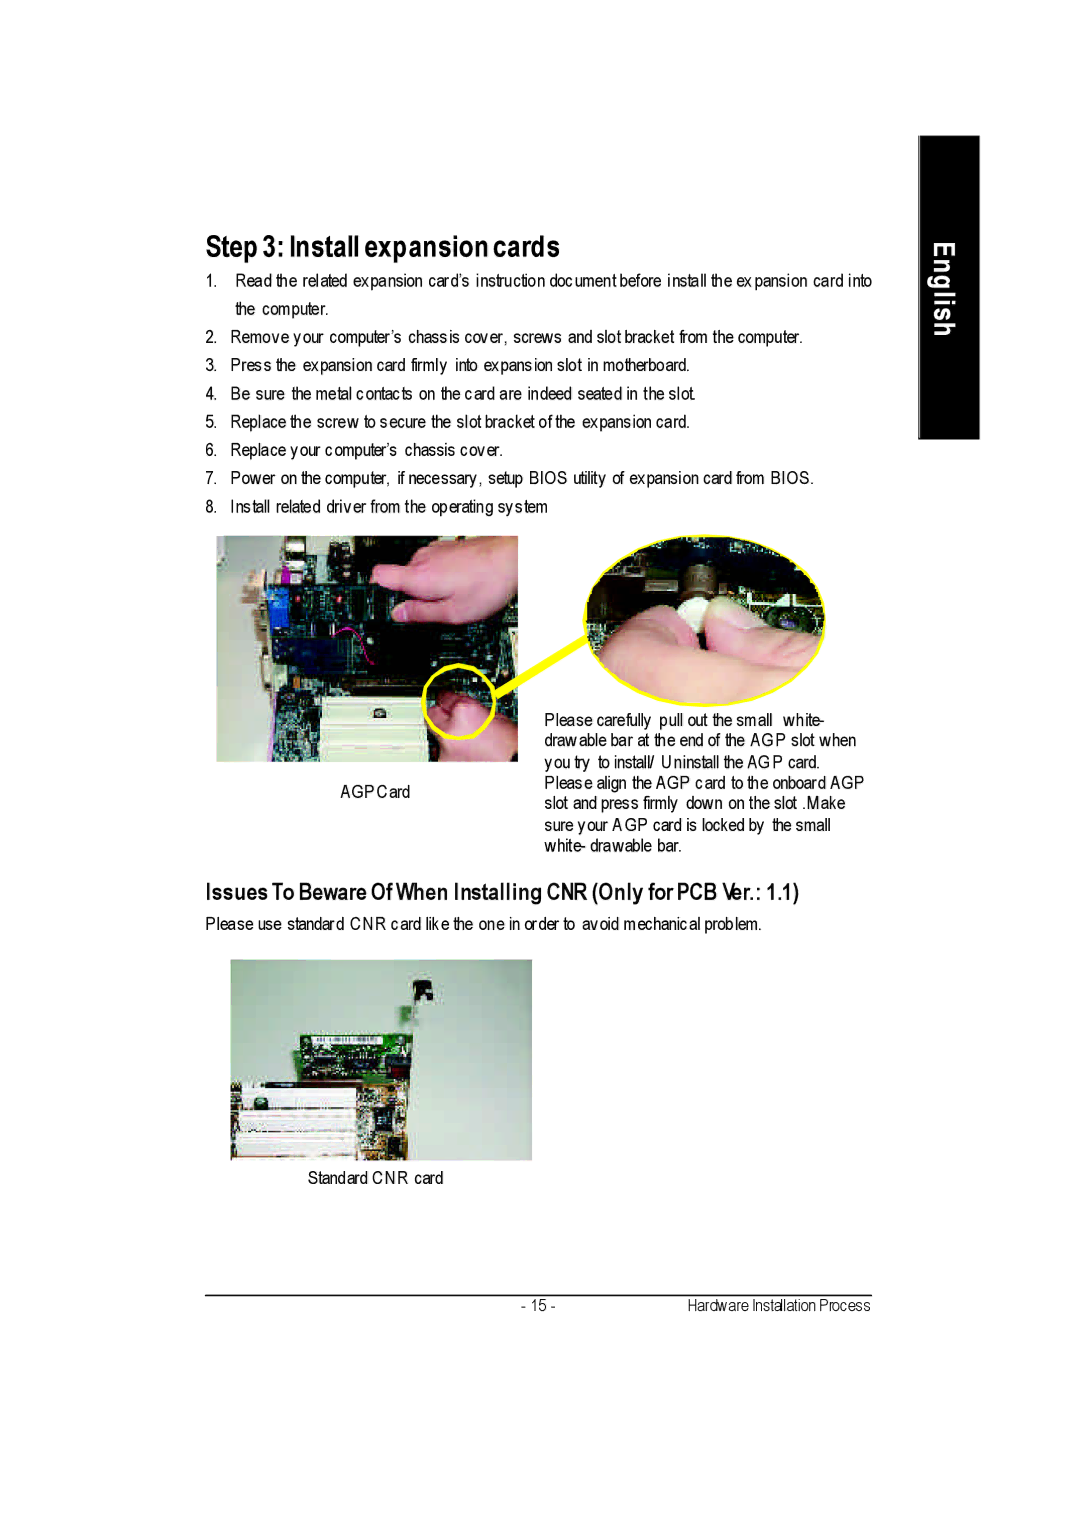
Integrated graphics is another highlight of the GA-7VKML. With the VIA KM266 chipset, it offers built-in graphics capabilities that eliminate the need for a separate graphics card for basic tasks, making it an excellent option for users on a budget or those looking to build a home or office PC. For users interested in add-in graphics cards, the motherboard features a standard AGP slot for enhanced graphic performance.
Moreover, the GA-7VKML facilitates high-speed connectivity options with its IDE controllers that support up to four IDE devices. It also features onboard 10/100 Mbps Ethernet, providing reliable networking capabilities ideal for both home and small office environments.
In terms of storage options, the motherboard includes RAID support, allowing users to set up RAID 0 or RAID 1 configurations for improved performance or data redundancy. This feature is particularly beneficial for users who prioritize data security or require faster access speeds.
The GA-7VKML also accommodates various connectivity options, including USB 2.0 ports, allowing for faster data transfer rates with compatible devices.
In conclusion, the Gigabyte GA-7VKML is characterized by its solid build quality, essential features for everyday computing needs, and its capability to handle AMD processors efficiently. Its combination of integrated graphics, expandability via AGP and IDE ports, and onboard Ethernet make it a practical choice for those seeking a dependable motherboard for basic to moderately demanding applications. While it may not compete with the latest technology, it holds historical significance as a robust solution for its time.