Unpacking
Due to modern mass production techniques, it is unlikely that your GMC Power Tool is faulty or that a part is missing. If you find anything wrong, do not operate the tool until the parts have been replaced or the fault has been rectified. Failure to do so could result in serious personal injury.
Assembly
Handle
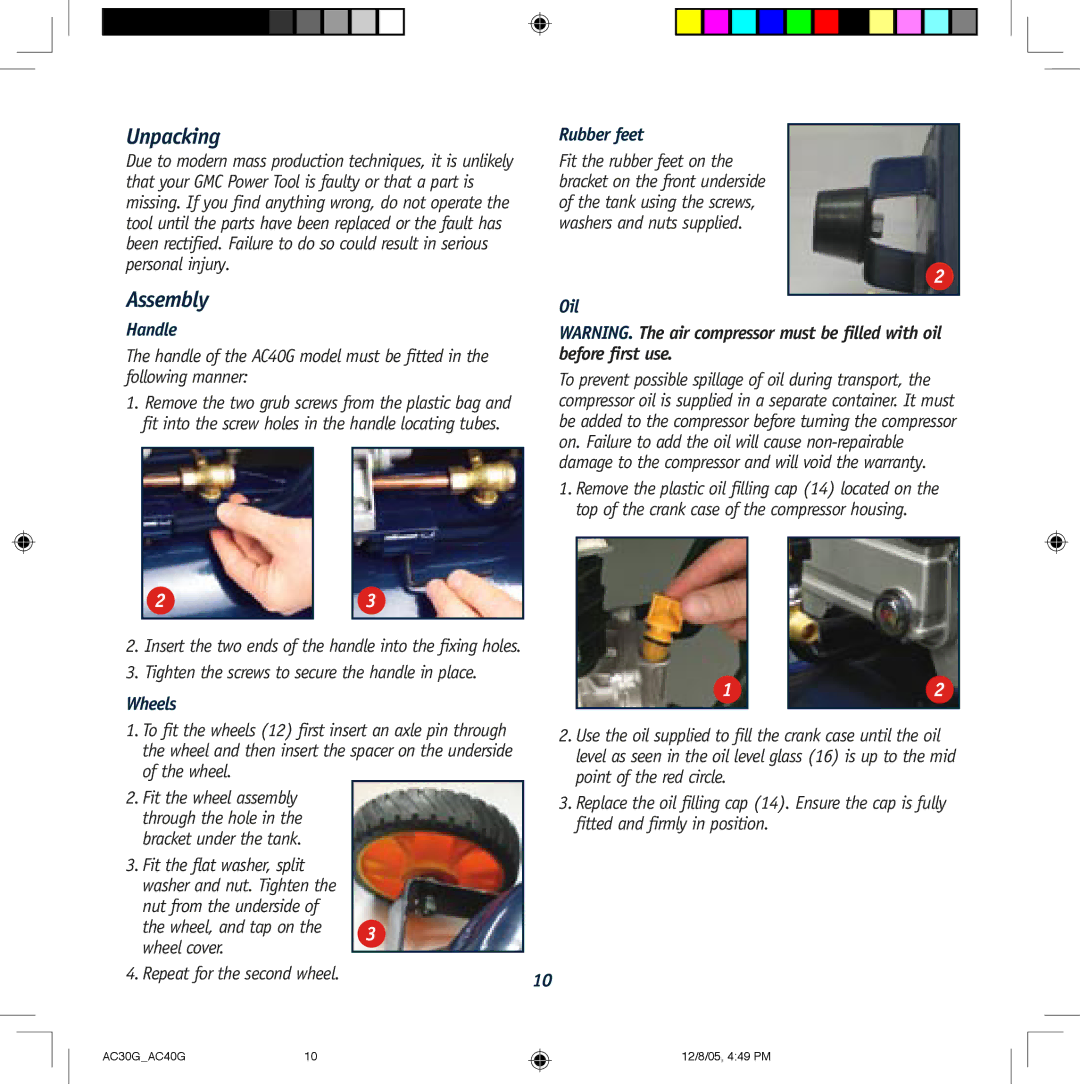
The handle of the AC40G model must be fitted in the following manner:
1.Remove the two grub screws from the plastic bag and fit into the screw holes in the handle locating tubes.
2 |
| 3 |
|
|
|
2.Insert the two ends of the handle into the fixing holes.
3.Tighten the screws to secure the handle in place.
Wheels
1.To fit the wheels (12) first insert an axle pin through the wheel and then insert the spacer on the underside of the wheel.
2.Fit the wheel assembly through the hole in the bracket under the tank.
3.Fit the flat washer, split washer and nut. Tighten the nut from the underside of
the wheel, and tap on the | 3 | |
wheel cover. | ||
| ||
|
4. Repeat for the second wheel.
AC30G_AC40G10
Rubber feet
Fit the rubber feet on the bracket on the front underside of the tank using the screws, washers and nuts supplied.
2
Oil
WARNING. The air compressor must be filled with oil before first use.
To prevent possible spillage of oil during transport, the compressor oil is supplied in a separate container. It must be added to the compressor before turning the compressor on. Failure to add the oil will cause
1.Remove the plastic oil filling cap (14) located on the top of the crank case of the compressor housing.
1 |
| 2 |
|
|
|
2.Use the oil supplied to fill the crank case until the oil level as seen in the oil level glass (16) is up to the mid point of the red circle.
3.Replace the oil filling cap (14). Ensure the cap is fully fitted and firmly in position.
10
12/8/05, 4:49 PM
