4.Tighten the depth locking lever (13) by pushing the lever upwards (Fig. N).
Note. Always use the correct blade depth setting. The correct blade depth setting for all cuts should not be more than 5mm below the material being cut. Allowing more depth will increase the chance of kickback and result in a rough cut.
Adjusting the bevel angle
CAUTION. Always ensure that the tool is switched off and unplugged from the power supply before making any adjustments.
1. The saw can be adjusted to |
| |
cut at any angle between |
| |
Q | ||
0° and 45°. | ||
|
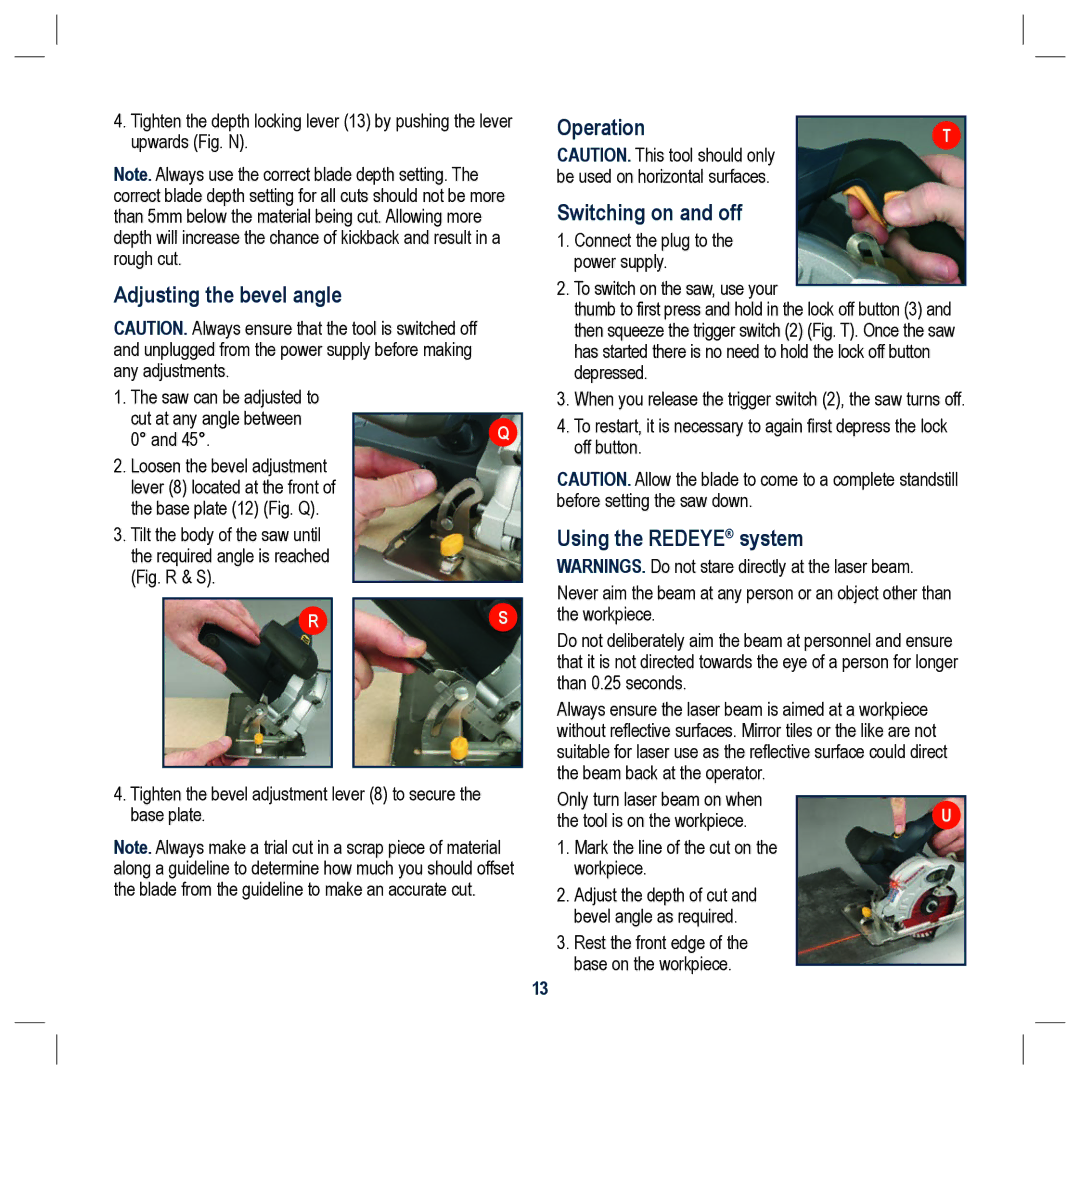
2.Loosen the bevel adjustment lever (8) located at the front of the base plate (12) (Fig. Q).
3.Tilt the body of the saw until the required angle is reached (Fig. R & S).
R |
| S |
|
|
|
4.Tighten the bevel adjustment lever (8) to secure the base plate.
Note. Always make a trial cut in a scrap piece of material along a guideline to determine how much you should offset the blade from the guideline to make an accurate cut.
Operation | T |
|
CAUTION. This tool should only be used on horizontal surfaces.
Switching on and off
1.Connect the plug to the power supply.
2.To switch on the saw, use your
thumb to first press and hold in the lock off button (3) and then squeeze the trigger switch (2) (Fig. T). Once the saw has started there is no need to hold the lock off button depressed.
3.When you release the trigger switch (2), the saw turns off.
4.To restart, it is necessary to again first depress the lock off button.
CAUTION. Allow the blade to come to a complete standstill before setting the saw down.
Using the REDEYE® system
WARNINGS. Do not stare directly at the laser beam.
Never aim the beam at any person or an object other than the workpiece.
Do not deliberately aim the beam at personnel and ensure that it is not directed towards the eye of a person for longer than 0.25 seconds.
Always ensure the laser beam is aimed at a workpiece without reflective surfaces. Mirror tiles or the like are not suitable for laser use as the reflective surface could direct the beam back at the operator.
Only turn laser beam on when | U |
the tool is on the workpiece. |
1.Mark the line of the cut on the workpiece.
2.Adjust the depth of cut and bevel angle as required.
3.Rest the front edge of the base on the workpiece.
13
