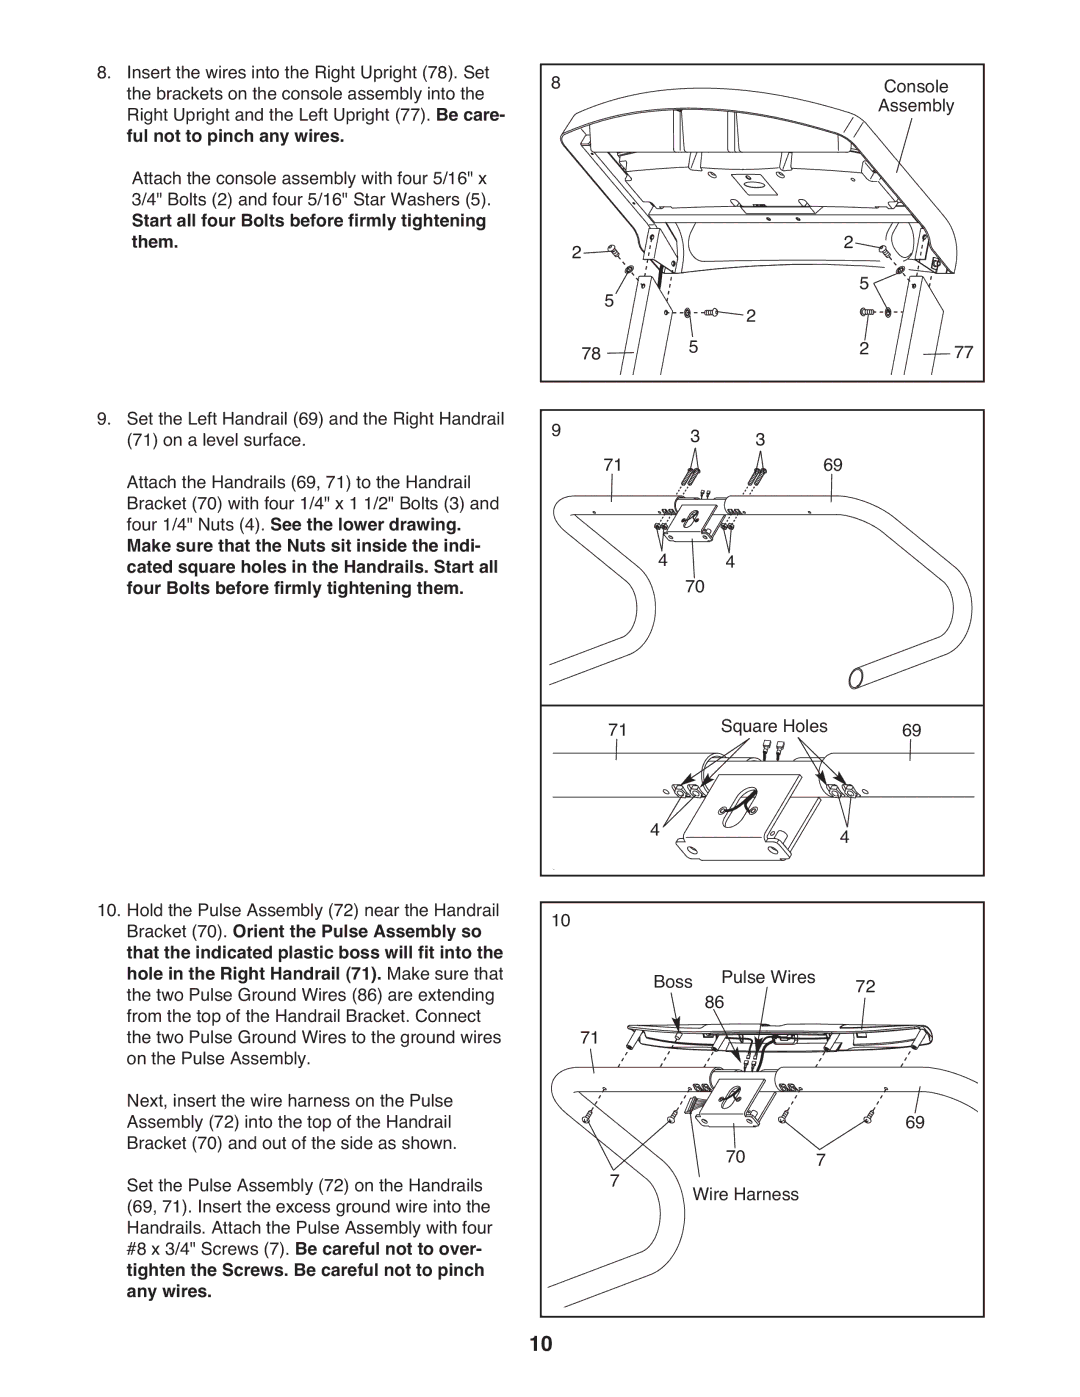
8. Insert the wires into the Right Upright (78). Set | 8 |
|
|
|
|
| Console |
the brackets on the console assembly into the |
|
|
|
|
| ||
Right Upright and the Left Upright (77). Be care- |
|
|
|
|
|
| Assembly |
ful not to pinch any wires. |
|
|
|
|
|
|
|
Attach the console assembly with four 5/16" x |
|
|
|
|
|
|
|
3/4" Bolts (2) and four 5/16" Star Washers (5). |
|
|
|
|
|
|
|
Start all four Bolts before firmly tightening |
| 2 |
|
|
| 2 |
|
them. |
|
|
|
|
| ||
|
| 5 |
|
| 2 | 5 |
|
|
|
| 5 | 2 | 77 | ||
|
| 78 |
| ||||
|
|
|
| ||||
9. Set the Left Handrail (69) and the Right Handrail | 9 |
|
| 3 | 3 |
|
|
(71) on a level surface. | 71 |
| 69 |
| |||
Attach the Handrails (69, 71) to the Handrail |
|
|
|
|
| ||
Bracket (70) with four 1/4" x 1 1/2" Bolts (3) and |
|
|
|
|
|
|
|
four 1/4" Nuts (4). See the lower drawing. |
|
|
|
|
|
|
|
Make sure that the Nuts sit inside the indi- |
|
| 4 |
| 4 |
|
|
cated square holes in the Handrails. Start all |
|
| 70 |
|
| ||
four Bolts before firmly tightening them. |
|
|
|
|
|
|
| 71 |
| Square Holes | 69 | |
|
| 4 |
|
| 4 |
10. Hold the Pulse Assembly (72) near the Handrail | 10 |
|
|
|
|
Bracket (70). Orient the Pulse Assembly so |
|
|
|
| |
that the indicated plastic boss will fit into the |
|
|
|
|
|
hole in the Right Handrail (71). Make sure that |
| Boss | Pulse Wires |
| 72 |
the two Pulse Ground Wires (86) are extending |
|
| |||
from the top of the Handrail Bracket. Connect | 71 |
| 86 |
|
|
the two Pulse Ground Wires to the ground wires |
|
|
|
| |
on the Pulse Assembly. |
|
|
|
|
|
Next, insert the wire harness on the Pulse |
|
|
|
| 69 |
Assembly (72) into the top of the Handrail |
|
| 70 | 7 | |
Bracket (70) and out of the side as shown. | 7 |
|
| ||
Set the Pulse Assembly (72) on the Handrails | Wire Harness |
|
| ||
(69, 71). Insert the excess ground wire into the |
|
|
| ||
Handrails. Attach the Pulse Assembly with four |
|
|
|
|
|
#8 x 3/4" Screws (7). Be careful not to over- |
|
|
|
|
|
tighten the Screws. Be careful not to pinch |
|
|
|
|
|
any wires. | 10 |
|
|
|
|
|
|
|
|
| |